The purpose of this write-up is to explain what the fseventsd Mac process is, in what scenarios it kicks in, and why its CPU and memory usage may skyrocket.
What is the fseventsd process on Mac?
As is the case with any operating system environment, there are processes that directly correlate with applications visually manifested on the screen, but there are many more executable entities which – in an ideal world – most users never really notice running on their computers. The latter typically relate to background workflows that underlie various important system tasks hidden in plain sight. The one named fseventsd is a good example of a macOS process whose role is restricted to auxiliary functions. The primary goal of this launch daemon is to keep a record of the changes that occur at the level of files and folders on a Mac’s storage disk.
It gets busy doing its chores whenever any program initiates tweaks on current data, which allows other potentially associated processes to stay on top of and respond to these updates where necessary. In a way, this is an instrument for syncing all file and directory conditions across the machine’s entire storage in real time. On a side note, the name has nothing to do with the digit seven – instead, it stands for “File System Events Daemon”, which is basically a verbose denomination when it comes to its logic. With the whole practical worth of this item in place, it has been heavily reported as a root cause for some system performance hiccups that will be described further down.

The fseventsd high CPU and memory virus may re-infect your Mac multiple times unless you delete all of its fragments, including hidden ones. Therefore, it is recommended to download Combo Cleaner and scan your system for these stubborn files. This way, you may reduce the cleanup time from hours to minutes.
Download Now Learn how Combo Cleaner works. If the utility spots malicious code, you will need to buy a license to get rid of it.Fseventsd Mac process gets way too hectic at times
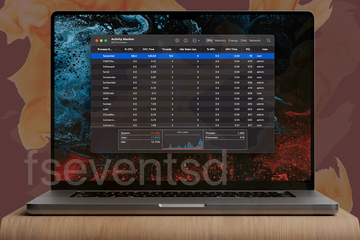
No matter how odd it may sound, fseventsd can make or break. The ugly side of its file system monitoring implementation is that it sometimes maxes out the Mac’s CPU and memory capacities. The issue makes itself felt the most in macOS Monterey and later. This is clearly visible in the Activity Monitor stats, where the rate of system resources consumption by this process reaches 100%. As a matter of fact, it may even exceed that limit when several available CPU cores are concurrently engaged in the data indexing routine. Predictably enough, this condition has a tangible footprint on the machine’s productivity. Even lightweight applications may take forever to load, with the super-frustrating beach ball spinning non-stop whenever you click something. The chain effect of this adverse activity is that the Mac will overheat, with the fan running at its peak to cool down the scorching hardware. This situation is “fertile ground” for kernel panics and random reboots.
What causes fseventsd to monopolize CPU and memory resources on Mac?
While it’s problematic to single out one overarching catalyst for the fseventsd high CPU and RAM usage bug, the numerous reports of those affected give actionable clues that may help find a solution. The following takeaways from hands-on research shine a light on the potential reasons for this predicament.
- Massive file transfers: Moving a slew of documents, images, videos, and other objects to or from your Mac, obviously, makes fseventsd immersed in work. The same applies to new software installation instances that are often accompanied by the introduction of a lot of new data to your computer. In either case, this activity will have a reflection on the CPU and memory consumption.
- Spotlight indexing glitches: The ties between fseventsd and the Mac’s built-in file indexing feature are as clear as crystal. Unsurprisingly, if Spotlight is having difficulties building an up-to-date profile of the file system, or if it has to rescan multiple directories in a loop for whatever reason, then the daemon in question will be gobbling up more resources than it normally does.
- Heavy Time Machine backups: A continuous increment in the gross size of the files and folders stored on a Mac calls forth an increasingly significant CPU and memory load when fseventsd is reporting a bevy of changes to the Time Machine utility during backups.
- Corrupted file system: This condition can be precipitated by a handful of factors ranging from hardware failures and abrupt power outages to unauthorized access and incorrect shutdowns. No matter the cause, when a file system becomes corrupted, fseventsd will bump into roadblocks trying to traverse and log system events.
- Problems with external storage: When external media such as a USB memory stick is plugged into a Mac, a temporary hidden file named fseventsd-uuid automatically crops up in the system to track all activity around files and folders on that drive throughout the connection session. If the user neglects to follow proper USB storage removal practices, the instances of fsevents-uuid might pile up erratically, thereby siphoning off a good deal of CPU and RAM.
- Malware activity: Some species of harmful software have gained notoriety for meddling with data on a target Mac. These include first and foremost adware, ransomware, and info-stealing trojans. With this interference underway, fseventsd will have to keep track of all these sporadic changes, hence a high strain on the computer’s processing unit and memory chip.
Workarounds for the fseventsd high memory and CPU problem
The appropriate method of fixing this resource overuse issue is a matter of its origin, which varies across different scenarios. If numerous simultaneous file system events are to blame, it could be a good idea to split large file transfers, both ingress and egress, into smaller portions.
In case Spotlight is having a hard time scouring the Mac’s storage, consider rebuilding the feature’s index. To do it, go to Spotlight configuration via System Preferences (renamed to System Settings in macOS Ventura and newer), select Privacy, drag and drop the hard drive’s icon to the Privacy area, and click Done. Allow some time for the tool to de-index the disk, then go back to these settings, select the hard drive in the same box, and click the minus (-) sign. Doing so will instruct Spotlight to re-index the storage.
If Time Machine backups are taking a lot of time and resources, consider moving some of your data to external storage. This will free up some space and reduce the CPU and memory pressure during backups. To avoid the fseventsd-uuid multiplication problem, be sure to disconnect USB memory sticks from your Mac properly. The right way is to select the storage device, head to File, and use the Eject option. If you suspect your file system might be corrupted, the first thing worth a shot is to run the First Aid tool from Disk Utility.
As previously mentioned, malicious software can be the culprit as well due to its “passion” for messing with data on a plagued Mac. The interesting facet of this theory is that fseventsd can be both a target and an instrument for disinfection as well as incident investigation. On the one hand, there’s a spike in CPU and RAM usage. On the other hand, this daemon provides a treasure trove of information for forensic analysis. It records all changes to files, folders, applications, and other data entities, saving all these events to a log file that can be found in the root of each disk volume. These details highlight, among other things, file creation, modification, and removal.
The silver lining is that probing a Mac for malware activity is a no-brainer. The following steps will walk you through the process. If anything potentially harmful is pinpointed, eliminate it without a second thought and then check whether the fseventsd quandary is still there. If the bug persists, consider resorting to the other troubleshooting techniques listed above.
Fseventsd high CPU virus manual removal from Mac
The steps listed below will walk you through the removal of this malicious application. Be sure to follow the instructions in the specified order.
Expand the Go menu in your Mac’s Finder bar and select Utilities as shown below.

Locate the Activity Monitor icon on the Utilities screen and double-click on it.

In the Activity Monitor app, look for fseventsd, fseventsd-uuid, or another process that appears suspicious. To narrow down your search, focus on unfamiliar resource-intensive entries on the list. Keep in mind that its name isn’t necessarily related to the way the threat is manifesting itself, so you’ll need to trust your own judgement. If you pinpoint the culprit, select it and click on the Stop icon in the upper left-hand corner of the screen.

When a follow-up dialog pops up asking if you are sure you want to quit the troublemaking process, select the Force Quit option.

Click on the Go menu icon in the Finder again and select Go to Folder. You can as well use the Command-Shift-G keyboard shortcut.

Type /Library/LaunchAgents in the folder search dialog and click on the Go button.

Examine the contents of the LaunchAgents folder for dubious-looking items. Be advised that the names of files spawned by malware may give no clear clues that they are malicious, so you should look for recently added entities that appear to deviate from the norm.
As an illustration, here are several examples of LaunchAgents related to mainstream Mac infections: com.updater.mcy.plist, com.avickUpd.plist, and com.msp.agent.plist. If you spot files that don’t belong on the list, go ahead and drag them to the Trash.

Use the Go to Folder lookup feature again to navigate to the folder named ~/Library/Application Support (note the tilde symbol prepended to the path).

When the Application Support directory is opened, identify recently generated suspicious folders in it and send them to the Trash. A quick tip is to look for items whose names have nothing to do with Apple products or apps you knowingly installed. A few examples of known-malicious folder names are ProgressSite and IdeaShared.

Enter ~/Library/LaunchAgents string (don’t forget to include the tilde character) in the Go to Folder search area.

The system will display LaunchAgents residing in the current user’s Home directory. Look for dodgy items related to rogue fseventsd process (see logic highlighted in subsections above) and drag the suspects to the Trash.

Type /Library/LaunchDaemons in the Go to Folder search field.

In the LaunchDaemons path, try to pinpoint the files the malware is using for persistence. Several examples of such items cropped by Mac infections are com.apple.sysmond.plist, com.startup.plist, and com.ExpertModuleSearchDaemon.plist. Delete the sketchy files immediately.

Click on the Go menu icon in your Mac’s Finder and select Applications on the list.

Find the entry for an app that clearly doesn’t belong there and move it to the Trash. If this action requires your admin password for confirmation, go ahead and enter it.

Expand the Apple menu and select System Preferences.


Proceed to Users & Groups and click on the Login Items tab.


Now select Profiles under System Preferences. Look for a malicious item in the left-hand sidebar. Several examples of configuration profiles created by Mac adware include TechSignalSearch, MainSearchPlatform, AdminPrefs, and Safari Settings. Select the offending entity and click on the minus sign at the bottom to eliminate it.


Get rid of fseventsd virus in web browser on Mac
To begin with, the web browser settings taken over by the fseventsd virus should be restored to their default values. Although this will clear most of your customizations, web surfing history, and all temporary data stored by websites, the malicious interference should be terminated likewise. The overview of the steps for completing this procedure is as follows:
- Remove fseventsd virus from Safari
Open the browser and go to Safari menu. Select Preferences in the drop-down list.

Once the Preferences screen appears, click on the Advanced tab and enable the option saying “Show Develop menu in menu bar”.

Now that the Develop entry has been added to the Safari menu, expand it and click on Empty Caches.

Now select History in the Safari menu and click on Clear History in the drop-down list.

Safari will display a dialog asking you to specify the period of time this action will apply to. Select all history to ensure a maximum effect. Click on the Clear History button to confirm and exit.

Go back to the Safari Preferences and hit the Privacy tab at the top. Find the option that says Manage Website Data and click on it.

The browser will display a follow-up screen listing the websites that have stored data about your Internet activities. This dialog additionally includes a brief description of what the removal does: you may be logged out of some services and encounter other changes of website behavior after the procedure. If you’re okay with that, go ahead and click on the Remove All button.

Restart Safari
- Remove fseventsd in Google Chrome
Open Chrome, click the Customize and control Google Chrome (⁝) icon in the top right-hand part of the window, and select Settings in the drop-down

When on the Settings pane, select Advanced
Scroll down to the Reset settings section.

Confirm the Chrome reset on a dialog that will pop up. When the procedure is completed, relaunch the browser and check it for malware activity.

- Remove fseventsd from Mozilla Firefox
Open Firefox and go to Help – Troubleshooting Information (or type about:support in the URL bar and press Enter).


When on the Troubleshooting Information screen, click on the Refresh Firefox button.

Confirm the intended changes and restart Firefox.
Fix fseventsd Mac issues using Combo Cleaner removal tool
The Mac maintenance and security app called Combo Cleaner is a one-stop tool to detect and remove fseventsd virus. This technique has substantial benefits over manual cleanup, because the utility gets hourly virus definition updates and can accurately spot even the newest Mac infections.
Furthermore, the automatic solution will find the core files of the malware deep down the system structure, which might otherwise be a challenge to locate. Here’s a walkthrough to sort out the fseventsd issue using Combo Cleaner:
Download Combo Cleaner installer. When done, double-click the combocleaner.dmg file and follow the prompts to install the tool onto your Mac.
By downloading any applications recommended on this website you agree to our Terms and Conditions and Privacy Policy. The free scanner checks whether your Mac is infected. To get rid of malware, you need to purchase the Premium version of Combo Cleaner.
Open the app from your Launchpad and let it run an update of the malware signature database to make sure it can identify the latest threats.
Click the Start Combo Scan button to check your Mac for malicious activity as well as performance issues.

Examine the scan results. If the report says “No Threats”, then you are on the right track with the manual cleaning and can safely proceed to tidy up the web browser that may continue to act up due to the after-effects of the malware attack (see instructions above).

In case Combo Cleaner has detected malicious code, click the Remove Selected Items button and have the utility remove fseventsd threat along with any other viruses, PUPs (potentially unwanted programs), or junk files that don’t belong on your Mac.

Once you have made doubly sure that the malicious app is uninstalled, the browser-level troubleshooting might still be on your to-do list. If your preferred browser is affected, resort to the previous section of this tutorial to revert to hassle-free web surfing.