The seamless sharing and accessibility of data across Apple devices stands as a major driver behind the annual influx of users gravitating towards Apple's ecosystem. If you’ve ever attempted to retrieve a file stored on a phone through a computer, then you probably know how complex the process can be. Conversely, if you want to browse iPhone files on a Mac, you’ll be surprised how streamlined and effortless it is.
In this post, we’ll tell you how to access iPhone files on Mac and share quite a few methods for this. So without waiting any further, let’s dive in!
| 💡Methods | 💾Effectiveness | ⚙️Difficulty |
|---|---|---|
| EaseUS MobiMover | It helps manage your iPhone files and simplify data transfer between iPhones and Macs. | Super easy |
| iCloud | It helps sync the bulk of your data so that you can view it with the same iCloud account. | Easy |
| Finder | It allows you to open files directly from your Mac’s Finder app. | Easy |
| iTunes | This is a conventional and simple way to view iPhone files on a Mac running an older macOS version. | Easy |
How to access iPhone files on Mac without iTunes
Using iTunes is probably the most conventional method of accessing your iPhone files on your Mac. However, you're certainly not bound to use just this method. Instead, there are a variety of ways available that can allow you to access your iPhone files on Mac in quite an easy way without iTunes. In this section, we’ll take a look at three such methods.
Method 1. A professional tool
One approach to effortlessly view your iPhone files on your Mac without relying on iTunes involves the use of a specialized utility. Those who prefer a direct and uncomplicated route will undoubtedly find this alternative method handy. Based on our thorough research of ad-hoc third-party applications, EaseUS MobiMover has emerged as a standout choice due to its notable functionalities and user-friendly interface.

This tool allows you to take a shortcut when transferring data between iPhones and Macs. For instance, you can move files between your iPhone and Mac through a drag-and-drop logic. An extra thing on the plus side of MobiMover is its extensive compatibility with various file formats, including photos, videos, messages, contacts, and more. Moreover, its functionality extends to serving as a reliable tool for backup and data recovery purposes.
Step 1. Open EaseUS MobiMover
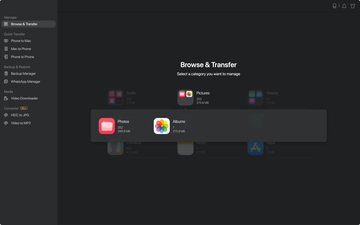
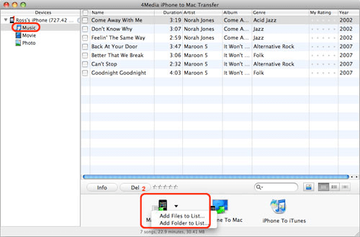
Run EaseUS MobiMover, and from the main interface, opt for "Browse & Transfer." Proceed to choose the specific category of content you wish to access. This step necessitates linking your iPhone to your Mac using a USB cable.
Step 2. Access iPhone files on your Mac
This way, you can see all the contents present on your iPhone directly from your Mac. Furthermore, you have the flexibility to select distinct categories for a comprehensive view of your files.

Step 3. Manage your files
Utilizing MobiMover allows you to execute certain actions on your files. For instance, should you desire to remove specific photos, you can opt for the relevant items and initiate the "Delete" function, followed by confirming your choice with a click on "Yes."

Method 2. iCloud
Another approach to accessing iPhone files on Mac without iTunes involves the use of your iCloud account. This proves particularly advantageous for individuals who predominantly store their data within iCloud rather than their iPhone's onboard storage. To conveniently access your iPhone data on your Mac through this technique, you only need to follow a concise sequence of steps highlighted below:
Step 1. Enable iCloud
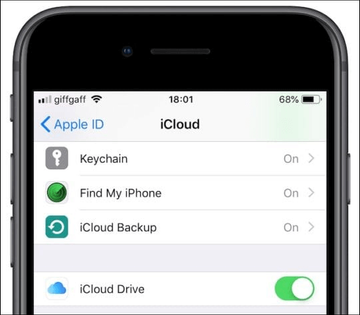
The first step is to enable iCloud on both your iPhone and your Mac, and to ensure that both devices are using the same Apple ID.
Step 2. Set up file access on iPhone
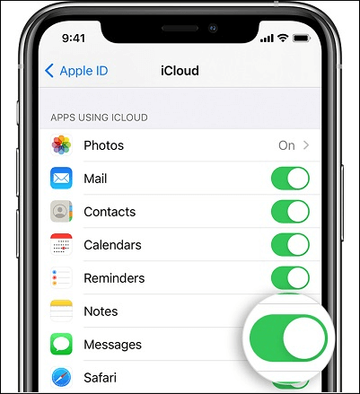
Upon activating iCloud across your devices, the subsequent step involves configuring file accessibility on your iPhone. To achieve this, proceed to your device's settings, locate the iCloud section, and enable the specific file categories you intend to access on your Mac.
Step 3. Access files on Mac
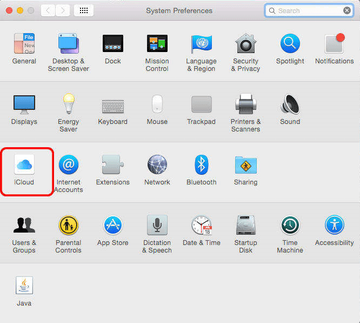
Access the iCloud Drive from your Mac’s System Preferences app. Within this interface, you'll encounter a comprehensive display of iPhone files for which you've granted iCloud access. The notable advantage lies in the continuous synchronization of these files with your iPhone, and it stays that way until you tweak these settings. Consequently, should you intend to modify any file, a single device suffices for the task, saving you the hassle of replicating changes across both devices.
Method 3. Finder
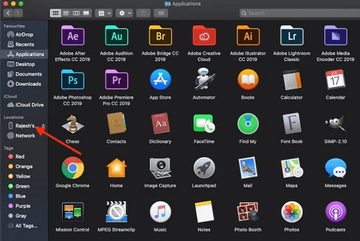
The third method to effortlessly access iPhone files on your Mac without using iTunes is to utilize the Finder app directly. This straightforward approach is quick and easy as long as you adhere to the following steps:
📝Note: This method is available on Macs running macOS Catalina and later.
Step 1. Enable iCloud
The first step is to enable iCloud on both your iPhone and your Mac, and to ensure that both devices are using the same Apple ID.
Step 2. Set up file access on iPhone
Upon activating iCloud across your devices, the subsequent step involves configuring file accessibility on your iPhone. To achieve this, proceed to your device's settings, locate the iCloud section, and enable the specific file categories you intend to access on your Mac.
Step 3. Access files on Mac
Access the iCloud Drive from your Mac’s System Preferences app. Within this interface, you'll encounter a comprehensive display of iPhone files for which you've granted iCloud access. The notable advantage lies in the continuous synchronization of these files with your iPhone, and it stays that way until you tweak these settings. Consequently, should you intend to modify any file, a single device suffices for the task, saving you the hassle of replicating changes across both devices.
How to view iPhone files on Mac with iTunes
In the previous section, we examined the various ways to access iPhone files on a Mac without using iTunes. Yet, despite the array of uncomplicated or advanced alternatives available, utilizing iTunes remains one the simplest and most straightforward means to view and manage iPhone files on a Mac. Therefore, if you prefer leveraging iTunes to achieve this task, you can effortlessly do so by adhering to the subsequent set of instructions:
Step 1. Connect iPhone to Mac
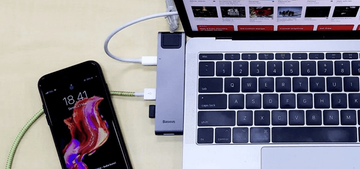
In order to view iPhone files on Mac with iTunes, the first step is to connect your iPhone via a USB cable to your Mac.
Step 2. Open iTunes
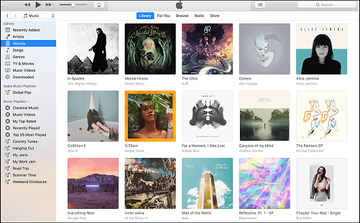
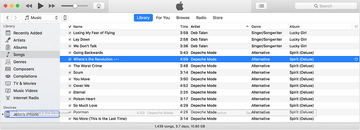
Once you connect your iPhone to your Mac, the iTunes app should open automatically. In case it doesn’t, you’ll need to launch iTunes on your Mac manually. Next, click on the iPhone icon in the iTunes window to select the iPhone you wish to access.
Step 3. Access your files
After selecting your iPhone, you can navigate to the different folders and file types you have in your iPhone storage. You can also choose to transfer or sync either specific folders or specific file categories on your iPhone to your Mac.
Bonus Tip: How to Transfer Files from iPhone to Mac
Now that you know the methods for accessing iPhone files on Mac, both iTunes-dependent and iTunes-independent ones, it’s worth unveiling an additional insightful suggestion on facilitating file transfers from iPhone to Mac. Having obtained your desired files, you might need to transfer them from your iPhone to your Mac - whether for backup purposes or to alleviate storage constraints on your device. You can also easily do it through EaseUS MobiMover. Using this tool is pretty straightforward, plus it also allows you to transfer a wide variety of file types and categories between your devices.
Here are the steps to transfer files from iPhone to Mac with EaseUS MobiMover:
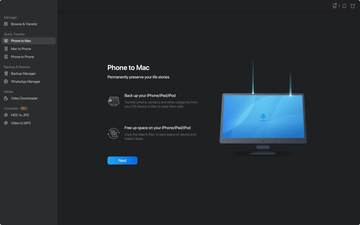
Step 1. Launch EaseUS MobiMover on your Mac, and from the homepage, select ''Phone to Mac''. This action requires establishing a connection between your iPhone and Mac via a USB cable. Following a successful connection, click "Next" to initiate the file transfer procedure.
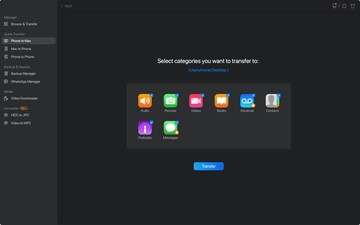
Step 2. MobiMover will show all the accessible files on your iPhone automatically. Select the specific types of files you want to transfer. At this point, consider modifying the default destination before clicking "Transfer" because the transferred content is stored on the Desktop by default.
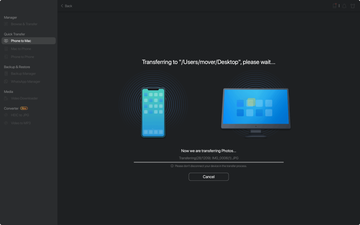
Step 3. Wait for MobiMover to transfer data from iPhone to Mac. When it finishes, you can open and check the transferred files.
To recap
There's a fairly diverse range of techniques to access iPhone files on a Mac, encompassing options both reliant on and independent of iTunes. Alongside iTunes, alternatives like iCloud, Finder, and third-party applications offer ways to view and manage iPhone files on your Mac. For those inclined towards a seamless iTunes-free experience, we recommend a reputable third-party solution such as EaseUS MobiMover, which helps effortlessly access iPhone files on your Mac. Otherwise, you can use all the other methods we’ve outlined in this post without fearing any difficulties or loss of data.
FAQ
1. How do I access files from iPhone to Mac via USB?
To establish a connection between your iPhone and Mac using a USB cable for file access, simply link both devices through the USB cable. Subsequently, you can opt to utilize either the Finder application or third-party software such as EaseUS MobiMover to facilitate the transfer of files from your iPhone to your Mac.
2. Why won't my iPhone show up on my Mac?
The absence of your iPhone on your Mac's interface can stem from several potential causes. Frequently, this occurrence is a result of either an improperly secured USB cable connection between the devices or the omission of your Mac from the list of trusted devices on your iPhone.
3. Can I transfer files from iPhone to Mac Wirelessly?
Absolutely, a wireless transfer of files from your iPhone to your Mac can be effortlessly performed. This process involves leveraging your iCloud account to seamlessly move or duplicate desired files from your iPhone to your Mac.
![How to access iPhone files on Mac [step by step]](/img/yjLwEH2Wr6-360-how-to-access-iphone-files-on-mac.png)