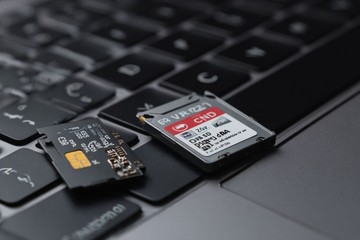
If your SD card suddenly stops opening photos or documents on your Mac (or doesn’t seem to appear at all), it’s likely corrupted. The cause could be anything from an interrupted transfer to a worn-out card, but the recovery steps are usually the same.
Here’s a clear, straightforward walkthrough to help you recover files from a corrupted SD card on Mac and get the card working again.
Signs your SD card may be corrupted
First let’s be clear on what we mean when we say an SD card is “corrupted”.
It doesn’t necessarily mean the card is physically broken. In most cases, the issue is with the file system - the part of the card that tells your Mac where each file lives. When that structure gets damaged, your photos or documents might disappear or fail to open.
There are plenty of forum threads where people complain their SD card won’t show up in Finder. We see this one all the time. In other cases, the card does appear, but trying to open files leads to constant errors.
If we had to list the most common reasons why this happens, it’s these:
- Interruptions during file transfers, like unplugging the reader or a sudden power loss.
- Pulling the SD card out without ejecting it properly.
- Using the same card across multiple devices without reformatting it first.
- File system errors from long-term use or storage wear.
- Physical issues with the card, such as worn contacts or minor damage.
First things to do before SD card recovery for Mac
While there’s not much you can do about physical issues on your own, it’s usually not that. In most cases, it’s a logical problem (where the file system is damaged). In these situations, we always recommend to:
- Stop using the SD card immediately to prevent overwriting files.
- Connect it using a reliable card reader and USB port.
- Check if it shows up in Disk Utility. You can find it in Applications > Utilities > Disk Utility.
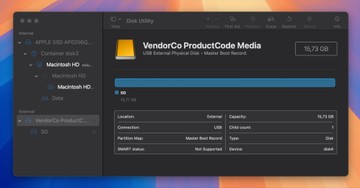
- If you see your SD card listed there, that’s good news - it means your Mac can still detect it, which gives you a chance to recover your SD card on Mac.
- Also, if you’re using a card reader, try a different slot or USB port (sometimes the problem isn’t the card at all).
Note. We’ve also seen a few cases where the SD card was fine and the files were still there, but hidden from view. It happens occasionally, often due to the way the file system flags certain items. You can quickly check if that’s the case by opening Finder, then pressing Command + Shift + Period (.) on your keyboard. This toggles hidden files on and off, so if your missing photos or documents suddenly appear, that was the issue.
How to uncorrupt an SD card on Mac (without losing files)
To uncorrupt an SD card on Mac, we’ll keep things simple and split it into two steps.
First, you’ll recover your files from the SD card so nothing gets lost in the repair process.
Second, you’ll fix the card itself using Disk Utility. This approach works for any type of file (photos, videos, documents) so it’s a universal memory card recovery method for Mac - you can use it no matter what’s stored there.
Step 1: Recover files from a corrupted SD card
To retrieve files, you’ll need SD card data recovery software for Mac. There are plenty of options to choose from - Disk Drill, Recoverit, TestDisk/PhotoRec, but for this walkthrough, we’ll use Disk Drill. It consistently ranks high in ratings and reviews, and it runs smoothly on macOS without extra setup hassles.
So, let’s go ahead and walk through the process step-by-step. Here’s how to recover files from an SD card on a Mac:
- To start, download and install Disk Drill from the official website.
- Connect your SD card to your Mac, either through the built-in slot (if you have one) or with a good USB card reader. Make sure the connection is solid. What matters here is whether your Mac detects the card. You can check in Disk Utility. If you see your SD card listed there with the correct size, even if it doesn’t appear in Finder, you can scan it.
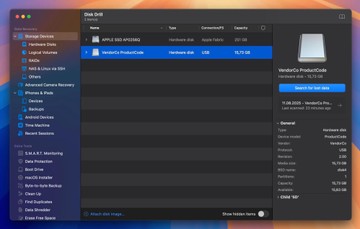
- Launch Disk Drill and select your SD card from the device list.
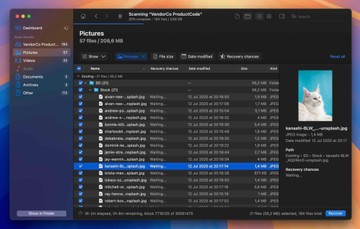
- Click Search for lost data. You’ll be prompted to choose between Universal Scan and Advanced Camera Recovery. Universal Scan runs a full search for all file types, while Advanced Camera Recovery is designed for pulling photos and videos directly from camera cards. For this case, go with Universal Scan.
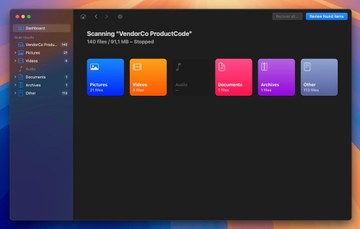
- While the scan runs, files will start appearing in real time. You can preview them right away or wait until the scan finishes.
- Use the sidebar to jump to categories like Pictures, Videos, Documents, or filter by format (JPG, MP4, DOCX, etc.). The search bar is handy if you remember file names.
- Preview files before recovery; you should be able to open photos, watch videos, view documents, and more.
- Select what you want to recover, click Recover, and choose a destination other than the SD card to avoid overwriting data.
Data recovery apps like this are useful in many situations; corrupted cards are only one example. If, for instance, you’ve already erased (in other words, formatted) an SD card to fix it and lost your data, you might be glad to know it’s also possible to recover a formatted SD card on a Mac with these same tools. For more tips and techniques, check on the Pandora Data Recovery Mentor. Data loss cases with SD cards are quite common, so there are many different guides.
And in our experience, chances with SD cards are usually higher than, let’s say, SSDs, so if you act quickly, you’ve got a solid shot at getting everything back.
Step 2: Fix the SD card in Disk Utility
Now that your files are safe somewhere else, we have nothing to lose by working directly on the SD card. The goal here is to repair the file system so the card can be used normally again.
On a Mac, the easiest way to do this is with Disk Utility’s built-in First Aid tool - it can check the card for errors and attempt to fix them without formatting. If First Aid works, your Mac SD card recovery is complete, and you’ll have a functioning SD card on your hands.
If First Aid doesn’t do the trick, the next best move is to use the Erase command in the same Disk Utility. This is actually our preferred approach because it rebuilds the entire volume from scratch instead of patching damaged pieces. Most corruption lives in the file system structures (the boot sector, partition map, and allocation tables). Erasing wipes those out and replaces them with fresh, clean versions. It clears orphaned entries, removes odd partition layouts some cameras leave behind, and gives the card a clean start.
The choice is yours - you can’t really go wrong here as long as your data is backed up.
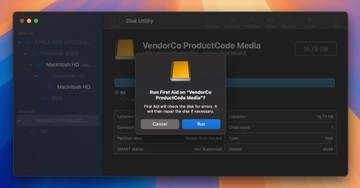
- To run First Aid, open Disk Utility, select your SD card, and click First Aid at the top.
- Confirm when prompted, let it check and repair the card, and then test it.
- If the card mounts and works normally, you’re done.
- If the problems persist, return to Disk Utility, enable Show All Devices.
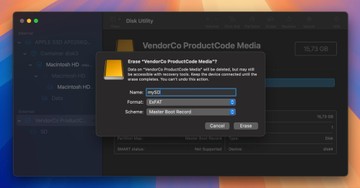
- Select the top-level entry for your card, and click Erase.
- Choose exFAT for cards larger than 32 GB or MS-DOS (FAT) for smaller ones. For the scheme, pick Master Boot Record for maximum device compatibility or GUID if it’s Mac-only.
- Run the erase, eject the card, and test it again, either on your Mac or in the camera it came from.
Note. If you’re planning to use this SD card in a digital camera, we’d suggest formatting it in that camera instead. In our experience, this gives you the best compatibility and helps avoid weird quirks later. The device sets up the file system exactly how it likes it, and that small step can save you from headaches down the road.
If Disk Utility refuses to erase the card and gives you something like “this drive is write-protected”, check the lock switch on the SD adapter - it’s the small tab on the side that slides up and down. However, we’ve seen cases where the lock is fine, but people still get the write-protected message. That usually means the SD card is physically failing (often the internal controller has switched it into read-only mode to prevent further damage). When that happens, there’s no reliable way to make it writable again, and replacing the card is the only long-term fix.
Final word
As you can see, nothing too complicated about SD card recovery on Mac. If you know what to do (and what not to) your chances for success are quite good.
If this isn’t your first time dealing with SD card problems, it’s worth thinking about how you use them day to day.
One of our key suggestions is to use each SD card exclusively with a specific device setup. For example, using the same card between one camera and your Mac is fine. But SD cards don’t handle constant switching between multiple devices very well. Different devices can write data in slightly different ways, and over time, that mix can lead to file system errors or corruption. So it’s always better to dedicate a card to a single camera or device and stick with that pairing for as long as possible.
If you picked up a tip that worked for you, drop it in the comments - your experience might save someone else’s files. And if this guide helped, share it. It could be exactly what someone needs when their SD card suddenly stops cooperating.
