When you delete a file on your Mac, it typically moves to the Trash - a temporary holding area that allows for easy recovery before permanent deletion. However, if you've emptied the Trash or encountered situations where files bypassed it entirely, Mac Trash recovery becomes more complex. This comprehensive guide details every proven method for retrieving your lost documents, photos, and other valuable data, progressing from built-in solutions to advanced techniques.
Restore files directly from the Trash before emptying
The Trash acts as a temporary storage buffer. Files here are not erased; their directory entries are simply moved until the Trash is emptied, making this a non-destructive process. This is the most straightforward and most immediate recovery method, applicable when the Trash has not been emptied.
Step-by-step process:
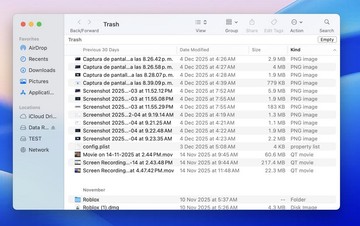
Step 1. Locate and Open the Trash: Click the Trash icon in your Mac's Dock.
Step 2. Browse Deleted Items: Review the contents. You can use the search bar in the top-right corner of the Finder window to locate specific files.
Step 3. Restore Your Files: Select the item(s) you wish to recover. Right-click and choose "Put Back" from the context menu. This action will restore the files to their original locations.
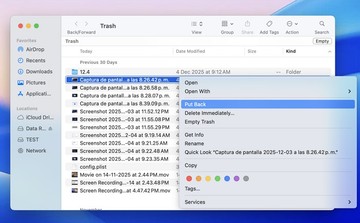
Alternatively, you can drag and drop the selected files from the Trash window to your Desktop or any other Finder folder.
Utilize Time Machine backup to recover Trash Mac
If you have Time Machine configured, it provides the most robust and reliable recovery path, capable of recovering emptied Trash on Mac, provided there is an active Time Machine backup on an external drive or network volume.
Step-by-Step Process:
Step 1. Ensure your Time Machine backup drive is connected.
Step 2. Navigate to the folder that initially contained the deleted file(s).
Step 3. Enter Time Machine by clicking its icon in the menu bar and selecting "Enter Time Machine," or launch it from System Settings.

Step 4. Use the timeline on the edge of the screen or the arrow buttons to "travel back in time" to a date before the files were deleted.
Step 5. Locate the file or folder, preview it if necessary, and click "Restore." The file will be returned to its present-day location.
Time Machine captures system snapshots, allowing you to recover not just files but also previous versions of documents. It is independent of the Trash's status.
Recover files after emptying the Trash with data recovery software
Once the Trash is emptied, macOS marks the space occupied by those files as available for new data. Until that space is overwritten, specialized software can scan the drive and reconstruct the deleted files. This is where a professional tool like EaseUS Data Recovery Wizard for Mac becomes essential.
The macOS rm command and emptying Trash remove the file system's pointer to the data, not the data itself. Recovery tools perform a deep scan of the storage device's sectors to identify and rebuild orphaned files using residual signatures.
Check the instructions below to undo “empty the Trash” on Mac with EaseUS Mac data recovery software:
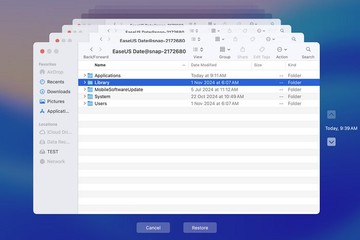
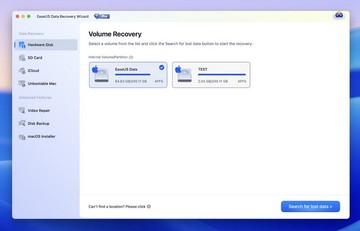
Step 1. Open the EaseUS Data Recovery Wizard. Click "Search for lost data" after selecting the original location of your screenshots.
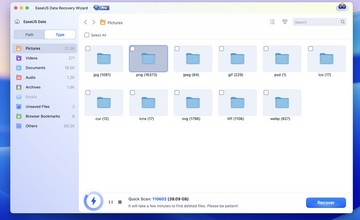
Step 2. The discovered files will be displayed in the left panel once scanning is complete. You can find them by their name, kind, and path.
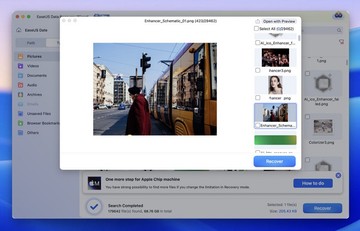
Step 3. Double-clicking the selected files displays a preview. Click "Recover" after reviewing the pictures you want to retrieve.
After the fix: Tips for recovering trashed files on Mac
Check other built-in options:
Recent Documents/Folders: Some applications (such as Microsoft Office and Adobe apps) maintain lists of recently opened files. Check the** File** > Open Recent menu.
Auto-Save & Versions: For documents edited with native Apple apps or supporting third-party apps, use File > Revert To > "Browse All Versions" to access historical auto-saved versions.
Proactive data protection strategy:
Use Cloud Syncing Wisely: Services like iCloud Drive or Dropbox often have their own trash/version history (e.g., iCloud.com's Recently Deleted).
Adjust Trash Behavior: Automatically delay emptying the Trash. Go to Finder > Settings > Advanced, then uncheck "Remove items from the Trash after 30 days."
Regular Backups: Maintain a secondary backup on a different system (e.g., a cloud service or a second external drive).
Final words
To maximize your chances of recovering deleted files from a Mac Trash, follow this systematic approach:
First, check the Trash - the simplest solution is often overlooked.
If emptied, immediately leverage Time Machine if it's set up.
If no backup exists, promptly use professional data recovery software, such as EaseUS Data Recovery Wizard for Mac. Refrain from any disk activity until the recovery is complete.
Finally, implement a robust backup strategy to prevent future data loss anxiety.
Data loss can be stressful, but by acting quickly and using the correct tools, successful recovery is highly probable. By following this guide, you are equipped with the knowledge to handle both complex and straightforward file deletion scenarios on macOS.