Find out what triggers abnormal CPU usage by accountsd process on Mac computers running Catalina and get an effective workaround for the problem.
Update:
What is accountsd process virus on Mac?
A perfect digital system is wishful thinking. Let’s face it: operating systems can get buggy and slow down, freeze, or reboot at times. These issues are often precipitated by crude software updates, app compatibility glitches, malicious code, or a combination of these factors. Macs aren’t exceptional in this regard. A recent surge in bug reports relating to the process named accountsd demonstrates this to the fullest. The problem is that this item starts consuming a large amount of a computer’s CPU resources. Counterintuitively, the Activity Monitor shows that its usage of the processing power goes well over the logical 100% threshold and may even reach 500% in some cases. This dramatic spike makes a Mac slow down to a crawl even when a few applications are running. It also drains the battery of a MacBook Air or MacBook Pro laptop and causes an overheating hazard.

What is the accountsd service supposed to do, anyway? In a nutshell, it synchronizes Mac applications with the user’s personal accounts enrolled in the system. This form of integration allows the person to provide a piece of software with access to use their account authentication details without the need to enter the username and password each time they are required. Interoperability of this sort is a common thing across the board, and it pursues the goal of improving the user experience. By adding one or several most-used services via Internet Accounts under System Preferences, a Mac owner can take shortcuts afterwards. This is how it should work in an ideal world, but sometimes it all gets out of hand.
Accountsd may re-infect your Mac multiple times unless you delete all of its fragments, including hidden ones. Therefore, it is recommended to download Combo Cleaner and scan your system for these stubborn files. This way, you may reduce the cleanup time from hours to minutes.
Download Now Learn how Combo Cleaner works. If the utility spots malicious code, you will need to buy a license to get rid of it.Whereas the accountsd issue has been periodically making itself felt since 2015, it got a boost with the release of macOS Catalina. To top it off, the quandary literally exploded in late September 2020, when the macOS Catalina 10.15.7 supplemental update went live. On macOS 11 Big Sur and the beta versions of macOS 12 Monterey, the problem has been observed periodically as well. In many cases, users run into the problem when no Wi-Fi network is found. Another widely reported catalyst for the glitch is the Mail app running when there is no active wireless connection. This overlapping of conditions sheds light on the gist of the predicament: when trying to connect to a mail server unsuccessfully, the system makes the accountsd process run wild and use up an unproportioned amount of CPU. This continuous loop is reflected in the Mail Connection Doctor interface accessible from the app’s Window menu (see screenshot below).

A similar drag goes for a Mac’s Calendar app. Since it can be linked with the user’s Internet accounts, the service attempts to perform the syncing routine but fails due to a missing Wi-Fi connection or some other circumstances. Again, this calls forth a situation where accountsd kicks in to try and complete the authorization to no avail. The origin of this frustrating behavior gives a clue about the applicable troubleshooting vector. Since the issue typically stems from the Mail or Calendar app’s inability to pull in specific login info, the fix is to disable and then re-enable the account it is trying to access. In the case of the Mail app, for instance, this is doable by going to the Accounts tab, unchecking the box next to “Enable this account”, and then putting the checkmark back in its place.

Stop “accountsd wants to use the “login” keychain” pop-ups on Mac
CPU and memory consumption blown out of proportion isn’t the only issue with this process. Another long-running bug is that the normal use of a Mac may be incessantly interrupted by alerts saying, “accountsd wants to use the “login” keychain”. If this problem kicks in, these dialogs will be appearing at boot time and then every several minutes. As illustrated on the following screen capture, the pop-ups prompt the user to enter their keychain password.

This predicament can mean either one of two things. First off, it is a common upshot of resetting a macOS user account password. Doing so calls forth a condition where the “login” keychain password and the new account access credentials no longer match. Therefore, if you have recently updated your user account authentication details, the workaround for the issue is to specify the same password for the keychain in question. Here’s how you do it:
- Go to ‘Utilities’ and open the ‘Keychain Access’ app;
- Control-click the “login” entry in the upper left part of the screen;
- In the contextual menu, select the option to change the keychain password;
- Enter your current password, your new password that matches the one set for your user account, confirm, and click OK.
Another reason for an influx of these pop-ups is that the “login” keychain is locked. This may occur in the aftermath of major or supplementary macOS updates. If so, the notification will be triggered every time you try to access your Mail app, Calendar, or another service that relies on accountsd for credential syncing. Use the following steps to take care of the problem:
- Open the ‘Keychain Access’ app from the Utilities screen;
- Spot “login” in the Keychains list and control-click it;
- Select “Change Settings for Keychain ‘login’” in the contextual menu;
- Uncheck the ‘Lock after … minutes of inactivity’ and ‘Lock when sleeping’ boxes, or specify the preferred amount of time for the former.

These steps should prevent the “accountsd wants to use the “login” keychain” alerts from popping up. The technique works wonders as long as the problem stems from a commonplace system misconfiguration, but it could be a no-go if harmful code has cropped up on the Mac.
Malicious activity as a root cause for accountsd issues
The accountsd high CPU issue on a Mac might have a flavor of malware interference, too. Malicious code may mimic this process or inject itself into it to appear legitimate and slip below the radar of the built-in system defenses. In this scenario, overconsumption of the machine’s processing capacity can be an upshot of foul play such as covert coin mining or data theft. It’s also a known byproduct of scareware activity, where high CPU usage is precipitated intentionally. This way, the user is more likely to fall for the false positives generated by the fake optimization tool. The culprit could as well be an adware sample that takes over web browsers and displays annoying ads. Regardless of the category, the goal of Mac malware that impersonates accountsd comes down to money-making or exfiltration of sensitive data.
It could be difficult to differentiate between the system-related and malware-borne root causes for the accountsd snafu. To dot the i’s and cross the t’s, it makes sense ascertaining that the latter isn’t the case. Bear in mind that any malicious exploitation involving this service can entail serious consequences. The iCloud Keychain stores a plethora of confidential data nobody should obtain. When sign-in credentials are at stake, delaying the response is risky business. If the Mac has no viruses onboard, then the fix can be narrowed down to tweaking account settings of a malfunctioning app.
Accountsd virus manual removal for Mac
The steps listed below will walk you through the removal of this malicious application. Be sure to follow the instructions in the specified order.
Expand the Go menu in your Mac’s Finder bar and select Utilities as shown below.

Locate the Activity Monitor icon on the Utilities screen and double-click on it.

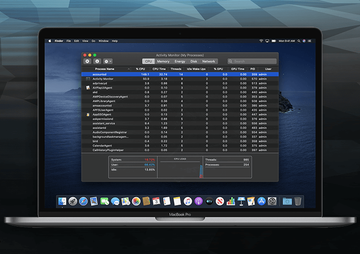
In the Activity Monitor app, look for accountsd or another process that appears suspicious. To narrow down your search, focus on unfamiliar resource-intensive entries on the list. Keep in mind that its name isn’t necessarily related to the way the threat is manifesting itself, so you’ll need to trust your own judgement. If you pinpoint the culprit, select it and click on the Stop icon in the upper left-hand corner of the screen.

When a follow-up dialog pops up asking if you are sure you want to quit the troublemaking process, select the Force Quit option.

Click on the Go menu icon in the Finder again and select Go to Folder. You can as well use the Command-Shift-G keyboard shortcut.

Type /Library/LaunchAgents in the folder search dialog and click on the Go button.

Examine the contents of the LaunchAgents folder for dubious-looking items. Be advised that the names of files spawned by malware may give no clear clues that they are malicious, so you should look for recently added entities that appear to deviate from the norm.
As an illustration, here are several examples of LaunchAgents related to mainstream Mac infections: com.pcv.hlpramc.plist, com.updater.mcy.plist, scom.avickUpd.plist, and com.msp.agent.plist. If you spot files that don’t belong on the list, go ahead and drag them to the Trash.

Use the Go to Folder lookup feature again to navigate to the folder named ~/Library/Application Support (note the tilde symbol prepended to the path).

When the Application Support directory is opened, identify recently generated suspicious folders in it and send them to the Trash. A quick tip is to look for items whose names have nothing to do with Apple products or apps you knowingly installed. A few examples of known-malicious folder names are Advanced Mac Tuneup, IdeaShared, and ProgressMatch.

Enter ~/Library/LaunchAgents string (don’t forget to include the tilde character) in the Go to Folder search area.

The system will display LaunchAgents residing in the current user’s Home directory. Look for dodgy items related to accountsd virus (see logic highlighted in subsections above) and drag the suspects to the Trash.

Type /Library/LaunchDaemons in the Go to Folder search field.

In the LaunchDaemons path, try to pinpoint the files the malware is using for persistence. Several examples of such items cropped by Mac infections are com.pplauncher.plist, com.startup.plist, and com.ExpertModuleSearchDaemon.plist. Delete the sketchy files immediately.

Click on the Go menu icon in your Mac’s Finder and select Applications on the list.

Find the app that clearly doesn’t belong there and move it to the Trash. If this action requires your admin password for confirmation, go ahead and enter it.

Expand the Apple menu and select System Preferences.


Proceed to Users & Groups and click on the Login Items tab.


Now select Profiles under System Preferences. Look for a malicious item in the left-hand sidebar. Several examples of configuration profiles created by Mac adware include TechSignalSearch, MainSearchPlatform, AdminPrefs, and Chrome Settings. Select the offending entity and click on the minus sign at the bottom to eliminate it.


Get rid of accountsd virus in web browser on Mac
To begin with, the web browser settings taken over by the accountsd virus should be restored to their default values. Although this will clear most of your customizations, web surfing history, and all temporary data stored by websites, the malicious interference should be terminated likewise. The overview of the steps for completing this procedure is as follows:
- Remove accountsd virus from Safari
Open the browser and go to Safari menu. Select Preferences in the drop-down list.

Once the Preferences screen appears, click on the Advanced tab and enable the option saying “Show Develop menu in menu bar”.

Now that the Develop entry has been added to the Safari menu, expand it and click on Empty Caches.

Now select History in the Safari menu and click on Clear History in the drop-down list.

Safari will display a dialog asking you to specify the period of time this action will apply to. Select all history to ensure a maximum effect. Click on the Clear History button to confirm and exit.

Go back to the Safari Preferences and hit the Privacy tab at the top. Find the option that says Manage Website Data and click on it.

The browser will display a follow-up screen listing the websites that have stored data about your Internet activities. This dialog additionally includes a brief description of what the removal does: you may be logged out of some services and encounter other changes of website behavior after the procedure. If you’re okay with that, go ahead and click on the Remove All button.

Restart Safari
- Remove accountsd in Google Chrome
Open Chrome, click the Customize and control Google Chrome (⁝) icon in the top right-hand part of the window, and select Settings in the drop-down

When on the Settings pane, select Advanced
Scroll down to the Reset settings section.

Confirm the Chrome reset on a dialog that will pop up. When the procedure is completed, relaunch the browser and check it for malware activity.

- Remove accountsd from Mozilla Firefox
Open Firefox and go to Help – Troubleshooting Information (or type about:support in the URL bar and press Enter).


When on the Troubleshooting Information screen, click on the Refresh Firefox button.

Confirm the intended changes and restart Firefox.
Get rid of accountsd virus using Combo Cleaner removal tool
The Mac maintenance and security app called Combo Cleaner is a one-stop tool to detect and remove accountsd virus. This technique has substantial benefits over manual cleanup, because the utility gets hourly virus definition updates and can accurately spot even the newest Mac infections.
Furthermore, the automatic solution will find the core files of the malware deep down the system structure, which might otherwise be a challenge to locate. Here’s a walkthrough to sort out the accountsd issue using Combo Cleaner:
Download Combo Cleaner installer. When done, double-click the combocleaner.dmg file and follow the prompts to install the tool onto your Mac.
By downloading any applications recommended on this website you agree to our Terms and Conditions and Privacy Policy. The free scanner checks whether your Mac is infected. To get rid of malware, you need to purchase the Premium version of Combo Cleaner.
Open the app from your Launchpad and let it run an update of the malware signature database to make sure it can identify the latest threats.
Click the Start Combo Scan button to check your Mac for malicious activity as well as performance issues.

Examine the scan results. If the report says “No Threats”, then you are on the right track with the manual cleaning and can safely proceed to tidy up the web browser that may continue to act up due to the after-effects of the malware attack (see instructions above).

In case Combo Cleaner has detected malicious code, click the Remove Selected Items button and have the utility remove accountsd threat along with any other viruses, PUPs (potentially unwanted programs), or junk files that don’t belong on your Mac.

Once you have made doubly sure that the malicious app is uninstalled, the browser-level troubleshooting might still be on your to-do list. If your preferred browser is affected, resort to the previous section of this tutorial to revert to hassle-free web surfing.