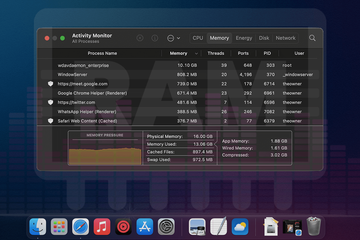
Intolerable CPU and RAM overuse by wdavdaemon process is a fairly common problem on organization-managed Macs that requires action to sort out.
What is wdavdaemon on Mac?
Enterprise IT environments are highly dynamic these days. Not only does this relate to things like cloud migration or managed infrastructure deployment, but it’s also about operating systems in use across these networks. For instance, when a company decides to switch from Windows to macOS ecosystem, the transition isn’t always smooth in every way. Aside from a less-than-complete overlap of file formats, customizations, and administrative controls, one of the areas that presents compatibility challenges is security. In hybrid networks with several software architectures at their core, it makes sense to combine defensive tools from both platforms so that potential PC malware doesn’t get a chance to spread to Macs, and vice versa. The extent to which such impact can make itself felt is debatable, but prevention efforts are definitely worthwhile when valuable digital assets are at stake. This explains why Microsoft’s service called wdavdaemon may run on Apple’s desktops and laptops.
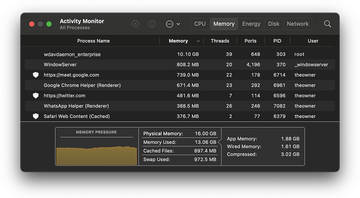
For clarity’s sake, let’s look into the gist of wdavdaemon. The name is a portmanteau denoting “Windows Defender Antivirus Daemon”. By the way, this security toolkit was rebranded into a cloud-centric Microsoft Defender solution back in 2018, and yet the legacy naming convention still persists in some auxiliary processes. The chores of this service largely boil down to real-time threat monitoring. Zooming back in on the subject at hand, wdavdaemon has been a huge irritant for network admins who administer both PCs and Macs under one corporate umbrella. The main issue is that it often causes abnormal congestion of the CPU and memory on Mac machines managed by the organization. Such spikes might appear normal in the course of routine computer scanning files and executables against a database of malware signatures and certain behavioral patterns that signal malicious activity.
The wdavdaemon high CPU and memory virus may re-infect your Mac multiple times unless you delete all of its fragments, including hidden ones. Therefore, it is recommended to download Combo Cleaner and scan your system for these stubborn files. This way, you may reduce the cleanup time from hours to minutes.
Download Now Learn how Combo Cleaner works. If the utility spots malicious code, you will need to buy a license to get rid of it.However, lots of enterprise endpoint users report wdavdaemon gobbling up nearly all processing resources all the time. This, naturally, leads to system instability and makes the user experience go down the drain. The Mac won’t stop freezing up and hardly responds to even trivial actions such as mouse clicks and app launches, let alone more complex tasks like large file transfers, graphics editing, or videoconferencing. Some people wonder how the CPU usage can possibly exceed 100%, which is what happens in such scenarios. The whys and wherefores of this ostensibly counterintuitive condition are quite simple, though: it occurs when more than one processor core is engaged.
It may seem that disabling Microsoft Defender’s real-time protection through the administrative console should be a sure-shot fix. This does address the problem in many cases, but sometimes wdavdaemon respawns in a few minutes and continues to do its CPU and memory siphoning thing. Completely uninstalling the toolkit is an option, but one that will make the company’s security team frown as it leaves a part of the network exposed to cyberattacks.
Wdavdaemon_unprivileged throws another wrench in the works
It turns out there’s no strict correlation between the scope of a daemon’s permissions and the performance hit it causes. This observation is demonstrated by a process named wdavdaemon_unprivileged, which is part of Microsoft Defender for Endpoint (MDE) geared toward tasks like signature updates, threat detection, and telemetry reporting. It additionally ensures file scanning and analysis comply with macOS’s sandboxing and System Integrity Protection constraints.
As opposed to wdavdaemon per se which runs with elevated privileges, it operates with restricted rights to minimize security risks. However, this hallmark doesn’t make it less of a potential problem when it comes to CPU and memory consumption. The reasons for this misbehavior run the gamut from overly aggressive real-time scanning and conflicts with security or backup tools like Time Machine and Dropbox, to corrupted signatures and misconfigured security policies.
A few mitigations can help tame the “appetites” of wdavdaemon_unprivileged on Mac machines. First off, admins need to make sure the latest Microsoft Defender version is running on the network. It’s also good practice to scrutinize logs and reports for clues about possible scanning loops or updated errors. Reducing real-time scanning load, for instance by excluding development directories, is worthwhile as well.
Potential security concern hidden in plain sight
There is a way to try and strike a balance between protection and hassle-free Mac usage under these circumstances. A viable theory is that wdavdaemon might go bananas when a strain of stealthy malware is running on a computer, or when a harmful application is mimicking wdavdaemon. The latter fits the context of polymorphism and antivirus evasion techniques leveraged by some sophisticated threats today. This feels like a far-fetched assumption, but it can potentially be the case when a well-motivated adversary is in play and the target organization’s network holds valuable data. The sections below will help you check whether haphazard surges in wdavdaemon resource consumption are caused by surreptitious malware, a misconfiguration, or a compatibility problem. If this turns out to be a security issue, there are also tips to resolve it for good.
Wdavdaemon high CPU virus manual removal from Mac
The steps listed below will walk you through the removal of this malicious application. Be sure to follow the instructions in the specified order.
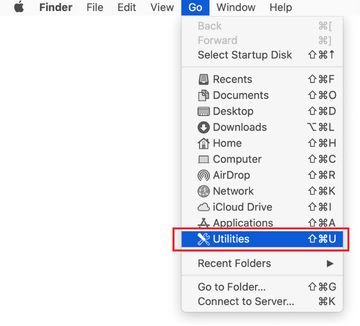
Expand the Go menu in your Mac’s Finder bar and select Utilities as shown below.
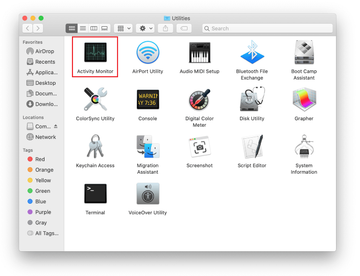
Locate the Activity Monitor icon on the Utilities screen and double-click on it.
In the Activity Monitor app, look for wdavdaemon, wdavdaemon_enterprise, or another process that appears suspicious. To narrow down your search, focus on unfamiliar resource-intensive entries on the list. Keep in mind that its name isn’t necessarily related to the way the threat is manifesting itself, so you’ll need to trust your own judgement. If you pinpoint the culprit, select it and click on the Stop icon in the upper left-hand corner of the screen.
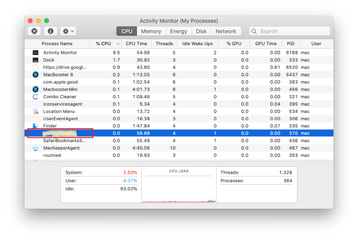
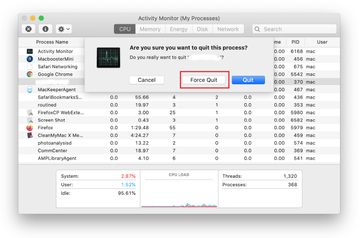
When a follow-up dialog pops up asking if you are sure you want to quit the troublemaking process, select the Force Quit option.
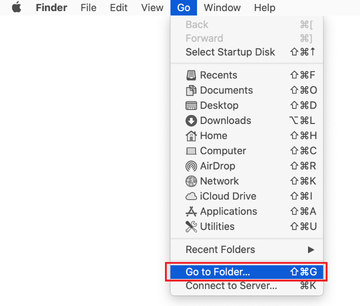
Click on the Go menu icon in the Finder again and select Go to Folder. You can as well use the Command-Shift-G keyboard shortcut.
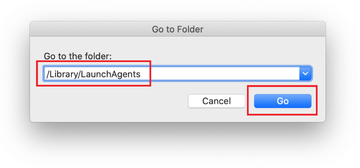
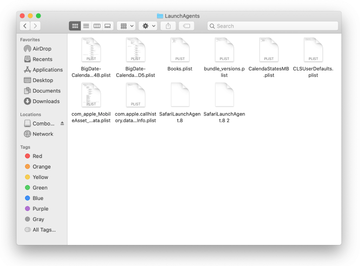
Type /Library/LaunchAgents in the folder search dialog and click on the Go button.
Examine the contents of the LaunchAgents folder for dubious-looking items. Be advised that the names of files spawned by malware may give no clear clues that they are malicious, so you should look for recently added entities that appear to deviate from the norm.
As an illustration, here are several examples of LaunchAgents related to mainstream Mac infections: com.updater.mcy.plist, com.avickUpd.plist, and com.msp.agent.plist. If you spot files that don’t belong on the list, go ahead and drag them to the Trash.
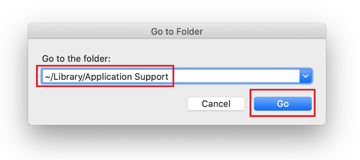
Use the Go to Folder lookup feature again to navigate to the folder named ~/Library/Application Support (note the tilde symbol prepended to the path).
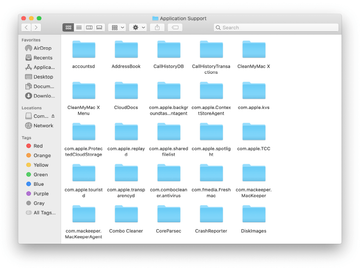
When the Application Support directory is opened, identify recently generated suspicious folders in it and send them to the Trash. A quick tip is to look for items whose names have nothing to do with Apple products or apps you knowingly installed. A few examples of known-malicious folder names are ProgressSite and IdeaShared.
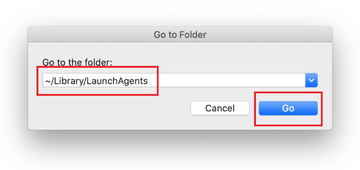
Enter ~/Library/LaunchAgents string (don’t forget to include the tilde character) in the Go to Folder search area.
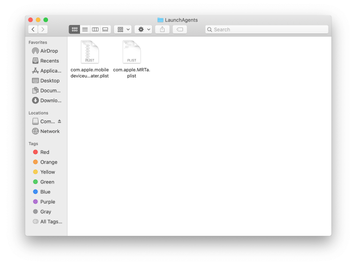
The system will display LaunchAgents residing in the current user’s Home directory. Look for dodgy items related to rogue wdavdaemon process (see logic highlighted in subsections above) and drag the suspects to the Trash.
Type /Library/LaunchDaemons in the Go to Folder search field.
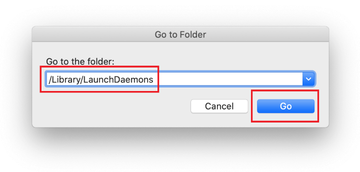
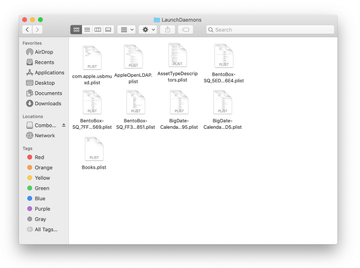
In the LaunchDaemons path, try to pinpoint the files the malware is using for persistence. Several examples of such items cropped by Mac infections are com.apple.sysmond.plist, com.startup.plist, and com.ExpertModuleSearchDaemon.plist. Delete the sketchy files immediately.
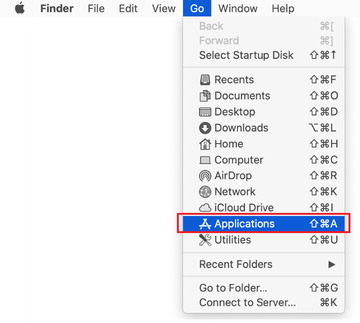
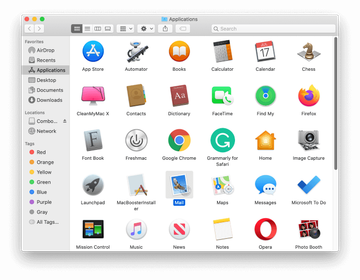
Click on the Go menu icon in your Mac’s Finder and select Applications on the list.
Find the entry for an app that clearly doesn’t belong there and move it to the Trash. If this action requires your admin password for confirmation, go ahead and enter it.
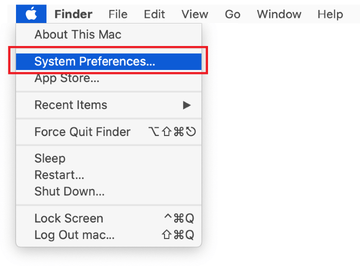
Expand the Apple menu and select System Preferences.
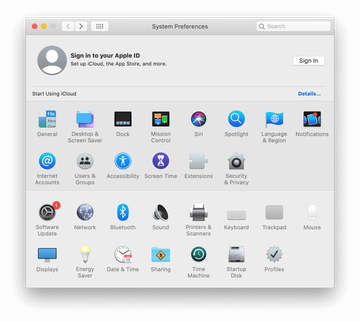
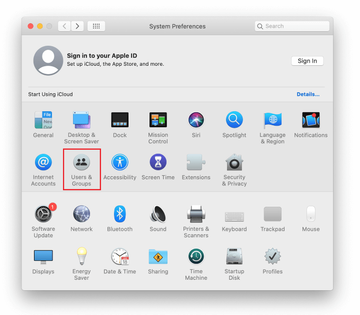
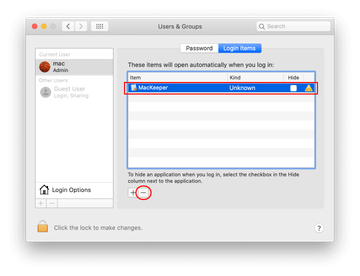
Proceed to Users & Groups and click on the Login Items tab.
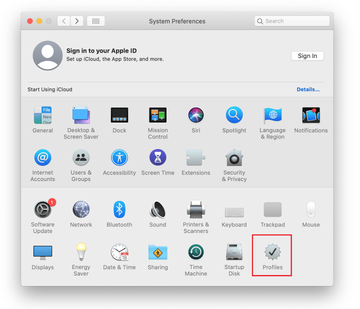
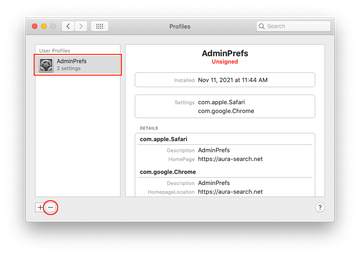
Now select Profiles under System Preferences. Look for a malicious item in the left-hand sidebar. Several examples of configuration profiles created by Mac adware include TechSignalSearch, MainSearchPlatform, AdminPrefs, and Safari Settings. Select the offending entity and click on the minus sign at the bottom to eliminate it.
Get rid of wdavdaemon related malware in web browser on Mac
To begin with, the web browser settings taken over by the wdavdaemon copycat malware should be restored to their default values. Although this will clear most of your customizations, web surfing history, and all temporary data stored by websites, the malicious interference should be terminated likewise. The overview of the steps for completing this procedure is as follows:
- Remove wdavdaemon virus on Safari
- Open the browser and go to Safari menu. Select Preferences in the drop-down list.
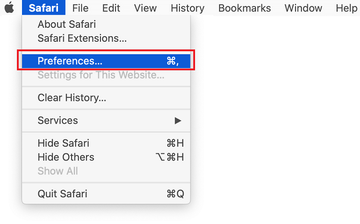
- Once the Preferences screen appears, click on the Advanced tab and enable the option saying “Show Develop menu in menu bar”.
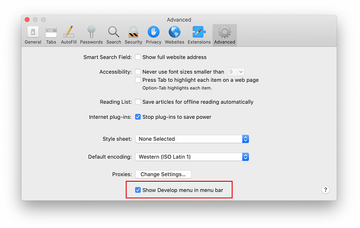
- Now that the Develop entry has been added to the Safari menu, expand it and click on Empty Caches.
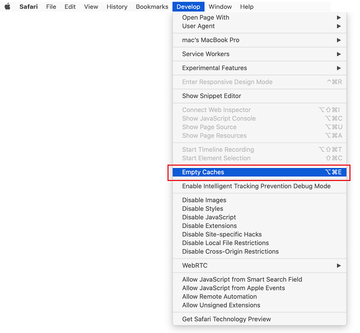
- Now select History in the Safari menu and click on Clear History in the drop-down list.
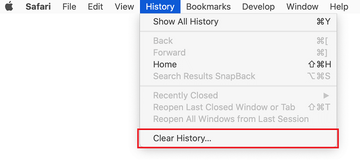
- Safari will display a dialog asking you to specify the period of time this action will apply to. Select all history to ensure a maximum effect. Click on the Clear History button to confirm and exit.
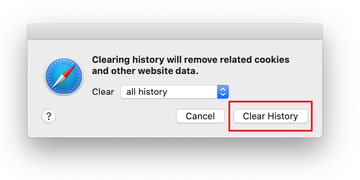
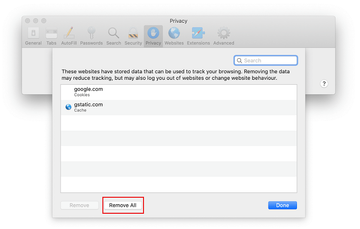
- Go back to the Safari Preferences and hit the Privacy tab at the top. Find the option that says Manage Website Data and click on it.

- The browser will display a follow-up screen listing the websites that have stored data about your Internet activities. This dialog additionally includes a brief description of what the removal does: you may be logged out of some services and encounter other changes of website behavior after the procedure. If you’re okay with that, go ahead and click on the Remove All button.
- Restart Safari
- Open the browser and go to Safari menu. Select Preferences in the drop-down list.
- Remove wdavdaemon virus on Google Chrome
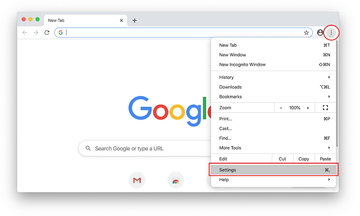
- Open Chrome, click the Customize and control Google Chrome (⁝) icon in the top right-hand part of the window, and select Settings in the drop-down
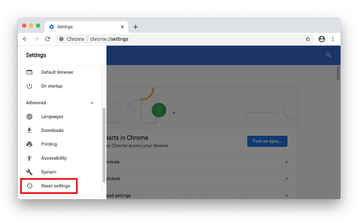
- When on the Settings pane, select Advanced
- Scroll down to the Reset settings section.
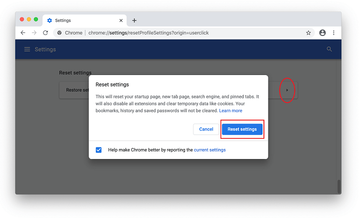
- Confirm the Chrome reset on a dialog that will pop up. When the procedure is completed, relaunch the browser and check it for malware activity.
- Open Chrome, click the Customize and control Google Chrome (⁝) icon in the top right-hand part of the window, and select Settings in the drop-down
- Fix wdavdaemon problem on Mozilla Firefox
- Open Firefox and go to Help – Troubleshooting Information (or type about:support in the URL bar and press Enter).
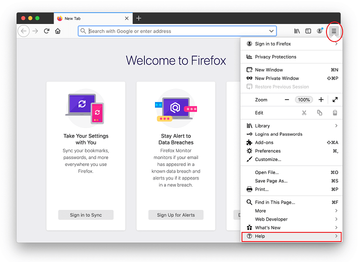
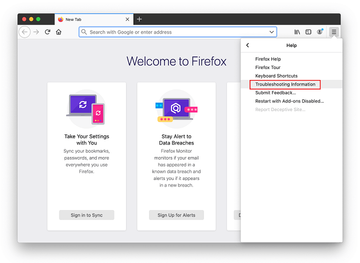
- When on the Troubleshooting Information screen, click on the Refresh Firefox button.
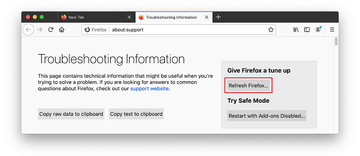
- Confirm the intended changes and restart Firefox.
- Open Firefox and go to Help – Troubleshooting Information (or type about:support in the URL bar and press Enter).
Fix wdavdaemon Mac issues using Combo Cleaner removal tool
The Mac maintenance and security app called Combo Cleaner is a one-stop tool to detect and remove wdavdaemon virus. This technique has substantial benefits over manual cleanup, because the utility gets hourly virus definition updates and can accurately spot even the newest Mac infections.
Furthermore, the automatic solution will find the core files of the malware deep down the system structure, which might otherwise be a challenge to locate. Here’s a walkthrough to sort out the wdavdaemon issue using Combo Cleaner:
Download Combo Cleaner installer. When done, double-click the combocleaner.dmg file and follow the prompts to install the tool onto your Mac.
By downloading any applications recommended on this website you agree to our Terms and Conditions and Privacy Policy. The free scanner checks whether your Mac is infected. To get rid of malware, you need to purchase the Premium version of Combo Cleaner.
Open the app from your Launchpad and let it run an update of the malware signature database to make sure it can identify the latest threats.
Click the Start Combo Scan button to check your Mac for malicious activity as well as performance issues.
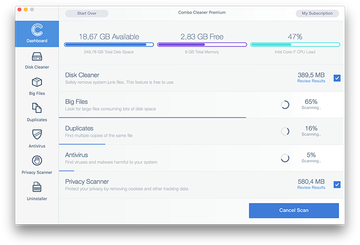
Examine the scan results. If the report says “No Threats”, then you are on the right track with the manual cleaning and can safely proceed to tidy up the web browser that may continue to act up due to the after-effects of the malware attack (see instructions above).
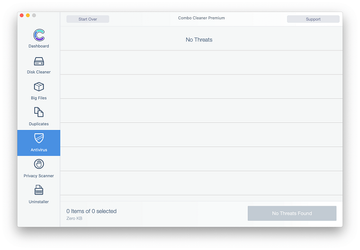
In case Combo Cleaner has detected malicious code, click the Remove Selected Items button and have the utility remove wdavdaemon threat along with any other viruses, PUPs (potentially unwanted programs), or junk files that don’t belong on your Mac.
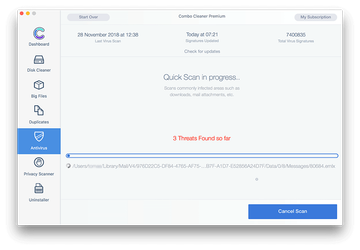
Once you have made doubly sure that the malicious app is uninstalled, the browser-level troubleshooting might still be on your to-do list. If your preferred browser is affected, resort to the previous section of this tutorial to revert to hassle-free web surfing.
