The Spotlight feature, albeit immensely useful, may cause a Mac to slow down and overheat if its critical process mds_stores consumes too much CPU and memory.
What is mds_stores Mac process?
The scourge of resource overuse has been top of mind for lots of Mac users and Apple’s software engineers for years. We’ve seen outbreaks of dissatisfaction over sudden spikes in CPU and memory usage by processes which, in an ideal world, should be the epitomes of stability and smoothness. This has been the case with a graphics management service WindowServer, an iCloud-related syncing routine called nsurlsessiond, a digital certificates verification daemon trustd, and a handful of other important entities geared toward keeping the operating system functionality and user experience at a proper level.
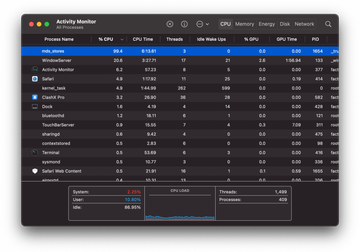
This time around, a surge in negative feedback has struck mds_stores, a process at the heart of Spotlight indexing. The first part of the acronym stands for “metadata server”. Normally, it should kick in with a noticeable CPU consumption rate only during significant changes in a system, such as an addition of massive new directories (local or cloud-based) or a full macOS reinstall. The mds_stores high CPU problem, however, often occurs when nothing particularly impactful is going on.
The mds_stores high CPU virus may re-infect your Mac multiple times unless you delete all of its fragments, including hidden ones. Therefore, it is recommended to download Combo Cleaner and scan your system for these stubborn files. This way, you may reduce the cleanup time from hours to minutes.
Download Now Learn how Combo Cleaner works. If the utility spots malicious code, you will need to buy a license to get rid of it.How can mds_stores go bonkers?
Whereas the intended mission of this system process presupposes a tangible use of a Mac’s processing capacities, this condition shouldn’t make itself felt continuously. The logic of Spotlight is to traverse the machine’s hard drive and network shares periodically in an attempt to pinpoint and catalog recent changes. This way, the search feature can return accurate and up-to-date results. The problem is, mds_stores might gobble up the CPU and memory permanently. What’s more, the usage reflected in the Activity Monitor can go well over the reasonable 100% threshold. It can happen when at least one processor core is working to its fullest to handle workflows spawned by mds_stores alone. Obviously, such a predicament makes the fan run at high speeds and affects the system’s performance overall, thereby generating unbearable noise and diminishing the user experience side of things
On a side note, this abnormal siphoning of computer resources often co-occurs with several more legitimate processes getting out of hand. Here is a brief summary of what they are and what tasks they are meant to perform:
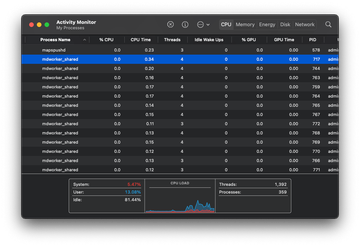
• mdworker_shared. This process is also a part of Spotlight. It does the actual file indexing on a Mac. You’ll see multiple instances of this routine with different PIDs (process IDs) in the Activity Monitor, which is normal as long as the CPU consumption stays moderate. Unfortunately, mdworker_shared may use up too much hardware power for long periods of time as well.
• triald. This thing is a daemon that facilitates Siri capabilities. As such, it can be related to machine learning, speech identification, and dictation. Despite its indisputable worth functionality-wise, triald may give some users a hard time because of its prolonged CPU hunger.
• installd. The name is fairly verbose. As is the case with the object above, the “d” at the end means it’s a daemon – a background process performing a specific system function. The rest of the name provides another clue: specifically, it handles actions associated with installing and updating App Store applications or macOS updates. And yes, installd CPU usage often skyrockets even when it’s not supposed to.
• IMDPersistenceAgent. The Messages and Facetime applications rely on this process to exchange messaging and video call data consistently and instantly reflect the corresponding details in the Notification Center. This process doesn’t always work smoothly either and may throw a spanner in the works of a Mac’s productivity.
If there is an overlap of atypical CPU usage by mds_stores and some of the above-mentioned processes, it means a systemic problem that probably won’t sort itself out unless the user takes action. This subject will be discussed further down.
Possible causes for mds_stores high CPU bug
The catalysts for this undesirable activity can vary. One of them is a series of peculiar events at the application level. For instance, if an app is modifying the contents of some folders nonstop, mds_stores will be detecting such tweaks and stay busy re-indexing these locations. Another likely reason is that the size of a directory that Spotlight needs to index is blown out of proportion. If it’s too big, performance issues could be imminent.
Connecting one or several external drives to your Mac is apparently going to trigger a massive round of data indexing, too. Also, in case the Spotlight database gets too large for a specific Mac’s CPU to handle, the system’s productivity takes a hit. An example of this is a huge size of Time Machine backups that are refreshed every hour and have to be re-indexed. Furthermore, some users have reported problems with mds_stores due to a specific browser add-on, such as the Pinterest extension in Mozilla Firefox. In many scenarios, the issue is a combination of several factors and requires quite a bit of trial and error to diagnose and repair.
Battle-tested ways to fix mds_stores CPU overuse
Whereas Spotlight, obviously, appears to be the entity that’s causing problems (given that its process mds_stores makes the CPU run high), double-checking won’t go amiss. To do it, you’ll need to temporarily disable this feature and see if the bug vanishes.
Click “Go” in the Apple menu bar, select “Utilities”, and double-click “Terminal”. Then, type the following command in the Terminal window: sudo mdutil -a -i off. Once you hit Enter, Spotlight will stop indexing your data. Look into the Activity Monitor and check whether or not mds_stores is still hoovering up the CPU.
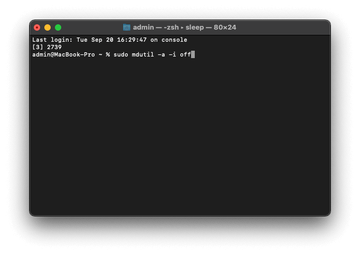
If the bug is no longer manifesting itself, you should run a command to turn Spotlight indexing back on. It’s a helpful feature definitely worth keeping enabled, really. In Terminal, type sudo mdutil -a -i on and press Enter to bring the functionality back on track. The flip side of doing so is that the mds_stores headache will start over and the fan will get noisy again. Don’t panic, though.
The next move is to limit the system areas that Spotlight must index. This will reduce the strain on your CPU and memory while keeping the feature abreast of the most important environments you want to be searchable. To manage the scope of the background file scanning, go to “System Preferences”, select “Spotlight”, click the “Privacy” tab, and use the “plus” sign to add folders or disks that should be excluded from mds_stores indexing. Pick the objects whose scanning is not critical for you.
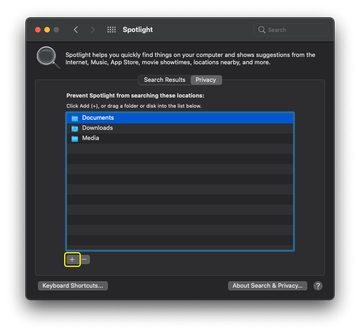
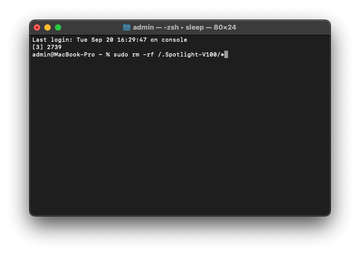
Interestingly, selecting a previously added location in that screen and clicking the “minus” sign will cause Spotlight to re-index it anew. This could be a good way to refresh the database and thereby correct some inconsistencies that are causing problems. Speaking of which, if the bug persists after you have excluded large directories from Spotlight scanning, you can try to run a full re-indexing of your entire drive by executing the following command in Terminal: sudo rm –rf /.Spotlight-V100/*. Be advised this will take hours to complete.
In the event that none of the above did the trick, there is one more vector of troubleshooting you can try. As previously mentioned, the mds_stores high CPU problem can be precipitated by an application changing the contents of certain folders all the time. This quirk is intrinsic to some samples of Mac malware, which means you may want to check your system for malicious code to err on the side of caution. Such a theory is especially plausible if the processor burden doesn’t decrease after disabling Spotlight indexing via a Terminal command described in one of the above paragraphs. The following steps will help you detect possible security threats and remove them from your Mac to stop the unwanted interference.
mds_stores high CPU virus manual removal from Mac
The steps listed below will walk you through the removal of this malicious application. Be sure to follow the instructions in the specified order.
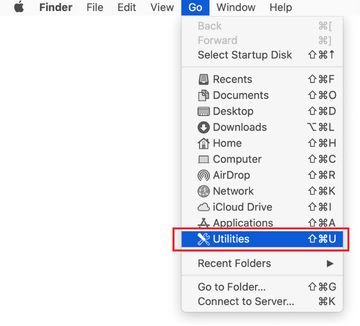
Expand the Go menu in your Mac’s Finder bar and select Utilities as shown below.
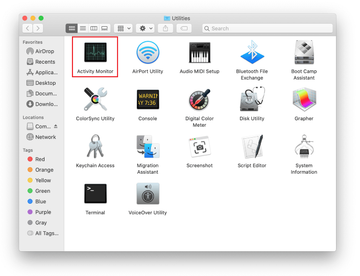
Locate the Activity Monitor icon on the Utilities screen and double-click on it.
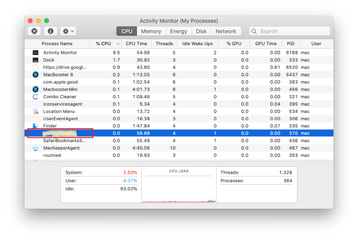
In the Activity Monitor app, look for mds_stores, mds, or another process that appears suspicious. To narrow down your search, focus on unfamiliar resource-intensive entries on the list. Keep in mind that its name isn’t necessarily related to the way the threat is manifesting itself, so you’ll need to trust your own judgement. If you pinpoint the culprit, select it and click on the Stop icon in the upper left-hand corner of the screen.
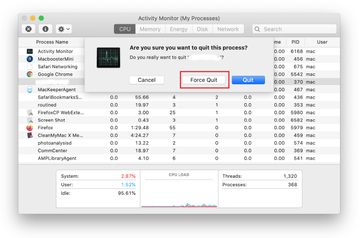
When a follow-up dialog pops up asking if you are sure you want to quit the troublemaking process, select the Force Quit option.
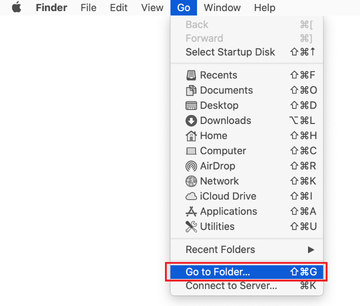
Click on the Go menu icon in the Finder again and select Go to Folder. You can as well use the Command-Shift-G keyboard shortcut.
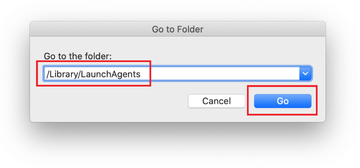
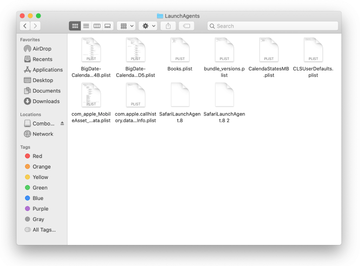
Type /Library/LaunchAgents in the folder search dialog and click on the Go button.
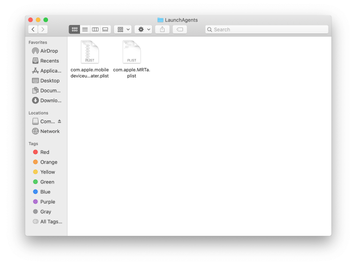
Examine the contents of the LaunchAgents folder for dubious-looking items. Be advised that the names of files spawned by malware may give no clear clues that they are malicious, so you should look for recently added entities that appear to deviate from the norm.
As an illustration, here are several examples of LaunchAgents related to mainstream Mac infections: com.updater.mcy.plist, com.avickUpd.plist, and com.msp.agent.plist. If you spot files that don’t belong on the list, go ahead and drag them to the Trash.
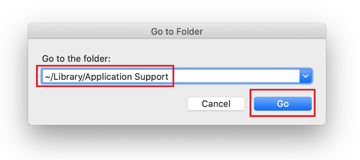
Use the Go to Folder lookup feature again to navigate to the folder named ~/Library/Application Support (note the tilde symbol prepended to the path).
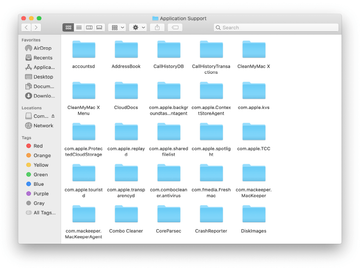
When the Application Support directory is opened, identify recently generated suspicious folders in it and send them to the Trash. A quick tip is to look for items whose names have nothing to do with Apple products or apps you knowingly installed. A few examples of known-malicious folder names are ProgressSite and IdeaShared.
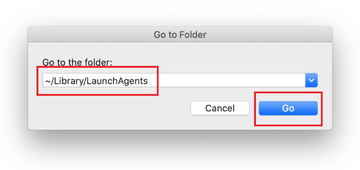
Enter ~/Library/LaunchAgents string (don’t forget to include the tilde character) in the Go to Folder search area.
The system will display LaunchAgents residing in the current user’s Home directory. Look for dodgy items related to rogue mds_stores process (see logic highlighted in subsections above) and drag the suspects to the Trash.
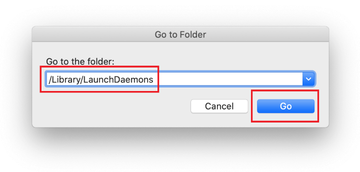
Type /Library/LaunchDaemons in the Go to Folder search field.
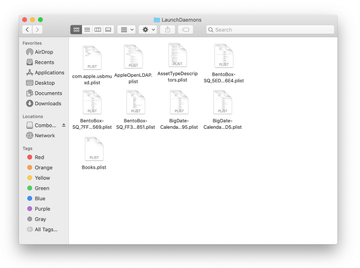
In the LaunchDaemons path, try to pinpoint the files the malware is using for persistence. Several examples of such items cropped by Mac infections are com.apple.sysmond.plist, com.startup.plist, and com.ExpertModuleSearchDaemon.plist. Delete the sketchy files immediately.
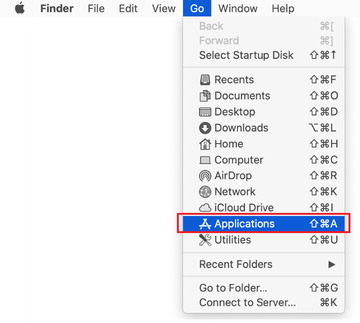
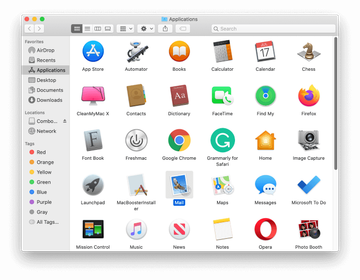
Click on the Go menu icon in your Mac’s Finder and select Applications on the list.
Find the entry for an app that clearly doesn’t belong there and move it to the Trash. If this action requires your admin password for confirmation, go ahead and enter it.
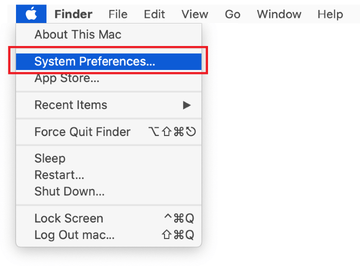
Expand the Apple menu and select System Preferences.
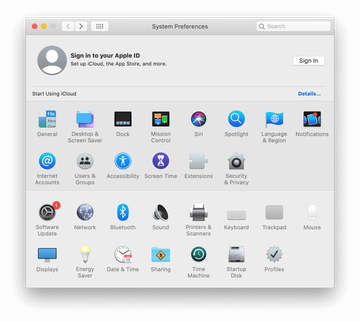
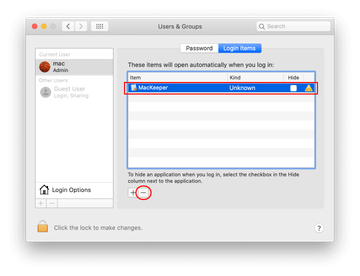
Proceed to Users & Groups and click on the Login Items tab.
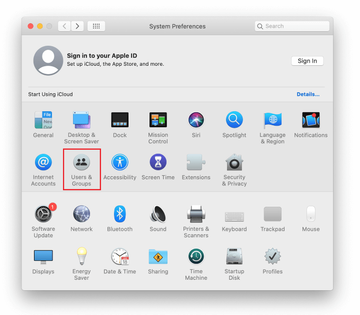
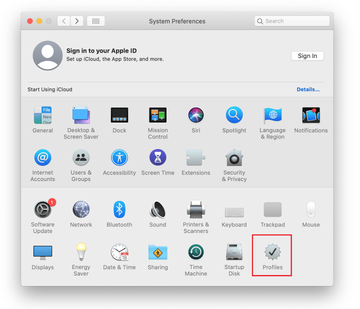
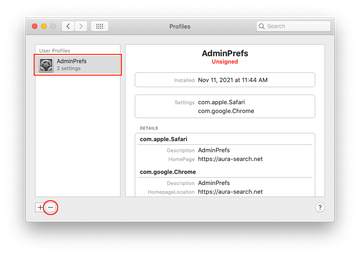
Now select Profiles under System Preferences. Look for a malicious item in the left-hand sidebar. Several examples of configuration profiles created by Mac adware include TechSignalSearch, MainSearchPlatform, AdminPrefs, and Safari Settings. Select the offending entity and click on the minus sign at the bottom to eliminate it.
Get rid of mds_stores related malware in web browser on Mac
To begin with, the web browser settings taken over by the mds_stores copycat malware should be restored to their default values. Although this will clear most of your customizations, web surfing history, and all temporary data stored by websites, the malicious interference should be terminated likewise. The overview of the steps for completing this procedure is as follows:
- Remove mds_stores virus from Safari
- Open the browser and go to Safari menu. Select Preferences in the drop-down list.
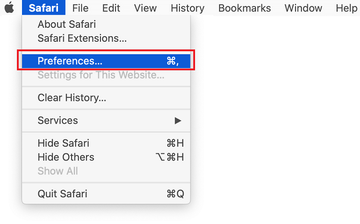
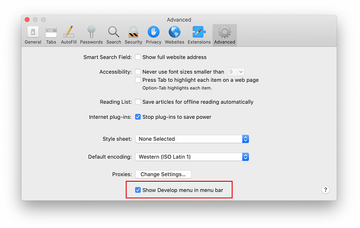
- Once the Preferences screen appears, click on the Advanced tab and enable the option saying “Show Develop menu in menu bar”.
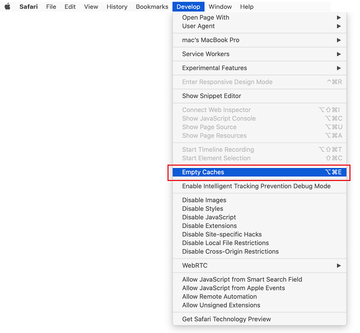
- Now that the Develop entry has been added to the Safari menu, expand it and click on Empty Caches.
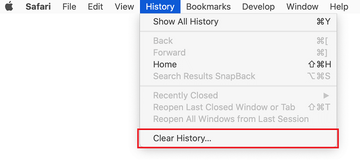
- Now select History in the Safari menu and click on Clear History in the drop-down list.
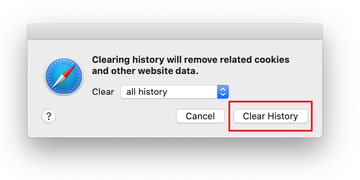
- Safari will display a dialog asking you to specify the period of time this action will apply to. Select all history to ensure a maximum effect. Click on the Clear History button to confirm and exit.
- Go back to the Safari Preferences and hit the Privacy tab at the top. Find the option that says Manage Website Data and click on it.

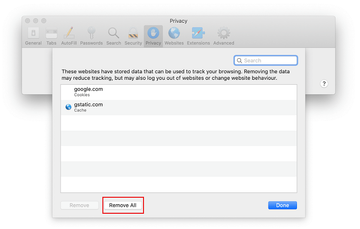
- The browser will display a follow-up screen listing the websites that have stored data about your Internet activities. This dialog additionally includes a brief description of what the removal does: you may be logged out of some services and encounter other changes of website behavior after the procedure. If you’re okay with that, go ahead and click on the Remove All button.
- Restart Safari
- Open the browser and go to Safari menu. Select Preferences in the drop-down list.
- Remove mds_stores virus in Google Chrome
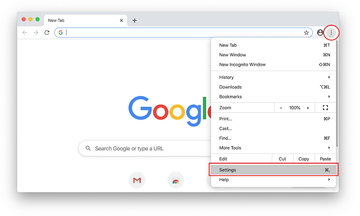
- Open Chrome, click the Customize and control Google Chrome (⁝) icon in the top right-hand part of the window, and select Settings in the drop-down
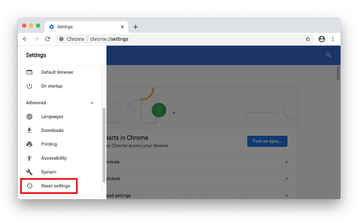
- When on the Settings pane, select Advanced
- Scroll down to the Reset settings section.
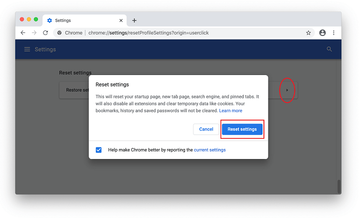
- Confirm the Chrome reset on a dialog that will pop up. When the procedure is completed, relaunch the browser and check it for malware activity.
- Open Chrome, click the Customize and control Google Chrome (⁝) icon in the top right-hand part of the window, and select Settings in the drop-down
- Fix mds_stores problem in Mozilla Firefox
- Open Firefox and go to Help – Troubleshooting Information (or type about:support in the URL bar and press Enter).
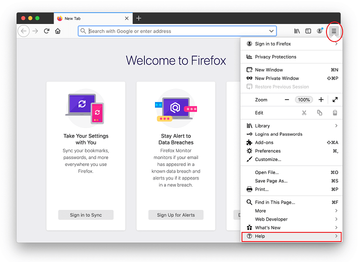
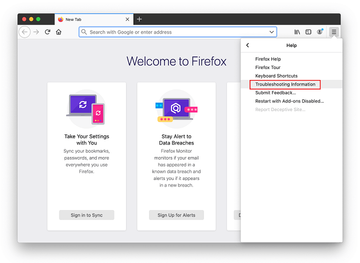
- When on the Troubleshooting Information screen, click on the Refresh Firefox button.
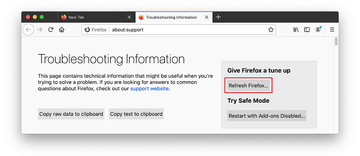
- Confirm the intended changes and restart Firefox.
- Open Firefox and go to Help – Troubleshooting Information (or type about:support in the URL bar and press Enter).
Fix mds_stores Mac issues using Combo Cleaner removal tool
The Mac maintenance and security app called Combo Cleaner is a one-stop tool to detect and remove mds_stores high CPU virus. This technique has substantial benefits over manual cleanup, because the utility gets hourly virus definition updates and can accurately spot even the newest Mac infections.
Furthermore, the automatic solution will find the core files of the malware deep down the system structure, which might otherwise be a challenge to locate. Here’s a walkthrough to sort out the mds_stores high CPU issue using Combo Cleaner:
Download Combo Cleaner installer. When done, double-click the combocleaner.dmg file and follow the prompts to install the tool onto your Mac.
By downloading any applications recommended on this website you agree to our Terms and Conditions and Privacy Policy. The free scanner checks whether your Mac is infected. To get rid of malware, you need to purchase the Premium version of Combo Cleaner.
Open the app from your Launchpad and let it run an update of the malware signature database to make sure it can identify the latest threats.
Click the Start Combo Scan button to check your Mac for malicious activity as well as performance issues.
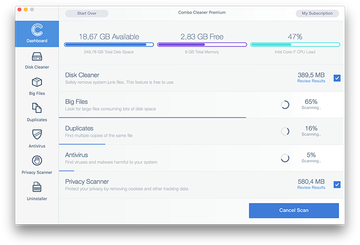
Examine the scan results. If the report says “No Threats”, then you are on the right track with the manual cleaning and can safely proceed to tidy up the web browser that may continue to act up due to the after-effects of the malware attack (see instructions above).
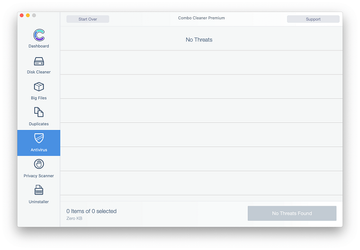
In case Combo Cleaner has detected malicious code, click the Remove Selected Items button and have the utility remove mds_stores high CPU threat along with any other viruses, PUPs (potentially unwanted programs), or junk files that don’t belong on your Mac.
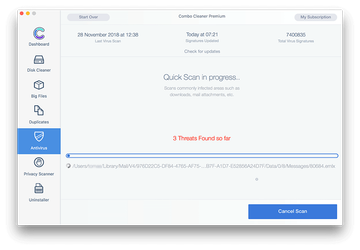
Once you have made doubly sure that the malicious app is uninstalled, the browser-level troubleshooting might still be on your to-do list. If your preferred browser is affected, resort to the previous section of this tutorial to revert to hassle-free web surfing.
