- What is “Your connection is not private” alert?
- Fix “Your connection is not private” error in Chrome on Mac
- Get around “This Connection Is Not Private” alert in Safari
- “Your connection is not private” error virus manual removal for Mac
- Get rid of “Your connection is not private” error malware using Combo Cleaner removal tool
- FAQ
This article shines the light on the reasons for “Your connection is not private” warning in Chrome and Safari and the methods to get around it on Mac.
What is “Your connection is not private” alert?
Not only do modern browsers provide a frictionless web surfing experience with a minimum of lags and a maximum of convenience, but they also keep users away from unsafe sites. Behind the facade of intuitive UIs and awesome features, there is a big layer of security. One of the ways this protection works is that there is no easy entry to pages that raise red flags from the perspective of defensive algorithms built into Google Chrome and Safari on Mac. When trying to visit one of these places on the Internet, people get an error saying, “Your connection is not private”. This encounter has become a fairly common attribute of online activities over the past few years, with pretty much every user having bumped into this message multiple times. What causes this warning? Is it a sign of real danger in all cases? How to bypass it if the user acknowledges the risk and knows that the intended resource is safe for sure? Let’s get to the bottom of this subject.
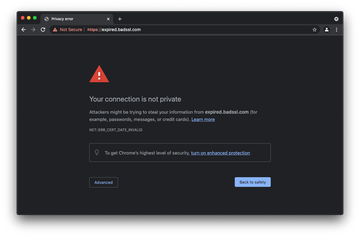
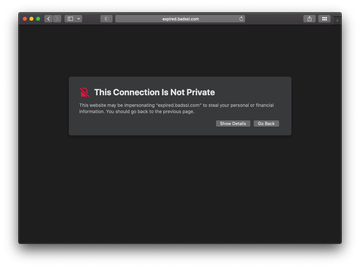
First things first, the alert that says, “Your connection is not private” in Chrome and “This Connection Is Not Private” in Safari (yes, there is a difference in the wording) is hardly ever a false positive. It won’t appear unless the security checks incorporated in the browser identify a potentially dubious discrepancy – most likely a connection protocol issue. For instance, if the page is using regular HTTP rather than an encrypted HTTPS mode of interacting with its visitors, it means that all data exchanged between the endpoint and the server can be easily mishandled if a third party intercepts it. Think of it as a shortcut to stealing your passwords, credit card details, messages, or any other information entered in a web form on the website. Obviously, anyone is better off avoiding such pages whose owners don’t take their audience’s privacy seriously.
“Your connection is not private” error virus may re-infect your Mac multiple times unless you delete all of its fragments, including hidden ones. Therefore, it is recommended to download Combo Cleaner and scan your system for these stubborn files. This way, you may reduce the cleanup time from hours to minutes.
Download Now Learn how Combo Cleaner works. If the utility spots malicious code, you will need to buy a license to get rid of it.Another common situation boils down to a digital certificate problem. Even if a site has the HTTPS string before its domain name, it may be using an untrusted or an out-of-date certificate. This adverse condition could be a launchpad for tampering with visitors’ sensitive data. Also, if antivirus software equipped with online protection features is running on the Mac, it may interfere with proper privacy monitoring workflows in Chrome and Safari. In this scenario, since the browser cannot properly verify that everything is smooth security-wise, it alerts the user to possible risk by showing “Your connection is not private” page. Essentially, this is a classic example of overlapping defenses that entail a conflict between different applications, thus diminishing the expected effect.
One more possible root cause for these warnings is insanely trivial. It’s about a mismatch between the Mac’s system clock information and the date and time set on the website’s end. It may appear strange how come the device time may be incorrect, given that it’s supposed to be fetched automatically. Well, it can happen if the computer hasn’t been used for a long time or if the user prefers manual configuration of the date, time, and time zone. Anyway, the browser will interpret such a gap as potential risk.
Also, older versions of Chrome and Safari may use obsolete certificate databases and wrongfully report privacy issues regarding websites that used to have issues but are currently safe to visit. Therefore, checking for and applying browser updates is well worth the effort, as it may address the drag. Similar logic goes for macOS updates – if available, these should be installed via System Preferences without a second thought. By the way, that’s how users get new versions of Safari, so this is undoubtedly an important element of troubleshooting.
There is one more thing to keep in mind. Macs are increasingly haunted by adware apps that set annoying browser redirects in motion. The landing pages in many of these schemes are search engine copycats that impersonate legitimate services. In this situation, the browser will detect a deviation and block the fraudulent connection. Some strains of Mac malware force hits to sites that host drive-by downloads. Furthermore, the authors of these malicious resources often neglect to install valid digital certificates, in which case the Internet sessions will be accompanied by alerts in question. That said, it’s definitely a good idea to check the Mac for unwanted code – the steps will be provided further down. But first, let’s go over the techniques to circumvent this error if you are certain that the target site is absolutely harmless.
Fix “Your connection is not private” error in Chrome on Mac
Figuring out what causes these alerts in Google Chrome is a matter of trial and error to an extent. Beneath the main warning phrase, though, there is an error code that could give you some clues. The most common inscriptions you may see are as follows:
- NET::ERR_CERT_AUTHORITY_INVALID
- ERR_CERT_COMMON_NAME_INVALID
- NET::ERR_CERT_WEAK_SIGNATURE_ALGORITHM
- ERR_CERTIFICATE_TRANSPARENCY_REQUIRED
- NET::ERR_CERT_DATE_INVALID
- SSL certificate error
These codes mainly denote certificate issues or a system clock inaccuracy. One way or another, here is a summary of the methods to bypass the error page or stop it from appearing henceforth as long as you trust the site:
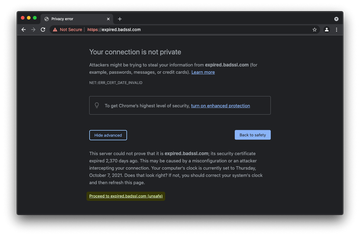
- Use advanced options on the alert page
- Click the Advanced button at the bottom left of the “Your connection is not private” error page.
- Select the option that says Proceed to [website URL] (unsafe). Chrome will now open the site despite the risk.
- Adjust the system clock
- Head to System Preferences and select Date & Time.
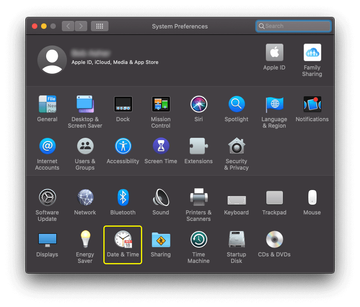
- Click the padlock icon to be able to change settings. Check if the system clock details are accurate. If they aren’t, specify the correct values.
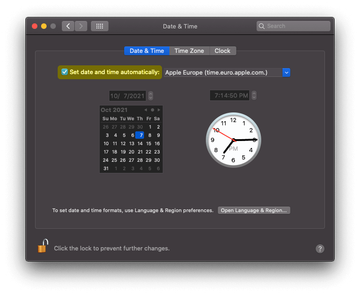
- Also, make sure the Set date and time automatically option is enabled.
- Head to System Preferences and select Date & Time.
- Use Incognito mode
- While Chrome is opened, click File in the menu bar and select New Incognito Window as illustrated below.
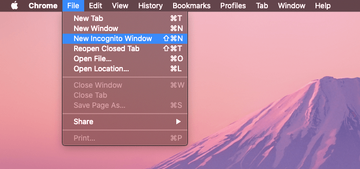
- Try to visit the site in Incognito mode. If it loads, then one of your Chrome extensions may be meddling with the browser’s security checks. Disable extensions one by one to identify the culprit.
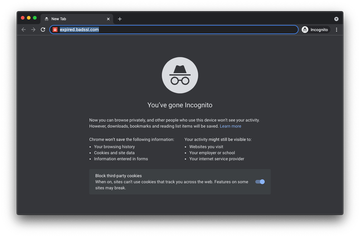
- If the intended page still won’t open, use the other steps listed in this guide to bypass the alert.
- While Chrome is opened, click File in the menu bar and select New Incognito Window as illustrated below.
- Check Chrome for updates
- Open the Customize and control Google Chrome menu, select Help, and click About Google Chrome.
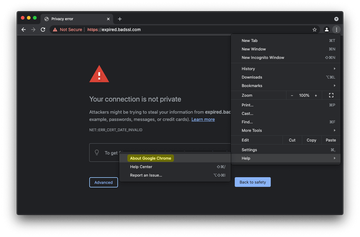
- If an update is available, apply it immediately. Note that you will need to restart the browser to complete the procedure.
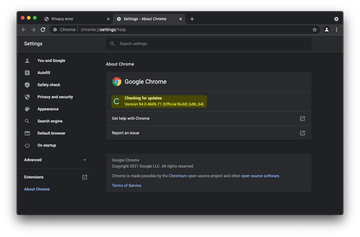
- Open the Customize and control Google Chrome menu, select Help, and click About Google Chrome.
Get around “This Connection Is Not Private” alert in Safari
In most cases, Safari won’t prevent you from accessing a website blocked due to privacy issues. This is largely a matter of your confidence in that web resource. If you know for a fact that it’s harmless, use the following steps to circumvent the error in Safari.
- Ignore the risk and proceed to the site anyway
- Click the Show Details button on the warning page. In the extra section that appears, click visit this website.
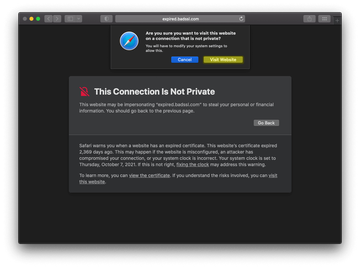
- If you are sure the site is safe to visit, click the Visit Website button on the confirmation dialog.
- Click the Show Details button on the warning page. In the extra section that appears, click visit this website.
- Give the Private Browsing mode a shot
- Click File in the Safari menu bar and select New Private Window.
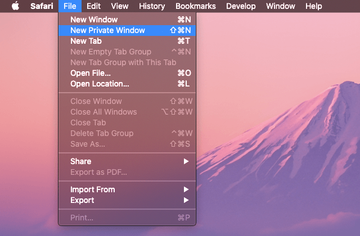
- A new Safari window will open that says “Private Browsing Enabled”.
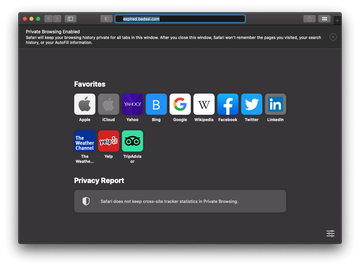
- Try to visit the website in Private Browsing mode. If this doesn’t work, follow the other steps in the walkthrough.
- Click File in the Safari menu bar and select New Private Window.
- Clear Safari caches and other website data
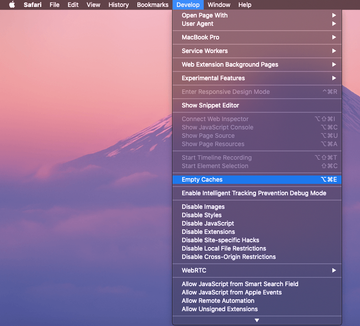
- Expand the menu named Develop and select Empty Caches as shown below. Note that this action won’t spawn any confirmation screens.
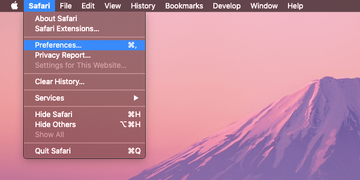
- Open the Safari menu and select Preferences.
- Click the Privacy tab and select Manage Website Data.
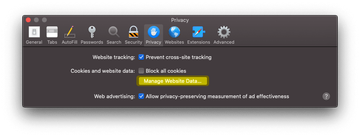
- Click the Remove All button and then Done.
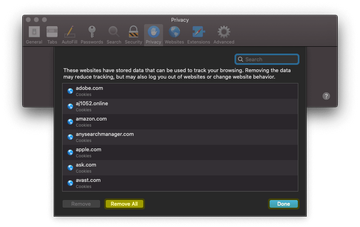
- Try to revisit the site.
- Expand the menu named Develop and select Empty Caches as shown below. Note that this action won’t spawn any confirmation screens.
- Check for macOS updates
- Go to System Preferences and select Software Update.
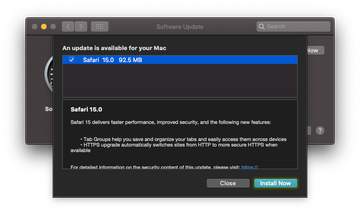
- If there is an update waiting to be applied, click the Install Now button. Chances are that it comes with Safari improvements that will address the nuisance error.
- Go to System Preferences and select Software Update.
- Check your system clock
- Follow the same procedure as in the Chrome section above: select Date & Time under System Preferences and make sure the information is correct. Don’t forget to enable the automatic setting.
“Your connection is not private” error virus manual removal for Mac
The steps listed below will walk you through the removal of the malicious application that causes suspicious browser behavior. Be sure to follow the instructions in the specified order.
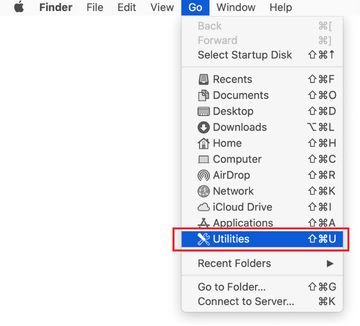
Expand the Go menu in your Mac’s Finder bar and select Utilities as shown below.
Locate the Activity Monitor icon on the Utilities screen and double-click on it.
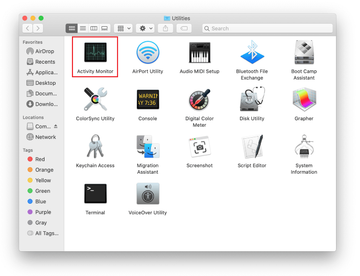
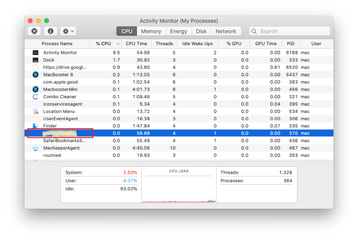
In the Activity Monitor app, look for a process that appears suspicious. To narrow down your search, focus on unfamiliar resource-intensive entries on the list. Keep in mind that its name isn’t necessarily related to the way the threat is manifesting itself, so you’ll need to trust your own judgement. If you pinpoint the culprit, select it and click on the Stop icon in the upper left-hand corner of the screen.
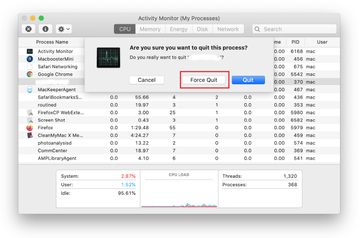
When a follow-up dialog pops up asking if you are sure you want to quit the troublemaking process, select the Force Quit option.
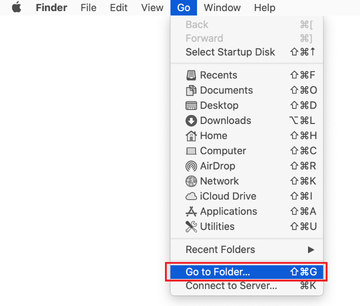
Click on the Go menu icon in the Finder again and select Go to Folder. You can as well use the Command-Shift-G keyboard shortcut.
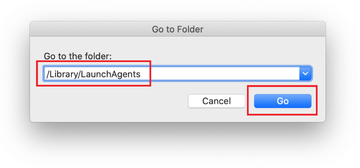
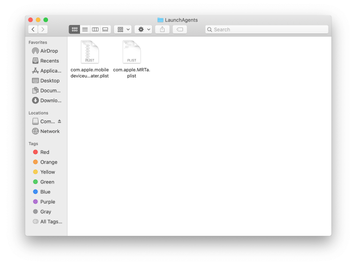
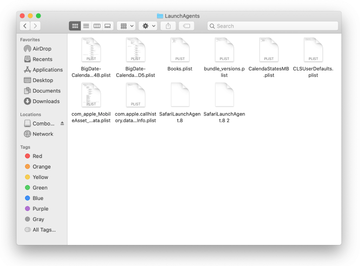
Type /Library/LaunchAgents in the folder search dialog and click on the Go button.
Examine the contents of the LaunchAgents folder for dubious-looking items. Be advised that the names of files spawned by malware may give no clear clues that they are malicious, so you should look for recently added entities that appear to deviate from the norm.
As an illustration, here are several examples of LaunchAgents related to mainstream Mac infections: com.pcv.hlpramc.plist, com.updater.mcy.plist, com.avickUpd.plist, and com.msp.agent.plist. If you spot files that don’t belong on the list, go ahead and drag them to the Trash.
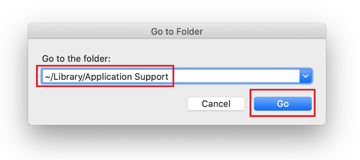
Use the Go to Folder lookup feature again to navigate to the folder named ~/Library/Application Support (note the tilde symbol prepended to the path).
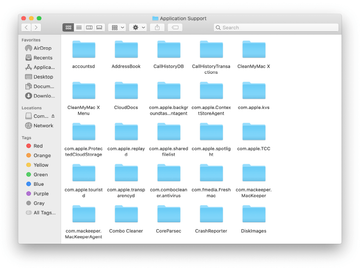
When the Application Support directory is opened, identify recently generated suspicious folders in it and send them to the Trash. A quick tip is to look for items whose names have nothing to do with Apple products or apps you knowingly installed. A few examples of known-malicious folder names are UtilityParze, ProgressSite, and IdeaShared.
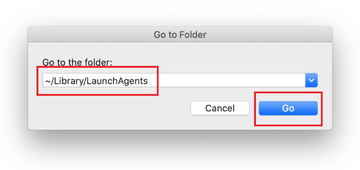
Enter ~/Library/LaunchAgents string (don’t forget to include the tilde character) in the Go to Folder search area.
The system will display LaunchAgents residing in the current user’s Home directory. Look for dodgy items related to the virus (see logic highlighted in subsections above) and drag the suspects to the Trash.
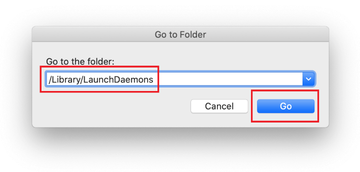
Type /Library/LaunchDaemons in the Go to Folder search field.
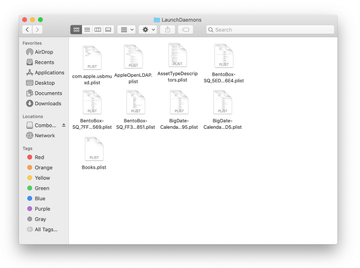
In the LaunchDaemons path, try to pinpoint the files the malware is using for persistence. Several examples of such items cropped by Mac infections are com.pplauncher.plist, com.startup.plist, and com.ExpertModuleSearchDaemon.plist. Delete the sketchy files immediately.
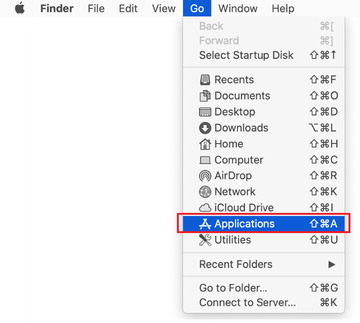
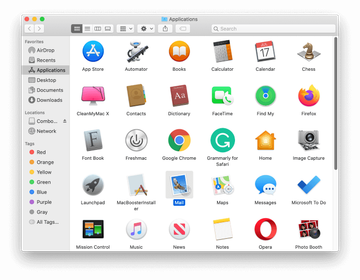
Click on the Go menu icon in your Mac’s Finder and select Applications on the list.
Find the entry for an app that clearly doesn’t belong there and move it to the Trash. If this action requires your admin password for confirmation, go ahead and enter it.
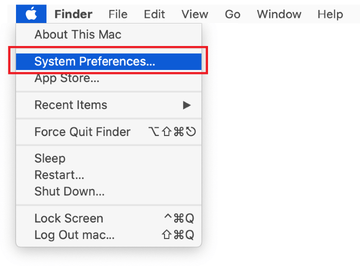
Expand the Apple menu and select System Preferences.
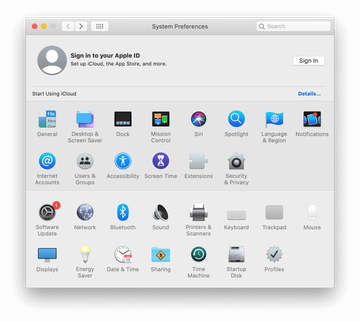
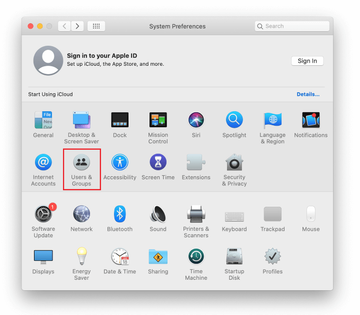
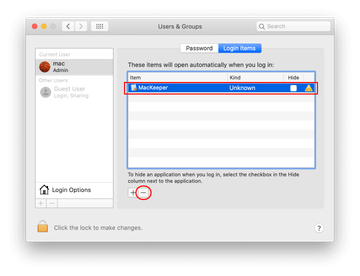
Proceed to Users & Groups and click on the Login Items tab.
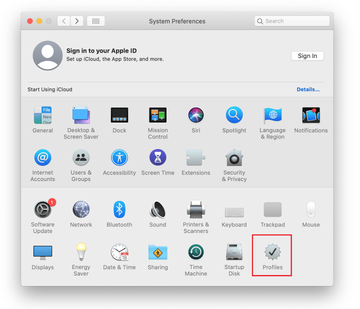
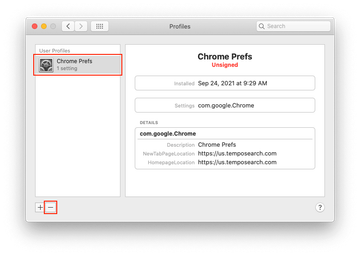
Now select Profiles under System Preferences. Look for a malicious item in the left-hand sidebar. Several examples of configuration profiles created by Mac adware include TechSignalSearch, MainSearchPlatform, AdminPrefs, and Safari Settings. Select the offending entity and click on the minus sign at the bottom to eliminate it.
Get rid of “Your connection is not private” error malware using Combo Cleaner removal tool
The Mac maintenance and security app called Combo Cleaner is a one-stop tool to detect and remove “Your connection is not private” error virus. This technique has substantial benefits over manual cleanup, because the utility gets hourly virus definition updates and can accurately spot even the newest Mac infections.
Furthermore, the automatic solution will find the core files of the malware deep down the system structure, which might otherwise be a challenge to locate. Here’s a walkthrough to sort out the “Your connection is not private” error issue using Combo Cleaner:
Download Combo Cleaner installer. When done, double-click the combocleaner.dmg file and follow the prompts to install the tool onto your Mac.
By downloading any applications recommended on this website you agree to our Terms and Conditions and Privacy Policy. The free scanner checks whether your Mac is infected. To get rid of malware, you need to purchase the Premium version of Combo Cleaner.
Open the app from your Launchpad and let it run an update of the malware signature database to make sure it can identify the latest threats.
Click the Start Combo Scan button to check your Mac for malicious activity as well as performance issues.
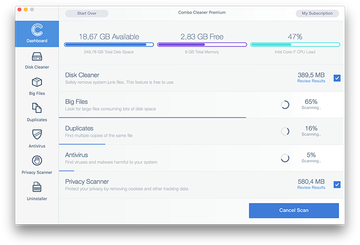
Examine the scan results. If the report says “No Threats”, then you are on the right track with the manual cleaning and can safely proceed to tidy up the web browser that may continue to act up due to the after-effects of the malware attack (see instructions above).
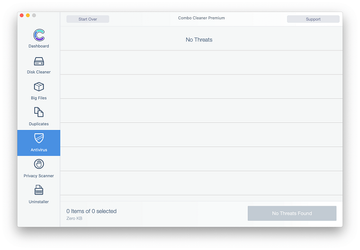
In case Combo Cleaner has detected malicious code, click the Remove Selected Items button and have the utility remove “Your connection is not private” error threat along with any other viruses, PUPs (potentially unwanted programs), or junk files that don’t belong on your Mac.
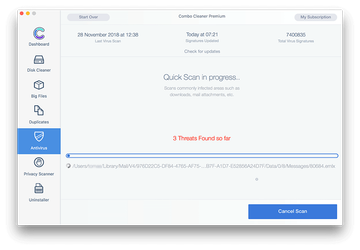
Once you have made doubly sure that the malicious app is uninstalled, the browser-level troubleshooting might still be on your to-do list. If your preferred browser is affected, resort to the previous section of this tutorial to revert to hassle-free web surfing.
FAQ
Why does Chrome keep saying your connection is not private?
This situation occurs when Chrome cannot verify that the site you are going to visit follows safe data protection practices. The most likely reason is that the SSL certificate is missing, expired, or misconfigured, which may result in a failure to encrypt the information generated as you are interacting with that resource. Whereas any HTTP page will raise a red flag, HTTPS doesn’t necessarily change this if implemented incorrectly.
In some cases, though, the problem is on the Mac’s end. An example of this scenario is when your system clock and the time and date settings of the web server are out of sync. Outdated macOS versions may add a spanner in the works, too. Also, if you haven’t updated Google Chrome for a while, the browser’s built-in privacy checks could act finicky and respond inadequately to secure websites.
How do I make my Mac connection private?
One of the best practice tips is to avoid using public Wi-Fi for sensitive communications. These connections tend to be crudely secured and easily exploited by malicious actors nearby or those who gain unauthorized access to the wireless hotspot. Even when surfing the web from home, you still run the risk of data exposure if your personal network doesn’t use authentication at all or if the password is weak. The use of virtual private network (VPN) services can take your privacy a step further. Another thing you should do is keep macOS and web browsers up to date.
Sometimes, though, the privacy of your connection is not up to you. If you are about to visit a website that has no digital certificate or uses an obsolete one, then any information you enter is exchanged with the resource in an unencrypted form and hence might be intercepted. Thankfully, all modern web browsers will alert you to the risk, and for good reason. Staying away from such places is an important prerequisite for maintaining privacy online.
How do I turn off “This Connection Is Not Private” on Safari?
There is no switch you can pull to disable these error messages on Safari altogether. Instead, you can try to get around them for specific sites as long as you are positive that there is no real risk. For instance, you can clear the browser’s caches, cookies, and other website data. If this doesn’t help, check if your system’s date and time settings are correct.
Loading the site in Private Browsing mode is worth a short, too. This technology prevents the details of your Internet activities from being saved. It is also strongly recommended to check for macOS updates. They often include Safari fine-tunings that may reduce false positives as you browse. If none of these does the trick, you can skip the warning at your own risk. Click the “Show Details” button and then use the “visit this website” option at the bottom to open the site.
