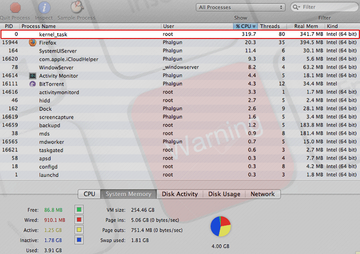
Learn what function the kernel_task Mac process performs, what may cause it to act up, and what to do if this entity is using up way too much CPU.
Update:
Macs are neither flawless in terms of performance nor are they immaculate in regards to security. But, they are still architected remarkably to tackle both of the above pitfalls with a fair degree of efficiency, which is incidentally one of the main reasons why becoming an Apple customer is on so many people’s wish list. While boasting a software design that isn’t likely to make users frown on its stability, Mac computers – both desktop and laptops – are susceptible to problems that seem marginal at first sight but actually create ripples among people who are at their wit’s end seeking to find a fix. This is the case with the kernel_task process that may malfunction in a really peculiar way. Specifically, it might cause a Mac’s CPU to skyrocket, thereby ostensibly making the computer slow and unresponsive. In some cases, the bug leads to kernel panics that make the system crash recurrently.
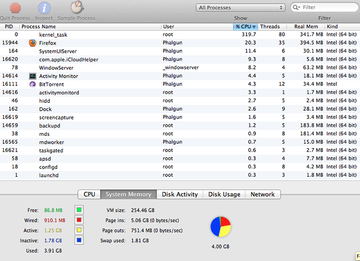
Let’s dot some i’s and cross a few t’s before we proceed. Kernel_task isn’t a malicious entity or anything – it’s a service built into macOS. Moreover, it performs an important job of managing the heat of the central processing unit. In particular, it is launched when the system receives signals about certain programs and processes consuming the CPU power in anomalous amounts. When running, kernel_task tries to restrict memory allocation to these “hungry” apps. Once the temperature gets back to normal, this process is supposed to get idle and stay that way until the same disconcerting conditions reappear. However, the gray facet of this workflow is that the benign service in question may start using close to all CPU resources, or even worse, the percentage reflected in Activity Monitor can exceed 100%, no matter how weird this may appear.
Malware triggering kernel_task response may re-infect your Mac multiple times unless you delete all of its fragments, including hidden ones. Therefore, it is recommended to download Combo Cleaner and scan your system for these stubborn files. This way, you may reduce the cleanup time from hours to minutes.
Download Now Learn how Combo Cleaner works. If the utility spots malicious code, you will need to buy a license to get rid of it.Such an intense consumption of a machine’s memory capacity, obviously, has a significant system footprint. The Mac slows down to a crawl, and the fan will keep spinning at its maximum for hours, which is likely to have an adverse effect upon the machine’s health altogether. Now, when behavior like this is being exhibited by an arbitrary application, the easiest fix is to go to Activity Monitor and quit the troublemaking process. In the case of kernel_task, though, this is a no-go because it’s a native macOS or Mac OS X routine that cannot be stopped in this manner. Most of the time, a computer restart addresses the problem, but the result typically doesn’t last and the problem resurfaces shortly.
Speaking of the reasons for excessive CPU usage by the object under scrutiny, there can be a few. One is related to out-of-date Adobe Flash Player. If so, the solution is to either update the suite or disable it completely – in the latter case, there may be hurdles with viewing certain online content. Another cause for these issues boils down to the activity of corrupt kernel extensions, also referred to as “kexts”. Whereas these are normally harmless system-critical items mostly added by Apple, some of them may be third-party extensions routinely installed as hardware drivers or something similarly auxiliary. If misconfigured, these objects may take up lots of CPU and thus trigger a response in the form of kernel_task trying to sort things out.
Finally, a factor underestimated by many users has to do malware. If a cryptominer ends up on a Mac computer and if it doesn’t utilize any throttling practices, it will start exploiting all of the processing unit’s available resources. This intrusion, in its turn, makes the operating system act accordingly. In fact, there can be more types of harmful code that make kernel_task react in its very own way, including scareware, adware, and aggressive browser add-ons. One way or another, it makes sense to ascertain that there is no virus component in this scenario. Follow the tips below to find and fix all the possible reasons for misbehavior of the process that makes a Mac run hotter than it should.
Manual removal of malware causing kernel_task high CPU usage
The steps listed below will walk you through the removal of this malicious application. Be sure to follow the instructions in the specified order.
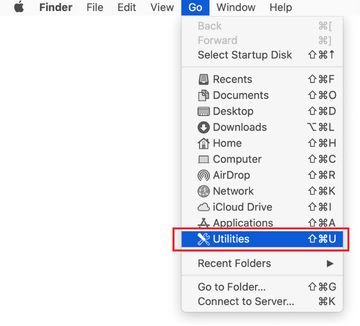
Expand the Go menu in your Mac’s Finder bar and select Utilities as shown below.
Locate the Activity Monitor icon on the Utilities screen and double-click on it.
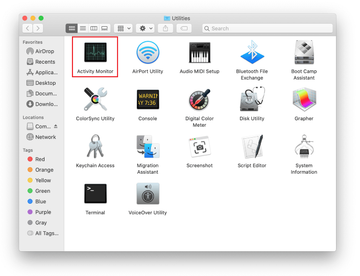
In the Activity Monitor app, look for Mac Cleanup Pro, MacKeeper, or another process that appears suspicious. To narrow down your search, focus on unfamiliar resource-intensive entries on the list. Keep in mind that its name isn’t necessarily related to the way the threat is manifesting itself, so you’ll need to trust your own judgement. If you pinpoint the culprit, select it and click on the Stop icon in the upper left-hand corner of the screen.
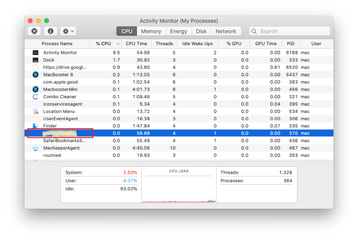
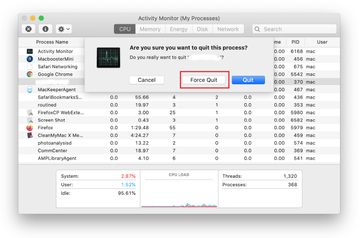
When a follow-up dialog pops up asking if you are sure you want to quit the troublemaking process, select the Force Quit option.
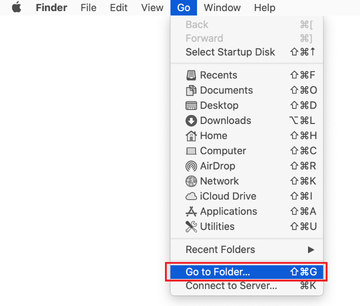
Click on the Go menu icon in the Finder again and select Go to Folder. You can as well use the Command-Shift-G keyboard shortcut.
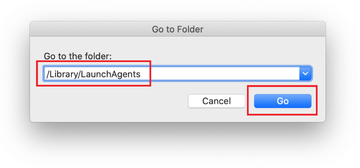
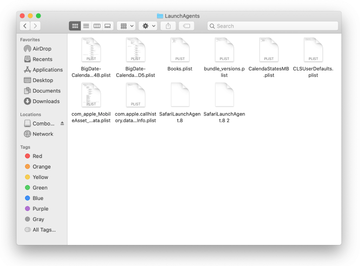
Type /Library/LaunchAgents in the folder search dialog and click on the Go button.
Examine the contents of the LaunchAgents folder for dubious-looking items. Be advised that the names of files spawned by malware may give no clear clues that they are malicious, so you should look for recently added entities that appear to deviate from the norm.
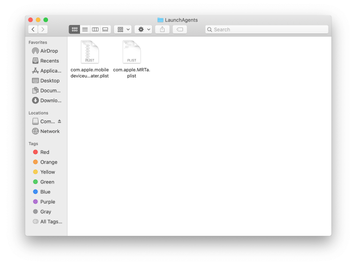
As an illustration, here are several examples of LaunchAgents related to mainstream Mac infections: com.pcv.hlpramc.plist, com.updater.mcy.plist, com.avickUpd.plist, and com.msp.agent.plist. If you spot files that don’t belong on the list, go ahead and drag them to the Trash.
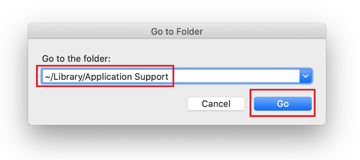
Use the Go to Folder lookup feature again to navigate to the folder named ~/Library/Application Support (note the tilde symbol prepended to the path).
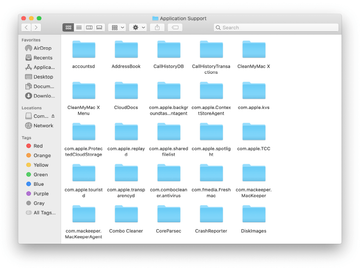
When the Application Support directory is opened, identify recently generated suspicious folders in it and send them to the Trash. A quick tip is to look for items whose names have nothing to do with Apple products or apps you knowingly installed. A few examples of known-malicious folder names are UtilityParze, LinkBranch, SystemSpecial, and IdeaShared.
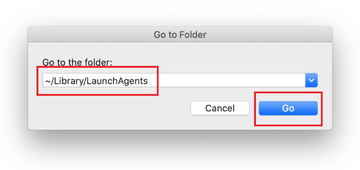
Enter ~/Library/LaunchAgents string (don’t forget to include the tilde character) in the Go to Folder search area.
The system will display LaunchAgents residing in the current user’s Home directory. Look for dodgy items related to the virus (see logic highlighted in subsections above) and drag the suspects to the Trash.
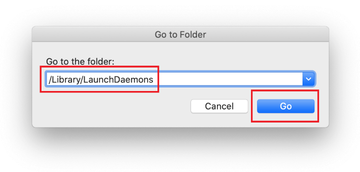
Type /Library/LaunchDaemons in the Go to Folder search field.
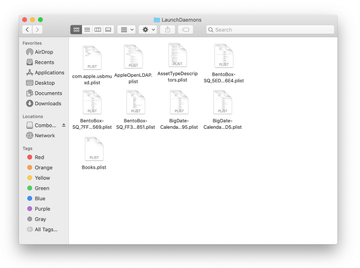
In the LaunchDaemons path, try to pinpoint the files the malware is using for persistence. Several examples of such items cropped by Mac infections are com.pplauncher.plist, com.startup.plist, and com.ExpertModuleSearchDaemon.plist. Delete the sketchy files immediately.
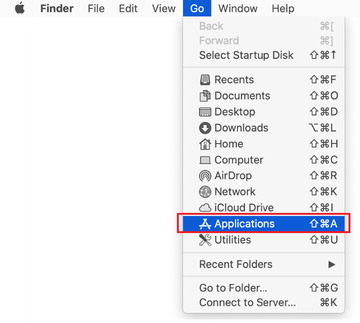
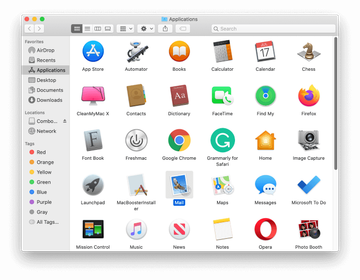
Click on the Go menu icon in your Mac’s Finder and select Applications on the list.
Find the entry for Mac Cleanup Pro, MacKeeper, or another app that clearly doesn’t belong there and move it to the Trash. If this action requires your admin password for confirmation, go ahead and enter it.
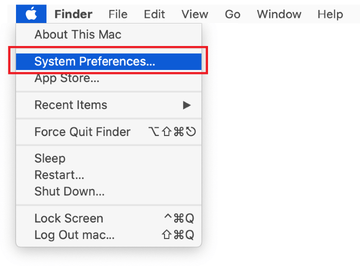
Expand the Apple menu and select System Preferences.
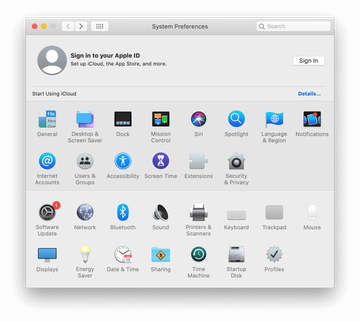
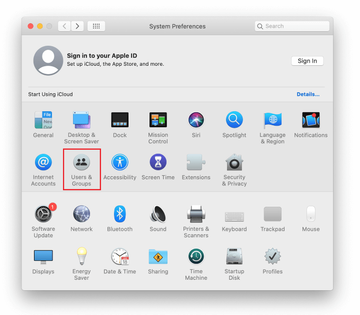
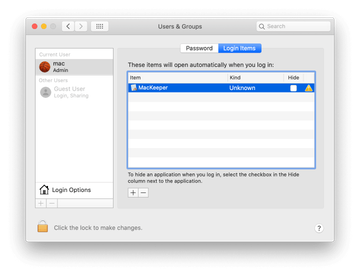
Proceed to Users & Groups and click on the Login Items tab.
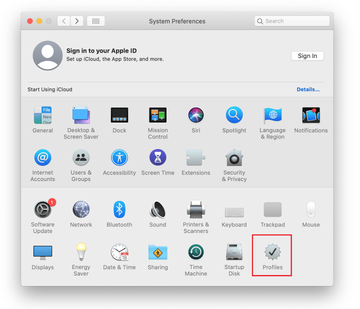
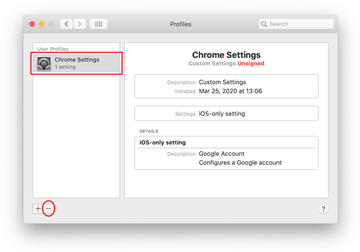
Now select Profiles under System Preferences. Look for a malicious item in the left-hand sidebar. Several examples of configuration profiles created by Mac adware include TechSignalSearch, MainSearchPlatform, AdminPrefs, and Chrome Settings. Select the offending entity and click on the minus sign at the bottom to eliminate it.
Get rid of malicious add-ons in web browser on Mac
To begin with, the web browser settings taken over by the virus exploiting kernel_task should be restored to their default values. Although this will clear most of your customizations, web surfing history, and all temporary data stored by websites, the malicious interference should be terminated likewise. The overview of the steps for completing this procedure is as follows:
- Remove the malware in Safari
- Open the browser and go to Safari menu. Select Preferences in the drop-down list
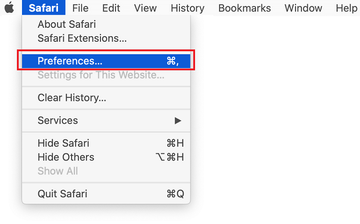
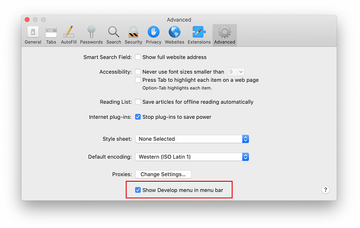
- Once the Preferences screen appears, click on the Advanced tab and enable the option saying “Show Develop menu in menu bar”.
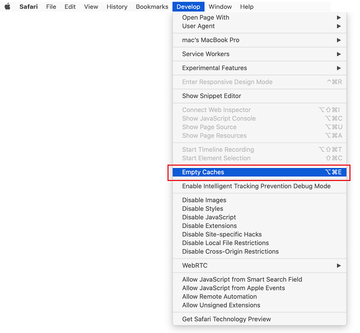
- Now that the Develop entry has been added to the Safari menu, expand it and click on Empty Caches.
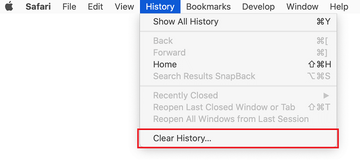
- Now select History in the Safari menu and click on Clear History in the drop-down list.
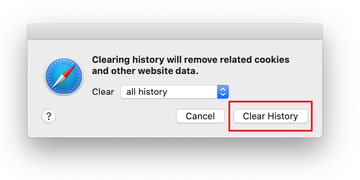
- Safari will display a dialog asking you to specify the period of time this action will apply to. Select all history to ensure a maximum effect. Click on the Clear History button to confirm and exit.
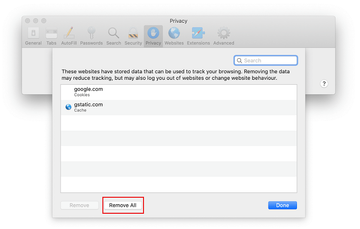
- Go back to the Safari Preferences and hit the Privacy tab at the top. Find the option that says Manage Website Data and click on it.

- The browser will display a follow-up screen listing the websites that have stored data about your Internet activities. This dialog additionally includes a brief description of what the removal does: you may be logged out of some services and encounter other changes of website behavior after the procedure. If you’re okay with that, go ahead and click on the Remove All button.
- Restart Safari
- Open the browser and go to Safari menu. Select Preferences in the drop-down list
- Get rid of the virus in Google Chrome
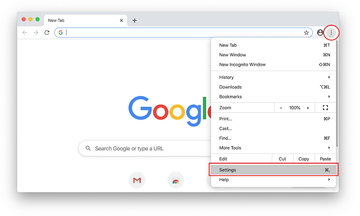
- Open Chrome, click the Customize and control Google Chrome (⁝) icon in the top right-hand part of the window, and select Settings in the drop-down
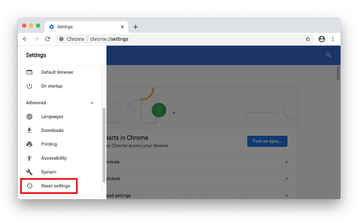
- When on the Settings pane, select Advanced
- Scroll down to the Reset settings section.
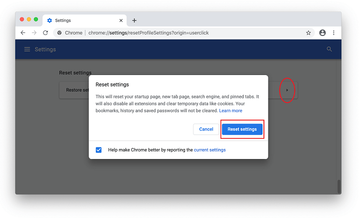
- Confirm the Chrome reset on a dialog that will pop up. When the procedure is completed, relaunch the browser and check it for malware activity.
- Open Chrome, click the Customize and control Google Chrome (⁝) icon in the top right-hand part of the window, and select Settings in the drop-down
- Stop malicious activity in Mozilla Firefox
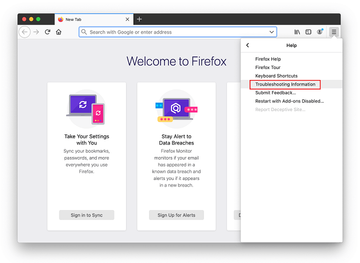
- Open Firefox and go to Help – Troubleshooting Information (or type about:support in the URL bar and press Enter).

- When on the Troubleshooting Information screen, click on the Refresh Firefox button.
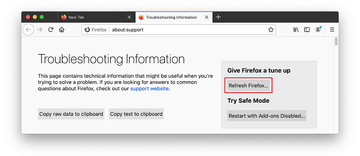
- Confirm the intended changes and restart Firefox.
- Open Firefox and go to Help – Troubleshooting Information (or type about:support in the URL bar and press Enter).
Use automatic tool to fix the kernel_task Mac issue
The Mac maintenance and security app called Combo Cleaner is a one-stop tool to detect and remove malware triggering kernel_task response. This technique has substantial benefits over manual cleanup, because the utility gets hourly virus definition updates and can accurately spot even the newest Mac infections.
Furthermore, the automatic solution will find the core files of the malware deep down the system structure, which might otherwise be a challenge to locate. Here’s a walkthrough to sort out the kernel_task issue using Combo Cleaner:
Download Combo Cleaner installer. When done, double-click the combocleaner.dmg file and follow the prompts to install the tool onto your Mac.
By downloading any applications recommended on this website you agree to our Terms and Conditions and Privacy Policy. The free scanner checks whether your Mac is infected. To get rid of malware, you need to purchase the Premium version of Combo Cleaner.
Open the app from your Launchpad and let it run the update of malware signature database to make sure it can identify the latest threats.
Click the Start Combo Scan button to check your Mac for malicious activity as well as performance issues.
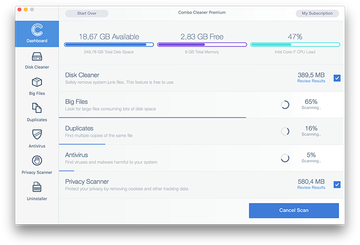
Examine the scan results. If the report says “No Threats”, then you are on the right track with the manual cleaning and can safely proceed to tidy up the web browser that may continue to act up due to the after-effects of the malware attack (see instructions above).
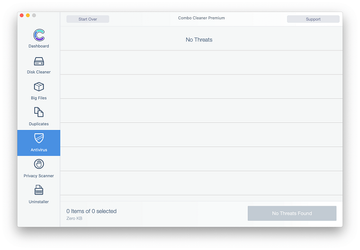
In case Combo Cleaner has detected malicious code, click the Remove Selected Items button and have the utility remove kernel_task abnormal response threat along with any other viruses, PUPs (potentially unwanted programs), or junk files that don’t belong on your Mac.
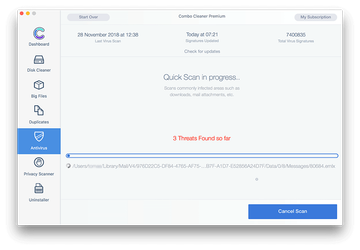
Once you have made doubly sure that the malicious app is uninstalled, the browser-level troubleshooting might still be on your to-do list. If your preferred browser is affected, resort to the previous section of this tutorial to revert to hassle-free web surfing.
FAQ
What is kernel_task on a Mac?
Kernel_task is a native macOS process that’s intended to “tame” resource-intensive applications when they are causing a critical spike in CPU usage. This is an intelligent mechanism that prevents the processing unit from being overheated, so its benign nature is out of the question. It kicks in automatically whenever the system identifies excessive resource consumption and rapidly growing or constantly high hardware temperatures.
When this situation occurs, the kernel_task process may be siphoning off the bulk of the computer’s CPU power itself. In some cases, the percentage reflected in the Activity Monitor exceeds the logical 100% threshold. High fan speed is a symptom that usually accompanies this activity.
Although this instrument pursues a commendable goal by making the machine’s resources less available to mischievous apps, it often leads to kernel panics and similar bugs. This condition requires urgent troubleshooting as it may entail serious hardware damage. For the record, such an inconsistency might co-occur with malware scenarios.
Can I quit kernel_task on my MacBook?
You can, but it’s probably not a good idea. Here’s the thing: kernel_task is an overarching system entity, and reducing abnormally high CPU usage to cool down your Mac’s hardware is merely one of its functions. There are additional deep-level services combined under its umbrella. Technically, kernel_task is among the core components of macOS that manages proper interoperability between the CPU, memory, and various applications you’re using.
It comes as no surprise that if you attempt to force quit this process via the Activity Monitor, the system displays an alert stating that you will be logged out. That being said, if kernel_task CPU consumption is skyrocketing (it may reach 300% or even 400% at times), you should identify the root cause for this hyper-response and eliminate it instead of quitting kernel_task itself.
Why is my Mac CPU usage so high?
The obvious and most reasonable explanation is that one or several processes currently running on your Mac are causing your central processing unit to allocate a lot of resources to maintain their operation. In other words, if you encounter high CPU usage on your Mac, the first thing on your to-do list is to look for the “culprit” app or apps.
Start your research by opening the Activity Monitor from the Utilities folder. Click on the header of the CPU column to sort the processes so that the most resource-heavy ones are at the top of the list. If you are using a graphics editing tool or P2P software, it will almost surely use up most of your processor’s power. Web browsers also tend to get CPU-intensive over time due a growing amount of caches and history they store.
Mac malware is another possible cause that’s often overlooked and underestimated. Malicious programs can be crudely coded and wear out the system when operating. Some strains are hogs by design – crypto miners make a good example. Some make Macs run slow deliberately, thereby trying to hoodwink the victims into paying for spoof optimization. Anyway, this is one of the areas worth inspecting in case a high CPU usage quandary occurs.
What does WindowServer do on a Mac?
WindowServer is a core macOS element whose role is to link all running applications and processes with what you see on your screen. In plain words, whenever you open a window, load a website in your browser, or play a video game, it’s WindowServer that’s visually reflecting all these actions on the display. It comprises a series of services that do the windows management part of the overall Mac functioning routine. And yes, it’s an important and absolutely benign system entity.
As is the case with kernel_task, it’s not uncommon for WindowServer to cause a high CPU usage issue. A specific application or a set of applications may overburden this compositing engine with multiple requests. Transparency effects in macOS are among frequently reported causes for this service using up much of the processing unit’s power, too. To figure out what’s making it act up, you may have to close your apps one by one and check how WindowServer CPU consumption responds to each instance.
