Learn how to completely remove iLife Media Browser from Mac computer without affecting the system and find out the common motivation scenarios for doing so.
Update:
There are applications Mac users install on their own, and there are ones pre-installed on computers or promoted in the course of operating system updates. Some people don’t appreciate things that show up on their machine out of the blue and take up memory space. This is a common concern regarding the iLife Media Browser utility. For the record, this tool is not harmful and it’s not malware, unless of course some crafty cybercriminals release a perpetrating program that impersonates it. The app in question is a component of the GarageBand solution, which, in its turn, constitutes the iLife software suite for macOS. The goal of iLife Media Browser is to facilitate the process of finding and importing audio and video content into a GarageBand project. This is, obviously, not a feature everyone uses.

Normally, if you don’t use this tool it simply resides in the system, inconspicuously runs in the background and doesn’t cause any inconvenience. The problems may start in the following scenarios. First, a lot of people run into issues after the iLife Media Browser update to version 2.0 that didn’t go as intended. In this case, the program will not operate correctly, crash and cause annoying error notifications. Another type of a concomitant predicament is when the user is running out of memory. Since the app under scrutiny happens to be quite resource-heavy, the Mac may slow down and become irresponsive handling other tasks, even simple ones. This impact diminishes user experience and requires some troubleshooting.
iLifeMediaBrowser may re-infect your Mac multiple times unless you delete all of its fragments, including hidden ones. Therefore, it is recommended to download Combo Cleaner and scan your system for these stubborn files. This way, you may reduce the cleanup time from hours to minutes.
Download Now Learn how Combo Cleaner works. If the utility spots malicious code, you will need to buy a license to get rid of it.In addition to excessive memory usage, one more facet of the problem is that the suite occupies a disproportionate amount of disk space as compared to other software on a Mac. It comes as no surprise that some users have been reporting system alerts stating that their hard drives are almost full. In these scenarios, it turns out that the size of a folder associated with iLife Media Browser can reach a whopping 70GB or so. A little bit of research reveals that the culprit is a directory storing caches of the user’s images. The system may leverage these cached items as shortcuts to display the user’s photos in a screensaver without retrieving them from the photos library. This seems to be a reasonable logic that makes it easier for macOS to handle multimedia, but with the caveat that it’s implemented at the expense of the Mac’s disk space.
Either issue is a drag, therefore the removal of iLife Media Browser may end up on the user’s agenda. Those who aren’t very tech-savvy may find it difficult to perform the uninstall procedure, because the tool is a constituent of a larger suite. Others hesitate and wonder whether this is okay for the stability of macOS. Fortunately, the uninstall will not affect Mac performance, nor will it cause other programs to malfunction. One more fact that might encourage users to remove iLife Media Browser is that it’s an obsolete - yet working - product whose functionality that has been delegated to newer solutions. All in all, if the cleanup is on your to-do list, go ahead and follow the steps below to complete it.
iLife Media Browser manual removal for Mac
The steps listed below will walk you through the removal of this potentially unwanted application. Be sure to follow the instructions in the order specified.
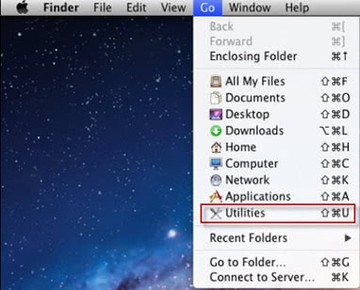
- Open up the Utilities folder as shown below
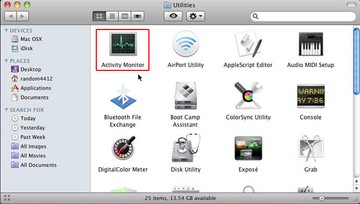
- Locate the Activity Monitor icon on the screen and double-click on it
- Under Activity Monitor, find the entry for iLife Media Browser, select it and click Quit Process
- A dialog should pop up, asking if you are sure you would like to quit the iLife Media Browser executable. Select the Force Quit option
- Expand the Go menu in Apple Finder and select Go to Folder
- Type or paste the following string in the folder search dialog: /Library/Containers
- Once the Containers directory opens up, find the following entries in it and move them to the Trash:
- com.apple.MediaLibraryService/Caches/com.apple.iLifeMediaBrowser.ILPhotosTranscodeCache
- com.apple.ScreenSaver.iLife-Slideshow-Extension/Data/Library/Caches/com.apple.iLifeMediaBrowser.ILPhotosTranscodeCache
- Use the Go to Folder lookup feature again to navigate to the path named /Library/Application Support. When it’s opened, find the iLifeMedia Browser folder inside. In this directory, spot the Plugins folder and empty it.
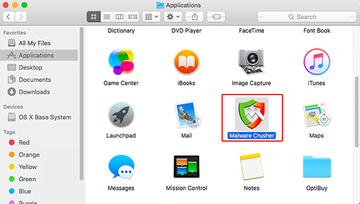
- Click the Go button again, but this time select Applications on the list. Find the entry for iLife Media Browser on the interface, right-click on it and select Move to Trash. If user password is required, go ahead and enter it
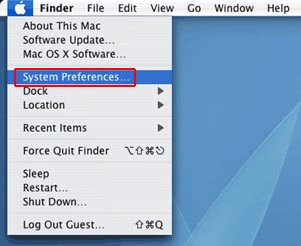
- Now go to Apple Menu and pick the System Preferences option
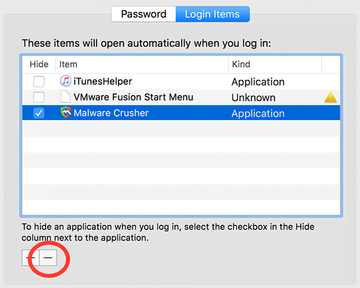
- Select Accounts and click the Login Items button. The system will come up with the list of the items that launch when the box is started up. Locate iLife Media Browser there and click on the “-“ button
Use automatic tool to uninstall iLife Media Browser from your Mac
The Mac maintenance and security app called Combo Cleaner is a one-stop tool to detect and remove iLife Media Browser virus. This technique has substantial benefits over manual cleanup, because the utility gets hourly virus definition updates and can accurately spot even the newest Mac infections.
Furthermore, the automatic solution will find the core files of the malware deep down the system structure, which might otherwise be a challenge to locate. Here’s a walkthrough to sort out the iLife Media Browser issue using Combo Cleaner:
Download Combo Cleaner installer. When done, double-click the combocleaner.dmg file and follow the prompts to install the tool onto your Mac.
By downloading any applications recommended on this website you agree to our Terms and Conditions and Privacy Policy. The free scanner checks whether your Mac is infected. To get rid of malware, you need to purchase the Premium version of Combo Cleaner.
Open the app from your Launchpad and let it run an update of the malware signature database to make sure it can identify the latest threats.
Click the Start Combo Scan button to check your Mac for malicious activity as well as performance issues.
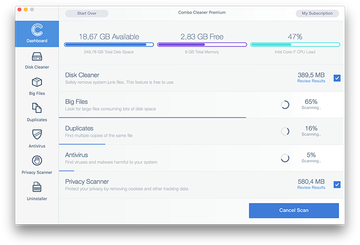
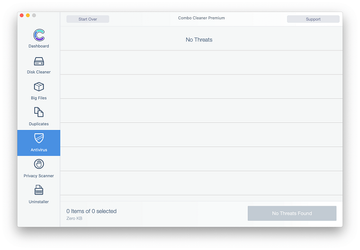
Examine the scan results. If the report says “No Threats”, then you are on the right track with the manual cleaning and can safely proceed to tidy up the web browser that may continue to act up due to the after-effects of the malware attack (see instructions above).
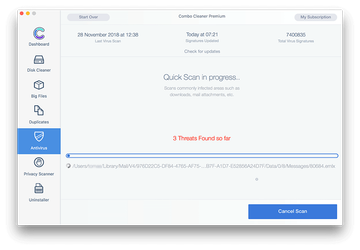
In case Combo Cleaner has detected malicious code, click the Remove Selected Items button and have the utility remove iLife Media Browser threat along with any other viruses, PUPs (potentially unwanted programs), or junk files that don’t belong on your Mac.
Once you have made doubly sure that the malicious app is uninstalled, the browser-level troubleshooting might still be on your to-do list. If your preferred browser is affected, resort to the previous section of this tutorial to revert to hassle-free web surfing.
![How to uninstall iLifeMediaBrowser from Mac [Mar 2020]](/img/ULm6oCklea-360-remove-ilife-media-browser-update.png)