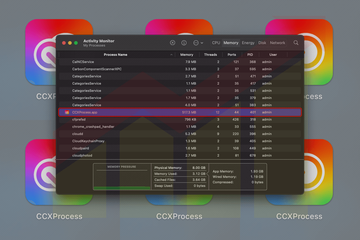
- What is CCXProcess on Mac?
- CCXProcess activity is not frictionless, to say the least
- Workarounds for CCXProcess bloatware issue
- CCXProcess CPU and memory hog virus manual removal from Mac
- Get rid of CCXProcess related malware in web browser on Mac
- Fix CCXProcess Mac memory issue using Combo Cleaner removal tool
This article explains the undercurrents of the CCXProcess Mac resource hog issue and provides tips to resolve it without affecting Adobe CC usage experience.
What is CCXProcess on Mac?
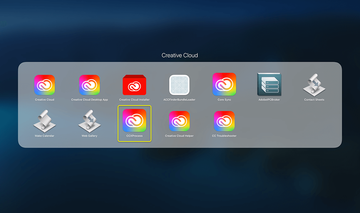
There is no denying that Adobe Creative Cloud (Adobe CC) is an irreplaceable instrument for graphics designers, both wannabes and professionals. As awesome and useful as it is, this suite has got a fair portion of criticism due to various glitches over the years. The issue that arguably dominates the whole controversy about the kit boils down to abnormal resource usage by its constituent applications and a handful of helper objects running on Macs. A prime example of this misbehavior is CCXProcess, an acronym for Creative Cloud Experience Process. This is a background binary that kicks off at startup and usually runs alongside a series of associated executable objects operating under the Adobe umbrella, including Adobe Desktop Service, AdobeCRDaemon, AdobeIPCBroker, CCLibrary, Adobe Installer. It can also be found in the list of the installed apps and in the Launchpad.
The CCXProcess high memory virus may re-infect your Mac multiple times unless you delete all of its fragments, including hidden ones. Therefore, it is recommended to download Combo Cleaner and scan your system for these stubborn files. This way, you may reduce the cleanup time from hours to minutes.
Download Now Learn how Combo Cleaner works. If the utility spots malicious code, you will need to buy a license to get rid of it.CCXProcess activity is not frictionless, to say the least
The role of CCXProcess is to maintain interoperability between Creative Cloud’s services and products, such as Photoshop, Lightroom, Illustrator, and Premiere. For instance, it is responsible for enabling and synchronizing things like fonts, custom configurations, files, filters, templates, libraries, and tutorials. While proper syncing is a hugely important element of a seamless user experience, CCXProcess is often associated with problems on Macs, often encountered after upgrading to macOS 11 Big Sur and newer (Monterey, Ventura). The greater part of these issues relate to super-heavy pressure on a computer’s resources. When running in the background, this entity may consume up to 100% of the CPU and memory. This quick, understandably, causes the Mac to slow down and leads to unbearable noise by driving the fan speeds high to cool down the continually scorching hardware.
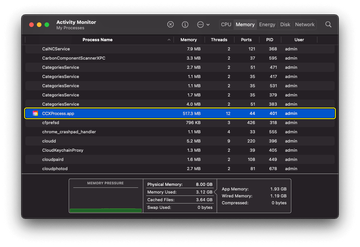
Fast battery drain is an extra facet of this obnoxious aftermath, which basically stems from the factors outlined above. To top it all off, CCXProcess can reportedly even congest the Mac’s disk at an astonishing rate that reaches dozens of gigabytes per hour. Apparently, such interference is a drag serious enough to prevent the user from performing run-of-the-mill activities, such as web browsing, let alone working with graphics – which the item in question is supposed to facilitate, not break. For some users, the problem gets to a point where they have to go the extra mile and close the process manually each time they boot up their Macs. That’s apparently at odds with the way a piece of software from a long-standing, famous tech giant should perform.
Workarounds for CCXProcess bloatware issue
When faced with the unintended adverse effects of CCXProcess, Mac users have to go through a good deal of trial and error to tame the resource hog. Assuming that quitting it at startup is a cold comfort, let’s go over a few techniques that may help.
• Check for updates from Adobe. From where I stand, the first and easiest thing to do is check for Adobe CC updates. If a newer version is available, it must be installed without delay. Based on discussions on popular technical forums, the publisher has been aware of the glitch for quite some time, and an update is likely to address it.
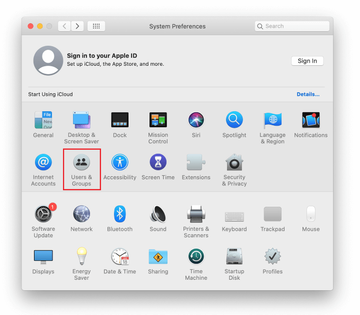
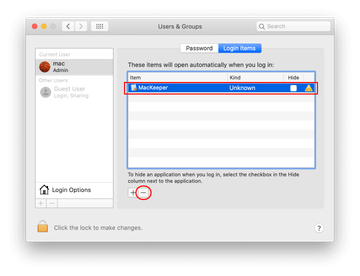
• Tidy up the Login Items. In scenarios where the Creative Cloud toolkit is up to date and the quandary persists regardless, stopping CCXProcess from launching at startup can be worthwhile. Go to System Preferences, proceed to “Users & Groups”, click the “Login Items” tab, select the mischievous app, and click the minus symbol. This may require you to enter your admin password to complete.
On a separate note, this siphoning of the computer’s CPU and memory often co-occurs with the presence of an object called OSMessageTracer among the Login Items. Whether coincidental or not, this fact should be considered as part of the troubleshooting. Its entry in the list includes a tag saying “Item from unidentified developer”. As per in-depth research, it appears to be affiliated with a now-obsolete application from Apple, as the associated LaunchDaemon is called com.apple.installer.osmessagetracing.plist. It also references the following app that’s actually missing from the system: /System/Library/PrivateFrameworks/OSInstaller.framework/Resources/OSMessageTracer. Again, it’s recommended to eliminate both CCXProcess and OSMessageTracer from the list of startup programs.
• Uninstall ad blockers. If the methods above turn out futile, a somewhat unorthodox way around the bug is to remove ad blocking programs if any. Not sure how the two things might overlap, but some users have been able to fix the resource gobbling this way.
• Uninstall CCXProcess.app. Whereas this component of the Creative Cloud is portrayed as important, the fact that it’s a source of numerous Mac performance problems diminishes its functional worth from the perspective of those affected. That said, it might make sense to choose the lesser of two evils and try to send the program to the Trash. It resides in Applications > “Adobe Creative Cloud Experience” folder. This attempt may be hampered by an error saying “The item “CCXProcess.app” can’t be moved to the Trash because it’s open”. In this case, you should find the executable in the Activity Monitor and force quit it there first. Be advised, though, that the Adobe CC kit will most likely reinstall it down the line. Still, this tactic will make it clear whether the app removal does the trick in terms of tackling the bloatware dilemma.
• Use kextunload property. This method is for advanced users only, as it implies changes to kernel extensions (kexts). These are driver files most of which are critical for macOS to work right. Some programs create packages of low-level services in the form of kexts to extend their functionality on a Mac. Since Adobe CC may take this route as well, finding and unloading a specific kernel extension can help resolve inconsistencies. Go to /System/Library/Extensions/ and look for a file with CCXProcess in its name that ends with “.kext” string. Such objects can’t be deleted by standard means. The kextunload feature (sudo kextunload command) is what bridges the gap. I’m not adding further details here because, once again, playing around with kexts is risky business.
• Disable antivirus software temporarily. According to feedback from some users, there might be compatibility issues between CCXProcess and Mac antivirus tools. To check if this is the case, try turning off your AV program’s real-time protection module for a while and see how things go.
• Check your Mac for malware. One of the clever tricks used by adware, spyware, malicious cryptominers, and scareware is to disguise their executables as legitimate ones. The “camouflage” can include the same name and even file properties as those used by trusted applications. With this in mind, a strain of malware may mimic CCXProcess to fly undetected.
That’s just about it for the known methods to resolve the CCXProcess CPU and RAM overuse glitch on a Mac. In terms of the malware theory, there is no need to reinvent the wheel in evaluating its likelihood in a particular situation. Use the following mix of manual and automatic techniques to pinpoint a potential culprit, and if found, purge your system of its influence.
CCXProcess CPU and memory hog virus manual removal from Mac
The steps listed below will walk you through the removal of this malicious application. Be sure to follow the instructions in the specified order.
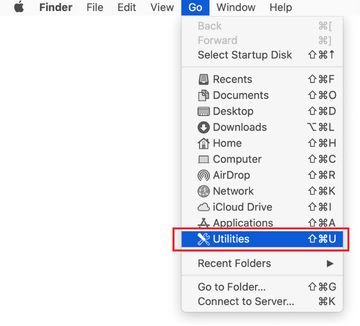
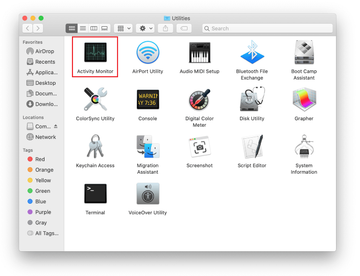
Expand the Go menu in your Mac’s Finder bar and select Utilities as shown below.
Locate the Activity Monitor icon on the Utilities screen and double-click on it.
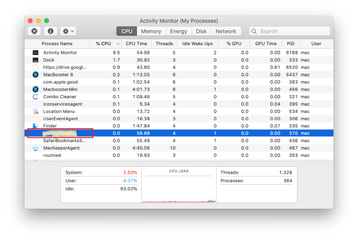
In the Activity Monitor app, look for CCXProcess.app or another process that appears suspicious. To narrow down your search, focus on unfamiliar resource-intensive entries on the list. Keep in mind that its name isn’t necessarily related to the way the threat is manifesting itself, so you’ll need to trust your own judgement. If you pinpoint the culprit, select it and click on the Stop icon in the upper left-hand corner of the screen.
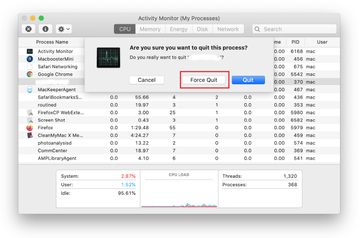
When a follow-up dialog pops up asking if you are sure you want to quit the troublemaking process, select the Force Quit option.
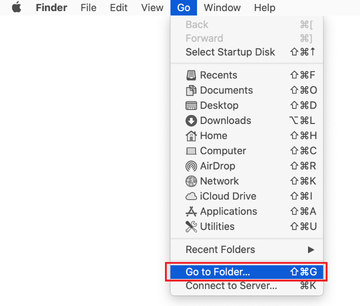
Click on the Go menu icon in the Finder again and select Go to Folder. You can as well use the Command-Shift-G keyboard shortcut.
Type /Library/LaunchAgents in the folder search dialog and click on the Go button.
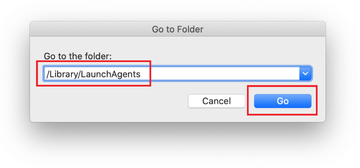
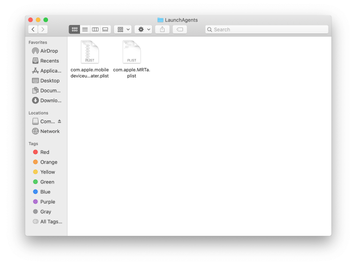
Examine the contents of the LaunchAgents folder for com.adobe.ccxprocess.plist and dubious-looking items. Be advised that the names of files spawned by malware may give no clear clues that they are malicious, so you should look for recently added entities that appear to deviate from the norm.
As an illustration, here are several examples of LaunchAgents related to mainstream Mac infections: com.updater.mcy.plist, com.avickUpd.plist, and com.msp.agent.plist. If you spot files that don’t belong on the list, go ahead and drag them to the Trash.
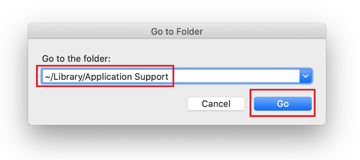
Use the Go to Folder lookup feature again to navigate to the folder named ~/Library/Application Support (note the tilde symbol prepended to the path).
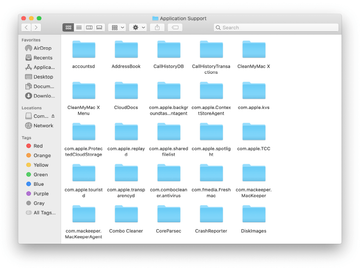
When the Application Support directory is opened, identify recently generated suspicious folders in it and send them to the Trash. A quick tip is to look for items whose names have nothing to do with Apple products or apps you knowingly installed. A few examples of known-malicious folder names are ProgressSite, and IdeaShared.
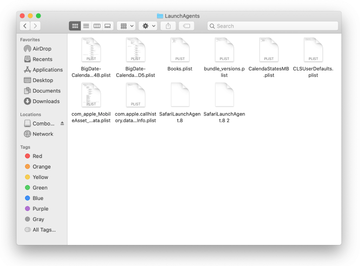
Enter ~/Library/LaunchAgents string (don’t forget to include the tilde character) in the Go to Folder search area.
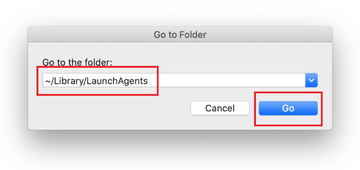
The system will display LaunchAgents residing in the current user’s Home directory. Look for dodgy items related to the rogue CCXProcess app (see logic highlighted in subsections above) and drag the suspects to the Trash.
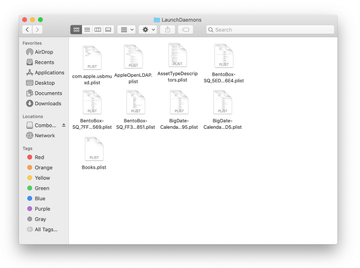
Type /Library/LaunchDaemons in the Go to Folder search field.
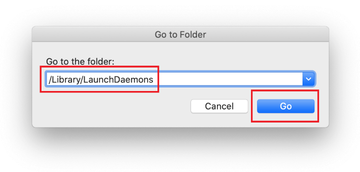
In the LaunchDaemons path, look for com.adobe.ccxprocess.plist and try to pinpoint other the files the malware is using for persistence. Several examples of such items cropped by Mac infections are com.apple.sysmond.plist, com.startup.plist, and com.ExpertModuleSearchDaemon.plist. Delete the sketchy files immediately.
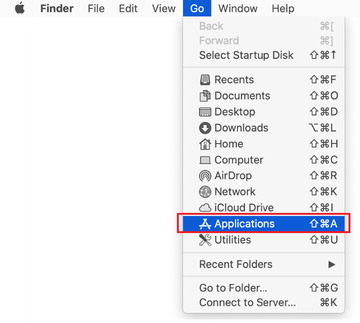
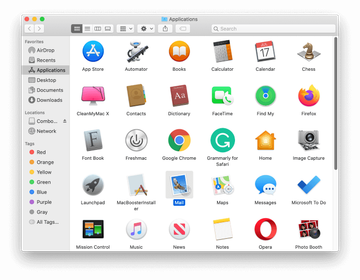
Click on the Go menu icon in your Mac’s Finder and select Applications on the list.
Find the entry for CCXProcess an apps that clearly don’t belong there and move them to the Trash. If this action requires your admin password for confirmation, go ahead and enter it.
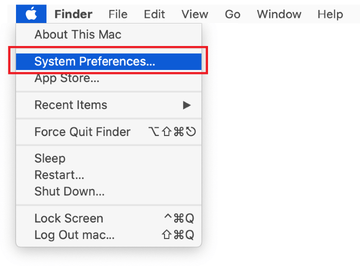
Expand the Apple menu and select System Preferences.
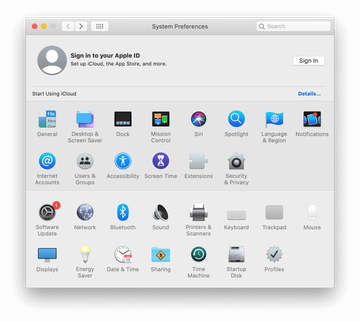
Proceed to Users & Groups and click on the Login Items tab.
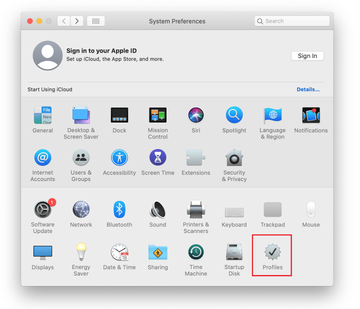
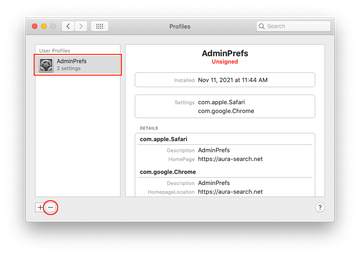
Now select Profiles under System Preferences. Look for a malicious item in the left-hand sidebar. Several examples of configuration profiles created by Mac adware include TechSignalSearch, MainSearchPlatform, AdminPrefs, and Safari Settings. Select the offending entity and click on the minus sign at the bottom to eliminate it.
Get rid of CCXProcess related malware in web browser on Mac
To begin with, the web browser settings taken over by the CCXProcess malware should be restored to their default values. Although this will clear most of your customizations, web surfing history, and all temporary data stored by websites, the malicious interference should be terminated likewise. The overview of the steps for completing this procedure is as follows:
- Fix the CCXProcess problem in Safari
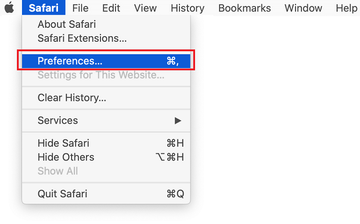
- Open the browser and go to Safari menu. Select Preferences in the drop-down list.
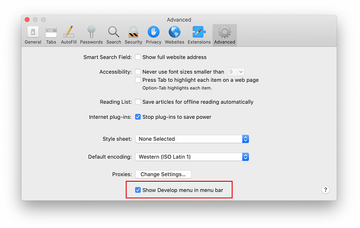
- Once the Preferences screen appears, click on the Advanced tab and enable the option saying “Show Develop menu in menu bar”.
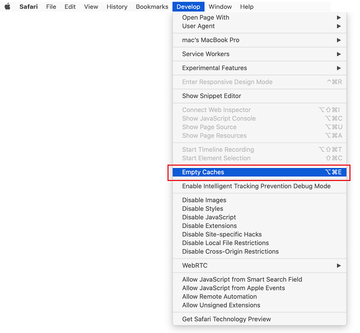
- Now that the Develop entry has been added to the Safari menu, expand it and click on Empty Caches.
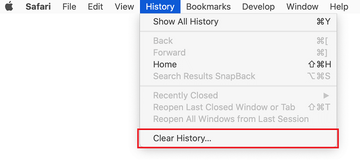
- Now select History in the Safari menu and click on Clear History in the drop-down list.
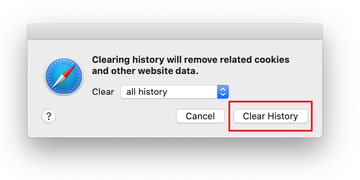
- Safari will display a dialog asking you to specify the period of time this action will apply to. Select all history to ensure a maximum effect. Click on the Clear History button to confirm and exit.
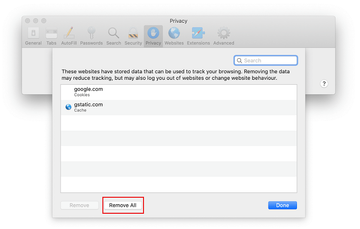
- Go back to the Safari Preferences and hit the Privacy tab at the top. Find the option that says Manage Website Data and click on it.

- The browser will display a follow-up screen listing the websites that have stored data about your Internet activities. This dialog additionally includes a brief description of what the removal does: you may be logged out of some services and encounter other changes of website behavior after the procedure. If you’re okay with that, go ahead and click on the Remove All button.
- Restart Safari
- Open the browser and go to Safari menu. Select Preferences in the drop-down list.
- Get rid of CCXProcess bug in Google Chrome
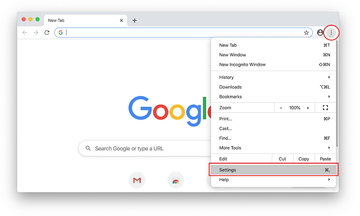
- Open Chrome, click the Customize and control Google Chrome (⁝) icon in the top right-hand part of the window, and select Settings in the drop-down
- When on the Settings pane, select Advanced
- Scroll down to the Reset settings section.
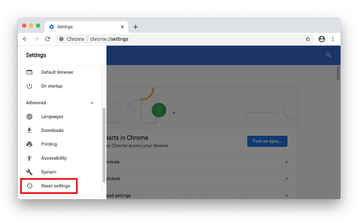
- Confirm the Chrome reset on a dialog that will pop up. When the procedure is completed, relaunch the browser and check it for malware activity.
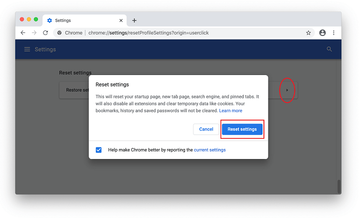
- Open Chrome, click the Customize and control Google Chrome (⁝) icon in the top right-hand part of the window, and select Settings in the drop-down
- Remove CCXProcess malware in Mozilla Firefox
- Open Firefox and go to Help – Troubleshooting Information (or type about:support in the URL bar and press Enter).
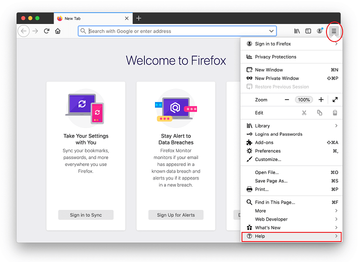
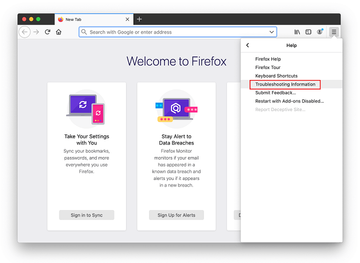
- When on the Troubleshooting Information screen, click on the Refresh Firefox button.
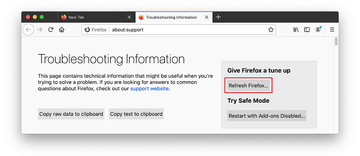
- Confirm the intended changes and restart Firefox.
- Open Firefox and go to Help – Troubleshooting Information (or type about:support in the URL bar and press Enter).
Fix CCXProcess Mac memory issue using Combo Cleaner removal tool
The Mac maintenance and security app called Combo Cleaner is a one-stop tool to detect and remove CCXProcess high CPU and memory virus. This technique has substantial benefits over manual cleanup, because the utility gets hourly virus definition updates and can accurately spot even the newest Mac infections.
Furthermore, the automatic solution will find the core files of the malware deep down the system structure, which might otherwise be a challenge to locate. Here’s a walkthrough to sort out the CCXProcess high CPU and memory issue using Combo Cleaner:
Download Combo Cleaner installer. When done, double-click the combocleaner.dmg file and follow the prompts to install the tool onto your Mac.
By downloading any applications recommended on this website you agree to our Terms and Conditions and Privacy Policy. The free scanner checks whether your Mac is infected. To get rid of malware, you need to purchase the Premium version of Combo Cleaner.
Open the app from your Launchpad and let it run an update of the malware signature database to make sure it can identify the latest threats.
Click the Start Combo Scan button to check your Mac for malicious activity as well as performance issues.
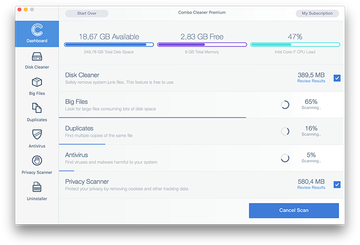
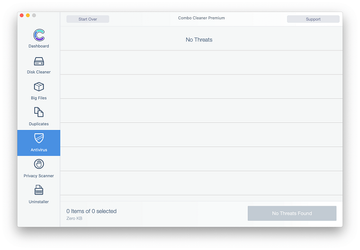
Examine the scan results. If the report says “No Threats”, then you are on the right track with the manual cleaning and can safely proceed to tidy up the web browser that may continue to act up due to the after-effects of the malware attack (see instructions above).
In case Combo Cleaner has detected malicious code, click the Remove Selected Items button and have the utility remove CCXProcess high CPU and memory threat along with any other viruses, PUPs (potentially unwanted programs), or junk files that don’t belong on your Mac.
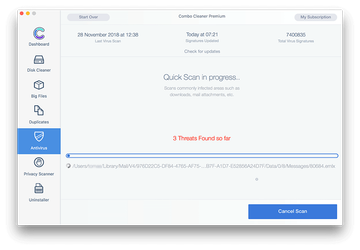
Once you have made doubly sure that the malicious app is uninstalled, the browser-level troubleshooting might still be on your to-do list. If your preferred browser is affected, resort to the previous section of this tutorial to revert to hassle-free web surfing.
