This article provides easy how-tos on changing the default search engine in the top web browsers used across the Mac ecosystem.
Although web search providers don’t charge users for enjoying their services, this is far from being a paradigm with no strings attached. The saying that there is no such thing as a free lunch fits this context more than precisely, with the fundamental trade-off being all about advertising. Tech giants are incessantly amassing data about users’ current interests based on what they search for.
When aggregated and processed by growingly intelligent algorithms, these details give the services actionable insights into things like shopping preferences as well as social and political biases, not to mention the exhaustive profiling of the person’s identity that spans their occupation, gender, age, and location. All search engines are doing it, even if their marketing strategy reiterates the opposite. Some are collecting personally identifiable information (PII) to a bigger extent, and some are less data-thirsty.
Either way, interpreting web search activities as a potential privacy concern makes a whole lot of sense these days. The silver lining is that web browsers offer an amazingly simple way to change the search defaults so that users are a few mouse clicks away from making a decision to putting it into effect. This isn’t a platform-sensitive type of thing, which means that the customizations are equally transparent on different operating systems. If you own a Mac machine, browser controls are brought to your fingertips via the Settings, or Preferences, interfaces.
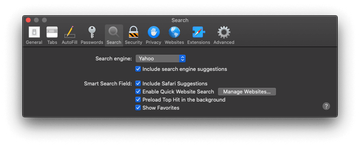
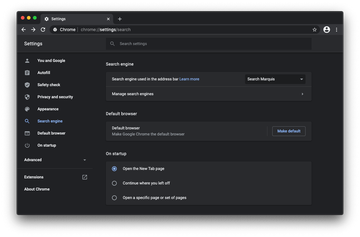
The accurate walkthrough, obviously, depends on the browser. In Safari, for instance, going to the Preferences screen and hitting the Search tab there suffices to review and modify the entirety of search set-ups. The procedure is a no-brainer in Google Chrome, too – clicking the dedicated search engine option displays the current defaults and allows for tweaks through an intuitive pull-down menu logic. Adding an extra provider to the list is a piece of cake as well.
Speaking of the motivation for changing the search engine on a Mac, there could be a factor besides prosaic usability criteria or privacy risks mentioned above. These computers are now in the crosshairs of malware authors. That being said, adware is the dominant form of malicious code plaguing Macs, and search preferences takeover is one of the most common upshots of this dodgy activity.
The vast majority of these pests alter search settings in Safari, Chrome, and Firefox without due permission in order to pump massive traffic into various junk services. The replacement landing pages can be knock-off search engines or even legitimate ones. In the latter scenario, though, the browser is steered via a series of advertising network APIs so that adware operators rake in profits anyway. If this predicament is the case, reverting to correct search settings after purging the unwanted application is part of the general cleanup routine.
Regardless of the specific circumstances or the train of thought that has led you to changing the search engine on your Mac, the following sections will walk you through the entire process. These steps apply to the top web browsers used on Mac computers, namely the native Safari as well as Google Chrome and Mozilla Firefox.
Change the default search engine in Safari
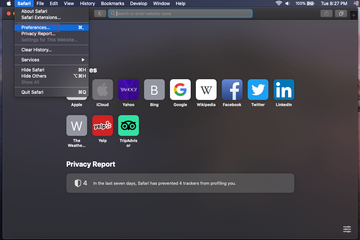
- Open the browser, click Safari in the Finder menu bar, and select Preferences in the drop-down list as illustrated below.
- When the Safari Preferences screen appears, click the Search tab, open the Search engine pull-down menu, and choose the preferred search provider by clicking its entry on the list. The service will have a checkmark next to it once selected.

- You can additionally specify whether Safari should display search engine suggestions and Safari suggestions. There is an extra option called Quick Website Search that allows you to look for information within a site using the browser’s Smart Search area. Disable and enable these features as you deem appropriate.
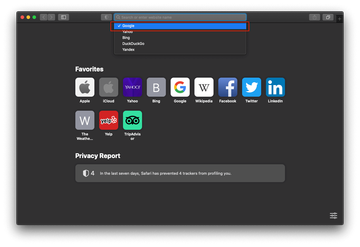
- A handy shortcut to switching between different search engines is to use the magnifying glass icon in the Smart Search field. Just click it and pick the service you would like to use for the current search.
How to change search engine in Google Chrome on Mac
- Open Chrome, click the Customize and control Google Chrome (⁝) icon in the upper right corner of the window, and select Settings.
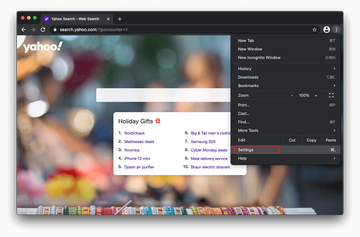
- When on the Settings pane, click Search engine in the sidebar.
- Select your preferred provider on the list next to the Search engine used in the address bar field.
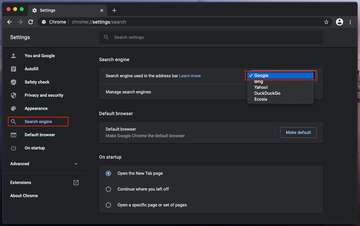
- If you want to add a search engine that’s not listed there, select Manage search engines and click the Add button.
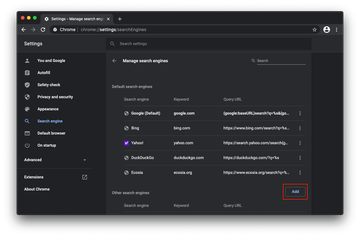
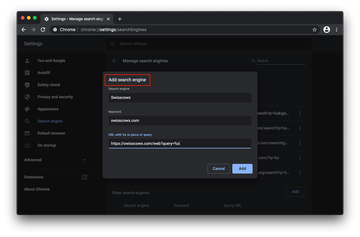
- Fill out the details for the new search engine and click Add to complete the process.
How to change search engine in Mozilla Firefox on Mac
- Open Firefox, click Open menu (the three horizontal lines icon), and select Preferences.
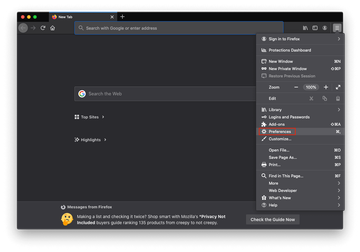
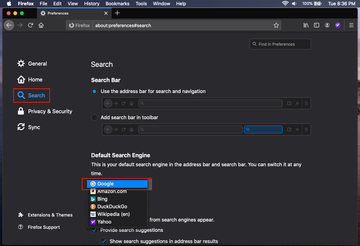
- Click Search in the left-hand sidebar, head to the Default Search Engine section, and select the search provider of your choice on the list as shown below.
- If you would like to add another search engine to the list, scroll down to the Search Shortcuts section and click Find more search engines.
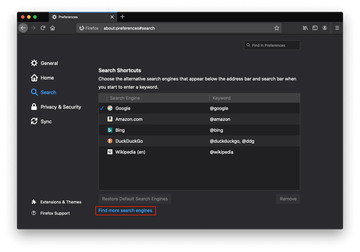
- Firefox will open its repository of search add-ons. Pick the one you want to use and add it to Firefox.

To recap
The numerous pros of web search services eclipse all cons, no matter what sceptics may say about this being a double-edged sword. The question is “Which search engine to use?” rather than “Should I be using search engines at all?” So, do your homework to select the provider that suits you the most, and follow the steps above to configure your preferred web browser accordingly.
