Find out what techniques are applicable to get rid of the Microsoft AutoUpdate Mac virus and associated annoying popups that deteriorate the user experience.
Update:
| Threat Profile | |
|---|---|
| Name | Microsoft AutoUpdate (Required Data Notice) popup virus Mac |
| Category | Mac adware, popup virus, potentially unwanted app |
| Symptoms | Displays a bogus data collection notice, causes system slowdown |
| Distribution Techniques | Booby-trapped app bundles, fake Adobe Flash Player update popups |
| Severity Level | Medium |
| Damage | Mac overheating due to high CPU usage, risk of identity theft |
| Removal | Scan your Mac with Combo Cleaner to detect all files related to the browser hijacker. Use the tool to remove the infection if found. |
The technology race is generally a favorable concept that calls forth progress at the end of the day. If different service providers didn’t have to compete with one another, there would be less motivation for them to excel in their industries and create top-notch products better than someone else’s. This permanent state of contest doesn’t mean war, though. The interaction between Apple and Microsoft is a good example. One of the areas where the corporations’ activities overlap is their proprietary products. Lots of Mac fans use Microsoft Office, OneDrive, Skype and other solutions every single day. There are versions of these suites that support macOS, which is a perfectly understandable move by the Redmond-based tech giant that tries to expand its audience. Is everything going smooth in this regard? Not really. The recent influx of negative feedback over what’s called the Microsoft AutoUpdate Mac virus has really been the talk of the town since at least mid-July 2019. In fact, this issue was first brought up years ago, but it seems to have reached a critical threshold this month.
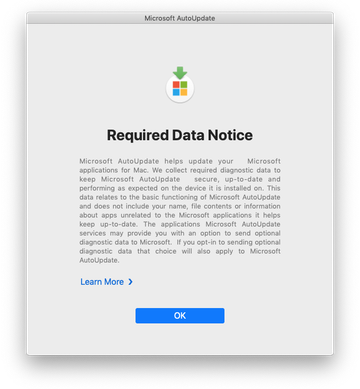
Normally, the Microsoft AutoUpdate tool runs silently in the background and performs its routine job to make sure the person uses the latest builds of MS products. It streamlines the way the appropriate updates are rolled out and installed on Mac machines, with the goal being to make the software fine-tuning process hassle-free and seamless. The problem that’s currently affecting Mac users on a large scale has to do with popups supposedly generated by this trustworthy service. In particular, these alerts may read “Required Data Notice”. The contents of this notification seem to be aligned with the recent release of a new AutoUpdate variant for Macs. It is known to request optional diagnostic data so that the vendor can improve the way its applications operate in the macOS environment. Some people might dislike this tactic, but it’s nothing new for major companies.
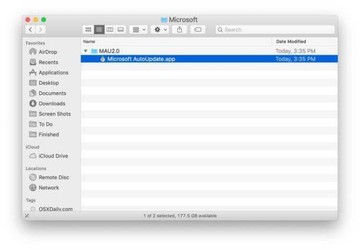
This relatively benign situation can be observed in two cases: if any Microsoft product is currently running on the Mac, or even if the user has previously leveraged one and uninstalled it but the cleanup wasn’t thorough enough. The latter is, obviously, an inconsistency in itself, and yet it’s quite common. If the AutoUpdate (MAU2.0) tool is redundant, it can be safely deleted from /Library/Application Support/Microsoft path to make the noxious popups vanish for good. The detailed instructions are provided further down. There could be a much more serious caveat in this whole story, though.
Microsoft AutoUpdate virus may re-infect your Mac multiple times unless you delete all of its fragments, including hidden ones. Therefore, it is recommended to download Combo Cleaner and scan your system for these stubborn files. This way, you may reduce the cleanup time from hours to minutes.
Download Now Learn how Combo Cleaner works. If the utility spots malicious code, you will need to buy a license to get rid of it.The dark side of this matter boils down to cybercriminals’ involvement with this controversial data collection initiative. The alerts mentioned above could stem from the shenanigans of the Microsoft AutoUpdate Mac virus. It is a piece of malicious code that triggers the popup dialogs impersonating Microsoft’s legit service. There is a fundamental difference between the objectives and the impact in the two scenarios. If it’s malware that causes these warning messages to appear, then the goal is to forward the unsuspecting Mac users to a phishing page that asks for sensitive information, including their name, address, and credit card details. Notice that Microsoft is collecting purely technical diagnostic data, nothing more than that. The malefactors simply mimic the genuine popup request to take advantage of the actual software maker’s reputation and thereby instill trust in the victims to perform identity theft.
Another side effect of the crooks’ pranks is the abnormal CPU consumption that accompanies the alerts. The Mac may slow down to a crawl or even freeze and reboot. Lots of victims have been reporting the Required Data Notice popup waking up their MacBook laptops even when the lid is closed, which is absolutely unacceptable for a regular interaction scenario between a service provider and a user. To top it off, the affected machine’s fan gets very noisy as it starts running at maximum speed to cool down the hardware. The quirk may last for hours if the glitch occurs, say, at night. Clicking the OK button actually dismisses the notification in most cases and saves the processing unit from permanently maxing out its resources, but the same thing tends to happen again after a while. This may entail a hardware failure in the long run. Furthermore, the quandary doesn’t seem to make sense to numerous affected users because they have no Microsoft products installed on their Macs in the first place. All of this havoc is definitely subject to immediate troubleshooting. Below is a step-by-step guide to completely remove the Microsoft AutoUpdate virus from Mac.
Microsoft AutoUpdate virus manual removal for Mac
The steps listed below will walk you through the removal of this unwanted application. Be sure to follow the instructions in the order specified.
- Open up the Utilities folder as shown below
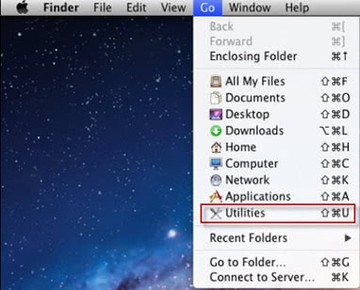
- Locate the Activity Monitor icon on the screen and double-click on it
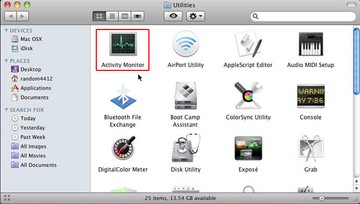
- Under Activity Monitor, find a suspicious-looking entry that doesn’t belong there, select it and click Quit Process
- A dialog should pop up, asking if you are sure you would like to quit the bad executable. Select the Force Quit option
- Expand the Go menu in Apple Finder and select Go to Folder.
- Type or paste the following string in the folder search dialog: /Library/LaunchAgents
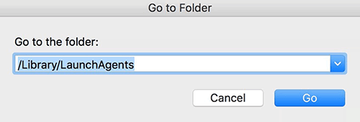
- Once the LaunchAgents directory opens up, find the following entries in it and move them to Trash:
- com.microsoft.update.agent.plist
- Use the Go to Folder lookup feature again to navigate to the folder named ~/Library/LaunchAgents. When this path opens, look for the following entries and send them to Trash
- com.microsoft.autoupdate.helper.plist
- Similarly, go to the ~Library/Application Support and ~Library/Application Support folders. Locate and move the following entries to Trash:
- Microsoft/MAU2.0/Microsoft AutoUpdate.app
- Microsoft AU Daemon
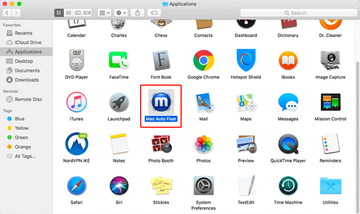
- Click the Go button again, but this time select Applications on the list. Find the entry for the potential infection on the interface, right-click on it and select Move to Trash. If user password is required, go ahead and enter it
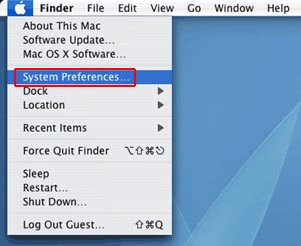
- Now go to Apple Menu and pick the System Preferences option
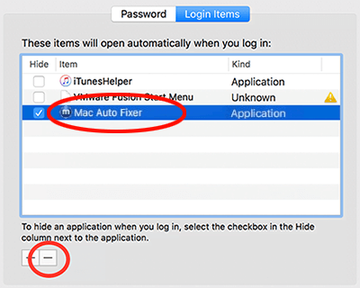
- Select Accounts and click the Login Items button. The system will come up with the list of the items that launch when the box is started up. Locate the culprit there and click on the “-“ button
Get rid of Microsoft AutoUpdate virus in web browser on Mac
To begin with, the web browser settings taken over by the Microsoft AutoUpdate virus should be restored to their default values. Although this will clear most of your customizations, web surfing history, and all temporary data stored by websites, the malicious interference should be terminated likewise. The overview of the steps for completing this procedure is as follows:
- Remove Microsoft AutoUpdate virus from Safari
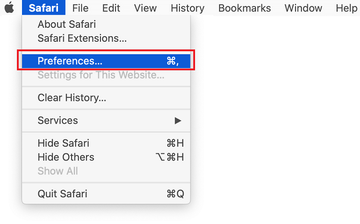
Open the browser and go to Safari menu. Select Preferences in the drop-down list.
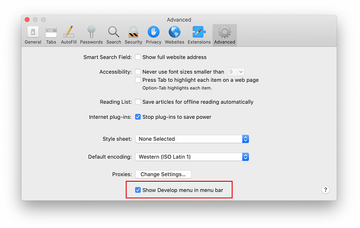
Once the Preferences screen appears, click on the Advanced tab and enable the option saying “Show Develop menu in menu bar”.
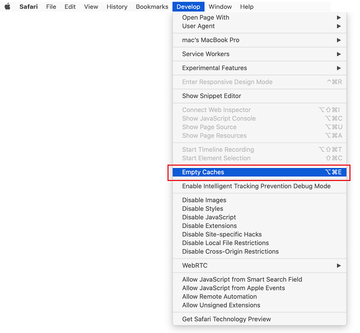
Now that the Develop entry has been added to the Safari menu, expand it and click on Empty Caches.
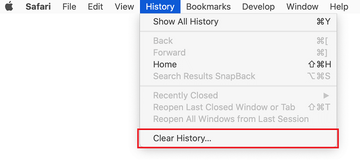
Now select History in the Safari menu and click on Clear History in the drop-down list.
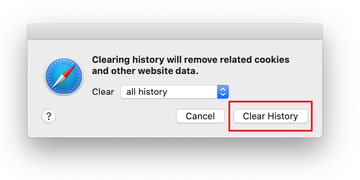
Safari will display a dialog asking you to specify the period of time this action will apply to. Select all history to ensure a maximum effect. Click on the Clear History button to confirm and exit.
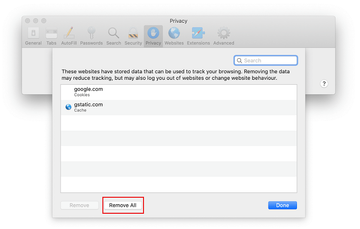
Go back to the Safari Preferences and hit the Privacy tab at the top. Find the option that says Manage Website Data and click on it.

The browser will display a follow-up screen listing the websites that have stored data about your Internet activities. This dialog additionally includes a brief description of what the removal does: you may be logged out of some services and encounter other changes of website behavior after the procedure. If you’re okay with that, go ahead and click on the Remove All button.
Restart Safari
- Remove Microsoft AutoUpdate in Google Chrome
Open Chrome, click the Customize and control Google Chrome (⁝) icon in the top right-hand part of the window, and select Settings in the drop-down
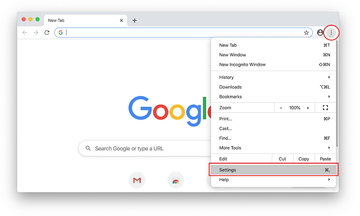
When on the Settings pane, select Advanced
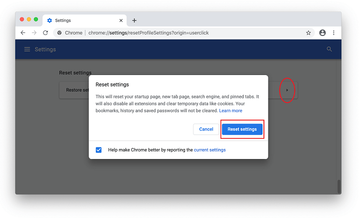
Scroll down to the Reset settings section.
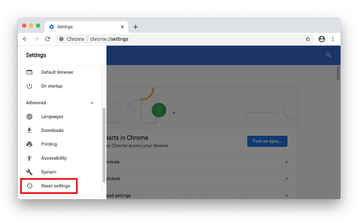
Confirm the Chrome reset on a dialog that will pop up. When the procedure is completed, relaunch the browser and check it for malware activity.
- Remove Microsoft AutoUpdate from Mozilla Firefox
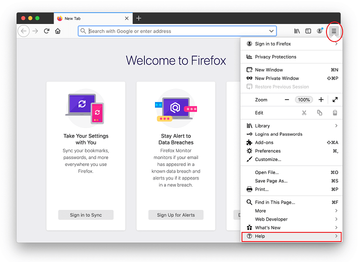
Open Firefox and go to Help – Troubleshooting Information (or type about:support in the URL bar and press Enter).
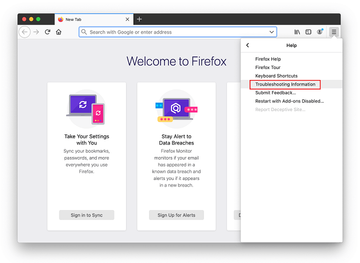
When on the Troubleshooting Information screen, click on the Refresh Firefox button.
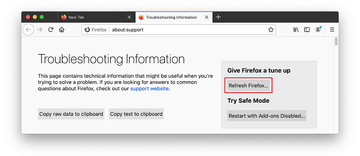
Confirm the intended changes and restart Firefox.
Use automatic tool to uninstall Microsoft AutoUpdate virus from your Mac
The Mac maintenance and security app called Combo Cleaner is a one-stop tool to detect and remove Microsoft AutoUpdate virus. This technique has substantial benefits over manual cleanup, because the utility gets hourly virus definition updates and can accurately spot even the newest Mac infections.
Furthermore, the automatic solution will find the core files of the malware deep down the system structure, which might otherwise be a challenge to locate. Here’s a walkthrough to sort out the Microsoft AutoUpdate issue using Combo Cleaner:
Download Combo Cleaner installer. When done, double-click the combocleaner.dmg file and follow the prompts to install the tool onto your Mac.
By downloading any applications recommended on this website you agree to our Terms and Conditions and Privacy Policy. The free scanner checks whether your Mac is infected. To get rid of malware, you need to purchase the Premium version of Combo Cleaner.
Open the app from your Launchpad and let it run an update of the malware signature database to make sure it can identify the latest threats.
Click the Start Combo Scan button to check your Mac for malicious activity as well as performance issues.
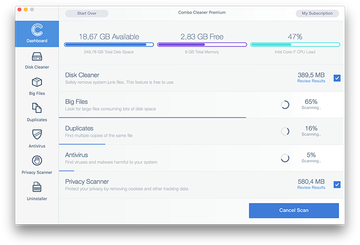
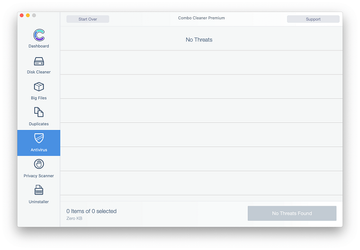
Examine the scan results. If the report says “No Threats”, then you are on the right track with the manual cleaning and can safely proceed to tidy up the web browser that may continue to act up due to the after-effects of the malware attack (see instructions above).
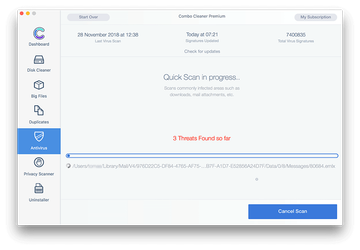
In case Combo Cleaner has detected malicious code, click the Remove Selected Items button and have the utility remove Microsoft AutoUpdate threat along with any other viruses, PUPs (potentially unwanted programs), or junk files that don’t belong on your Mac.
Once you have made doubly sure that the malicious app is uninstalled, the browser-level troubleshooting might still be on your to-do list. If your preferred browser is affected, resort to the previous section of this tutorial to revert to hassle-free web surfing.
FAQ
Where is Microsoft AutoUpdate on my Mac?
The accurate answer depends on whether you are dealing with the legit or malware-riddled variant of the updater suite. If it’s the former scenario, then you should browse to “/Library/Application Support/Microsoft” on your Mac. A handy way of doing this is to use the “Go to Folder” feature and type or paste the above path in the search box. When the directory is opened, find a folder with “MAU” string in its name – for instance, MAU2.0. Once you expand it, you will see the executable named “Microsoft AutoUpdate.app”. If you are sure you don’t need it anymore, go ahead and drag this file to the Trash. Empty the Trash folder when done.
On a side note, this operation is worth performing if the MAU application is giving you a hard time with its random popups accompanied by overly high CPU consumption. Another situation where the removal makes sense is if the Microsoft product you used to keep on your Mac (such as Office 365, Project, or Visio) has been uninstalled but the AutoUpdate tool hasn’t been deleted for some reason and keeps running regardless.
In the event the irritating notifications are splashing up because of malware activity, the file path and removal logic tend to be different. To get rid of the culprit, follow the steps provided in this article (see the guide above). In a nutshell, you should additionally examine the Applications folder and the Login Items to spot the traces of the unwelcome entity. Note that its name may suggest no obvious association with MAU (Microsoft AutoUpdate).
Is Microsoft AutoUpdate on Mac a virus?
Not necessarily. It could be a legitimate element of a Microsoft software suite you have been using. Also, chances are it’s a leftover component of different versions of Office 365, Project, or Visio solution that hasn’t been automatically eradicated as part of the removal of the underlying software. And yes, the valid edition of Microsoft AutoUpdate might cause issues outlined in this tutorial – due to a glitch or some other misconfiguration predicament.
The malicious counterpart of MAU may try to defraud Mac users of their sensitive data under the guise of the genuine app. The symptoms can be similar, except that the “Learn More” or “OK” button leads to a phishing page rather than the appropriate Microsoft knowledge base. If this is the case, a security procedure aimed at thorough Mac cleanup is strongly recommended.
