Uninstall Mac Space Reviver from Mac to get rid of popup alerts and misleading scan reports aimed at duping users into purchasing the rogue app’s license.
At first sight, Mac Space Reviver seems to be a garden-variety system optimization tool. It claims to recover drive space by finding and trashing duplicate files on a Mac. So far so good – a lot of users will sure find this type of functionality handy. Whey then has this application been so heavily discussed on various security forums for the last few years? It’s because of the shady distribution tactic employed by its authors, some likely ties with notorious scareware, as well as excessively obtrusive behavior when on a computer. Going to a dedicated official landing page and installing Mac Space Reviver is a rare scenario. Instead, people catch it via a drive-by bundling hype while thinking they are installing something different.

Bundles of that sort will typically include the PUP (potentially unwanted program) in question that’s overshadowed by a catchy free utility, such as a movie downloader or format converter. If the user opts for default setup, they will install both without suspecting the presence of the obfuscated extra. In light of this, just a quick tip: always select the custom install option to at least peek what’s under the setup client’s umbrella. This way, it’s easy to deselect whatever doesn’t belong on the Mac and steer clear of malvertising issues.
Another technique for Mac Space Reviver to make the rounds is via promotion by affiliated scareware programs, including Advanced Mac Cleaner or Mac File Opener. When one of these culprits ends up inside a computer, it will do its own brainwashing job while also displaying popups that read, “Need more hard disk space on this Mac? Install Mac Space Reviver now to scan your Mac for free & identify duplicate files.” These annoying dialogs can show up in Safari or simply splash in the middle of the screen, insisting that the victim click the Install Now button. Once this takes place, things will continue to get out of hand big time.
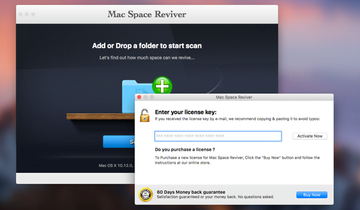
Haven taken root in the host, Mac Space Reviver will run a scan and shortly display results crammed up with duplicate objects that it has allegedly spotted. Although most of those items aren’t actually duplicated, the misleading tool will state it can recover hundreds of megabytes of disk space by deleting those pseudo-redundant ones. The pest will also start generating bogus warning notifications that emphasize how critical the drive memory condition is and how badly the user needs to unlock its full feature set so that the issues are sorted out. That’s the whole point and gist of Mac Space Reviver – to trick and annoy users into purchasing its license. The methods for achieving this goal are far from ethical. No matter how you slice it, this app is a nuisance and it should be uninstalled from infected Mac as soon as possible.
Mac Space Reviver virus manual removal for Mac
The steps listed below will walk you through the removal of this potentially unwanted application. Be sure to follow the instructions in the order specified.
• Open up the Utilities folder as shown below
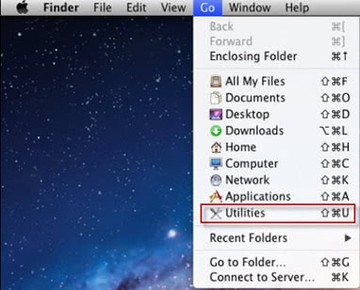
• Locate the Activity Monitor icon on the screen and double-click on it
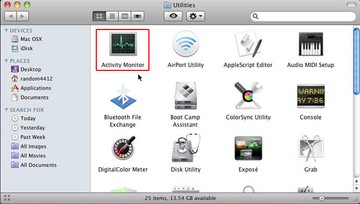
• Under Activity Monitor, find the entry for Mac Space Reviver, select it and click Quit Process
• A dialog should pop up, asking if you are sure you would like to quit the Mac Space Reviver executable. Select the Force Quit option
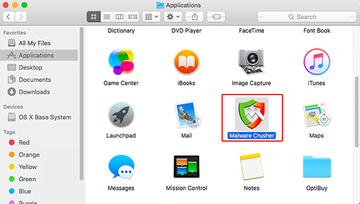
• Click the Go button again, but this time select Applications on the list. Find the entry for Mac Space Reviver on the interface, right-click on it and select Move to Trash. If user password is required, go ahead and enter it
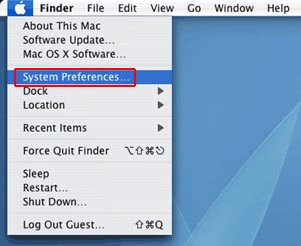
• Now go to Apple Menu and pick the System Preferences option
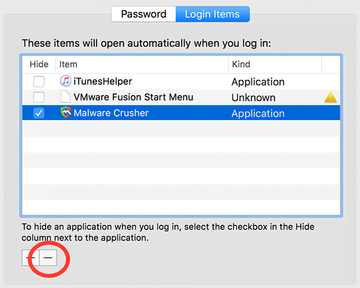
• Select Accounts and click the Login Items button. The system will come up with the list of the items that launch when the box is started up. Locate Mac Space Reviver there and click on the “-“ button
Use automatic tool to uninstall Mac Space Reviver malware from your Mac
Unless you are a power user, you run the risk of failing to find and delete some components of this infection on your own. Overlooking dodgy LaunchAgents, LaunchDaemons, and malicious configuration profiles means that the threat will continue to cause problems. A more efficient alternative to manual cleanup is to use MacBooster 8, an application that will scan your Mac for issues and fix them automatically.
The app comes with a competitive toolkit that includes Virus & Malware Scan as well as a decent range of optimization features. Therefore, not only does it identify and vanquish mainstream Mac viruses but it also releases disk space and memory so that your computer gets a performance tune-up. Here’s how to go the route of Mac Space Reviver malware removal with MacBooster:
Download and install MacBooster 8.
By downloading any applications recommended on this website you agree to our Terms and Conditions and Privacy Policy. The free scanner checks whether your Mac is infected. To get rid of malware, you need to purchase the Pro version of MacBooster.
Open the app. When on the System Status screen, click the Scan button to check your Mac for viruses, junk files, and memory hogs.
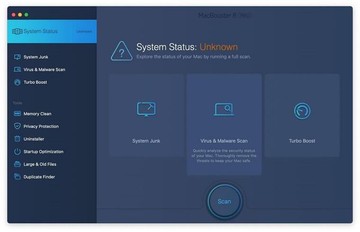
Once the scan is completed, inspect the report to see what security threats and performance issues have been found. To get rid of the detected items, click the Fix button at the bottom.
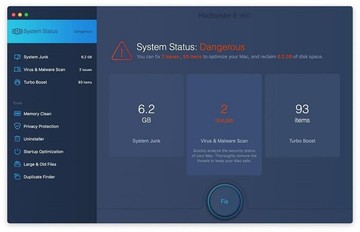
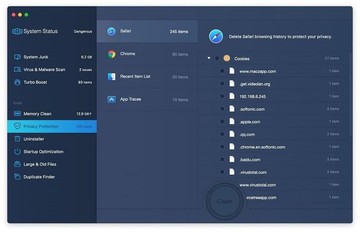
As an extra step, you might want to make sure that the Mac Space Reviver malware infection leftovers are no longer riddling your web browser. This can be the case in an adware scenario. Proceed to the Privacy Protection feature in the left-hand sidebar, select the default browser in the list, and click the Clean button.
In case your web browser is still acting up, follow the steps provided in the previous section of this guide to get rid of the adverse web surfing interference for good.
