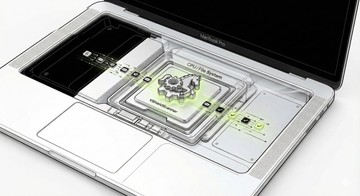
What is VShieldScanner and why does it hog your Mac’s memory?
On the face of it, VShieldScanner is just another background service in the grand machinery of macOS and third-party tools. In practice, it is the workhorse behind McAfee’s real-time protection on a Mac. Whenever you open, create, modify, download, or copy a file, this engine jumps in, intercepts the operation, and scans the content against McAfee’s signatures and behavioral rules. It also powers scheduled and on-demand scans and applies whatever policy your McAfee agent or corporate admin has pushed down.
That always-on behavior explains why you see it in Activity Monitor even when you are not doing anything “special”. The moment a high-churn workload appears, though, the daemon can slip into overkill mode. Think about large Git checkouts, node_modules forests, Xcode build trees, Docker images, VM disks, or a big iCloud/OneDrive/Dropbox sync. All of these are essentially massive piles of small files, and VShieldScanner tries to inspect each one as it is touched.

Memory spikes often show up alongside CPU and disk I/O. The process keeps scanning state, file metadata, caches, and possibly archive unpacking buffers in RAM, which can balloon when there is a lot to analyze at once. These surges can be accompanied by “Your computer is low on memory” alerts that throw an extra spanner in the works. On Apple Silicon and recent macOS versions, the underlying McAfee engine has migrated from older kernel extensions to system extensions and user-space services; while this is the right direction security-wise, it can temporarily increase CPU and memory overhead during cache rebuilds and re-indexing after upgrades.
There is also a “normal but annoying” pattern worth keeping in mind. After a fresh install or a major definition/product update, McAfee may decide it needs to re-scan a good chunk of your disk under the hood. During that period, VShieldScanner tends to stay glued to the top of the Activity Monitor list and gulp extra RAM. On laptops, this translates into fan noise and battery drain until the operation completes. The good news is that this behavior should be temporary, not a 24/7 condition.
VShieldScanner - Quick profile
| Property | Details |
|---|---|
| Process name | VShieldScanner |
| Category | Legitimate security daemon, potential resource hog |
| Component of | McAfee security products for macOS (Endpoint Security, VirusScan, enterprise McAfee Agent) |
| Role | On-access and on-demand scanning engine that hooks file operations, scans downloads, archives, network shares, and enforces policy |
| Typical trigger for spikes | First-run or post-update re-scan, large on-demand/scheduled scan, developer builds (Xcode, Node), cloud sync and backup tools touching many files, scanning of network volumes or Time Machine backups |
| Symptoms | High memory footprint, one or more cores pegged, heavy disk I/O, fans spinning, sluggish Finder and IDEs, Docker/VM stutter, battery drain |
| Legitimacy | Safe and expected on systems where McAfee is installed; not malware |
| Severity | Medium; performance impact can be serious but usually fixable with tuning |
| Recommended action | Confirm it is the real McAfee process, then adjust McAfee settings and exclusions, reschedule scans, and work with IT if it is a managed endpoint |
First checks: make sure it is normal, not something nastier
Before you start tearing apart settings or uninstalling anything, it is worth doing a quick sanity check.
Confirm the process looks legit
- Open Applications > Utilities > Activity Monitor.
- Switch to the Memory tab and locate
VShieldScanner. - Check the Path field (View > Columns > Kind / Process ID / etc., then double-click the process). It should sit under a McAfee installation folder such as
/Library/McAfee/or a similar vendor path, and the parent process is usually a McAfee agent or service, not a random app with a sketchy name. - If you see multiple similar-looking processes in odd locations, or you are not sure the McAfee install is clean, run an extra scan with a reputable anti-malware tool to rule out piggybacking adware or trojans.
Note when the spike happens
- Right after you log in?
- When a scheduled scan kicks in?
- During big builds, zip extractions, Time Machine runs, or cloud sync surges?
- Correlating the spike with an activity will help you apply targeted exclusions or scheduling tweaks instead of random guesswork.
Check whether it settles down
- If VShieldScanner only goes wild for 10–20 minutes after a reboot, install, or major update, you may simply be looking at a “one-time” or periodic re-index. In that case, letting it finish while your Mac is plugged in is usually the least painful option.
If the process sits at the top of both CPU and Memory tabs all day long and makes your Mac practically unusable, it is time to tune things.
How to reduce VShieldScanner high RAM and CPU usage on Mac
1. Update both macOS and McAfee
Compatibility glitches can make a scanning engine work harder than it should.
- Update macOS
- Go to Apple menu > System Settings > General > Software Update.
- Install any pending macOS updates and security patches, then reboot.

- Update McAfee
- Open your McAfee console (for example, McAfee Endpoint Security for Mac or VirusScan Console).
- Look for an Update, Check for Updates, or About section and ensure the engine and definitions are current.
- On managed machines, the McAfee Agent may pull updates from your company’s server; if you suspect it is stuck, contact IT and mention the VShieldScanner symptoms.
If a known bug was causing runaway scans, the latest build is often the cure.
2. Adjust real-time scan aggressiveness (where allowed)
On many builds, McAfee lets you control how aggressive on-access scanning is. On enterprise systems some of this is locked by policy, but it is still worth checking.
Open the McAfee app from Applications or the menu bar icon.
Navigate to the Real-Time Scanning, On-Access Scanner, or Threat Prevention section.
Look for options such as:
- Scan on read and write vs scan on write only
- Heuristic level or scan sensitivity
- Scan network volumes
- Scan archives or scan compressed files fully
To reduce impact:
- If permitted, set scanning to write only for performance-critical paths, so McAfee checks new and modified files but not every read.
- Disable or relax deep archive scanning if you constantly unpack huge archives as part of your work.
- Turn off scanning of mounted network volumes and backup disks if your policy allows it; these are prime suspects for constant background churn.
Apply changes and monitor Activity Monitor for 15–20 minutes under a typical workload.

If the options you need are grayed out, your Mac is centrally managed and you will have to ask your admin to adjust the policy instead of forcing local workarounds.
3. Create sensible exclusions for heavy workflows
This is where most developer and power-user complaints live: McAfee tries to scan every single build artifact, cache file, and temporary object. The trick is to exclude noisy but low-risk locations without punching giant holes in your defenses.
In the McAfee console, find Exclusions, Exceptions, or On-Access Scan Exclusions. Then:
Good candidates to exclude (examples, adapt to your setup):
Developer/build directories
Your main project repos and build trees, for example:~/Projects/<your-project>/build~/Library/Developer/Xcode/DerivedData~/Projects/<your-project>/node_modules
Container and VM images
- Local folders where Docker or other container engines store images and volumes.
- Virtual machine bundles (
*.vmwarevm,*.parallels, etc.) that are already isolated and can be scanned separately on schedule.
Backup and sync caches
- Time Machine backup destination volumes.
- Large local caches used by iCloud Drive, OneDrive, Dropbox, Box, or other sync clients, especially if you see VShieldScanner spike every time those tools churn.
What not to exclude:
- Your whole home folder, /Applications, /Library, or system paths such as /System.
- Download folders and email attachments, which are high-risk entry points.
Once added, save the exclusions, then repeat the activity that normally triggers the spike (for example, an Xcode build or a npm install) and watch Activity Monitor. In many cases, this alone drops VShieldScanner from “resource hog” to “barely noticeable”.
4. Tame scheduled and on-demand scans
A full-disk scan running in the background while you are compiling, syncing, and backing up is a recipe for misery.
- Open your McAfee console and locate Scheduled scans.

Review existing jobs and:
- Move heavy scans to off-hours, for example overnight when the Mac is plugged in.
- Avoid overlapping multiple McAfee tasks (for instance, a full scan starting while another one is still running).
- If your device often sleeps at night, consider setting scans to run during a predictable idle window, such as lunch breaks, and tick any “run missed scan at next opportunity” options responsibly.
For manual scans:
- When you scan a folder from Finder’s context menu, avoid choosing top-level locations like your entire startup disk unless necessary.
- Scan specific download folders, external drives, or project directories instead.
If you are on a corporate build where schedules come from the server, IT may need to adjust them for development machines, CI runners, or Macs connected to massive network shares.
5. Deal with “stuck” or runaway VShieldScanner instances
Sometimes the engine simply gets stuck on a corrupt file, weird archive, or broken cache.
Try the following in order:
- Soft reset
- Quit any app that is hammering the file system (IDEs, sync tools, backup apps).
- In Activity Monitor, select VShieldScanner, click the X button, and choose Quit.
- If it respawns immediately and keeps misbehaving, repeat and choose Force Quit once, then wait for McAfee to restart it cleanly.
- Restart McAfee services
- Use the McAfee menu bar icon to disable and then re-enable real-time scanning, or quit and relaunch the main console.
- On some editions, you may need to reboot the Mac to fully reset the system extension and associated daemons.
- Reinstall or repair McAfee
- If the issue started after a failed update or migration between macOS versions, a clean reinstall of the McAfee client can refresh corrupted components.
- Use the official McAfee uninstaller if provided, then install the latest package from your vendor or IT portal.
If VShieldScanner immediately returns to 100% CPU and multi-gigabyte RAM usage on a clean boot with nothing heavy running, grab screenshots and logs and escalate to McAfee support or your internal security team.
6. Special case: enterprise-managed Macs
If your Mac is controlled by a company profile and you see messages like “Managed by your organization” in various places, chances are your McAfee configuration is centrally enforced.
In that scenario:
- Do not attempt to bypass or disable protection; it may violate policy and, more importantly, put sensitive data at risk.
- Document the issue clearly:
- Activity Monitor screenshots showing VShieldScanner’s RAM and CPU usage.
- A short note on what you were doing (for example, “pulling a 20 GB repo, running Xcode build, OneDrive sync active”).
- Approximate duration and how often it happens.
- Send this information to your IT or security team and ask whether:
- Developer-specific or “high-churn” policies with tailored exclusions exist.
- Network share and Time Machine locations can be excluded from on-access scanning and covered by scheduled scans instead.
Most organizations that rely on McAfee have already encountered these complaints, so you might simply need to be moved to a more appropriate policy group.
After you fix it: keeping your Mac fast and protected
Once you have VShieldScanner back under control, it is worth spending a few minutes on long-term hygiene so the problem does not resurface every other week.
- Keep everything up to date
Regularly install macOS updates and McAfee engine/definition updates to benefit from performance and compatibility fixes. - Review exclusions once in a while
As your workflows change, old projects can be removed from the exclusion list and new heavy directories can be added, so the scanner is not wasting cycles on obsolete data. - Avoid stacking multiple AV products
Running more than one full-blown antivirus on the same Mac is a classic way to double the scanning load. Stick to one reputable solution unless your IT department explicitly says otherwise. - Watch for malware when symptoms look “off”
While VShieldScanner is legitimate, truly abnormal behavior such as random pop-ups, rogue browser redirects, or unknown processes appearing alongside it may indicate separate malware. In that case, running an additional on-demand scan with a trustworthy Mac security tool is a sensible extra precaution. - Back up regularly
Performance issues are annoying, but data loss is worse. Make sure Time Machine or another backup system is working properly, even if you have to adjust scanning to avoid hammering the backup volume in real time.
FAQ
1. Is it safe to kill VShieldScanner in Activity Monitor?
Yes, briefly. Terminating it once is safe, and McAfee will usually restart the process automatically. Just do not rely on force-quitting it as a permanent “fix”, because that undermines your real-time protection.
2. Can I uninstall McAfee to stop the spikes?
On a personal Mac, you can, and macOS will still have its own built-in defenses. On a corporate Mac, uninstalling it without approval is rarely allowed. In either case, make sure you have another protection layer in place before removing McAfee.
3. Are high RAM and CPU usage always a sign of a problem?
Not necessarily. Short-term spikes during full scans, first-run indexing, or big file operations are normal. It only becomes a real problem when VShieldScanner hogs resources for hours on end during routine work, with no sign of settling down.
If you go through the steps above and the daemon still drags your Mac down day after day, loop in McAfee support or your IT team. That way, you keep both performance and security where they should be, without turning your daily workflow into a stress test.