What is searchpartyd on Mac?
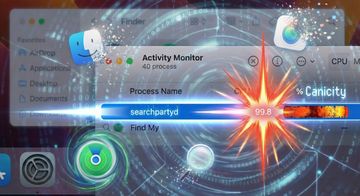
If you open Activity Monitor and notice a process called searchpartyd chewing through CPU, it’s tempting to assume the worst. In reality, this name usually belongs to a legitimate Apple component rather than a parasite.
Under the hood, searchpartyd is tied to Apple’s Search Party framework – the technology behind offline finding in the Find My network. In plain English, this is the system that helps Apple devices participate in the crowd-sourced location grid, even when some of them are offline.
| Threat Profile | |
|---|---|
| Name | searchpartyd high CPU problem |
| Category | Resource hog, macOS background service, occasionally misattributed to Mac malware |
| Related process | searchpartyuseragent, locationd, bluetoothd, WindowServer, mds, kernel_task |
| Symptoms | Fans ramping up, Mac running hot, battery draining quickly, noticeable lag, Activity Monitor showing searchpartyd near the top of the CPU list, sometimes above 100% on multi-core systems |
| Common triggers | Intensive Find My / “offline finding” activity, Bluetooth and location scanning, iCloud glitches, system upgrades (for example, Ventura → Sonoma), third-party security software or firewalls interfering with Apple services |
| Severity | Low to medium (performance impact, usually no direct data loss) |
| Damage | Performance degradation, throttling, shortened battery life, perception that the system is compromised |
| Removal/fix | Adjust Find My and location settings, tame Bluetooth, restart or reset the process, check for suspicious LaunchAgents, and optionally run a dedicated cleanup tool if you suspect adware using a look-alike name |
In practice, that means:
- It works with Find My Mac, AirTags, and other compatible devices.
- It relies on Bluetooth, Wi-Fi, and sometimes location services to detect and report nearby devices in a privacy-preserving way.
- It communicates with Apple’s servers to sync cryptographic keys and location updates for your own hardware as well as for devices you act as a “finder” for.

On a healthy system, searchpartyd runs quietly in the background and only spikes CPU for short bursts when it’s scanning, syncing, or processing a batch of location-related tasks. Most of the time, you’d never notice it.
That said, things sometimes get weird. After a macOS upgrade or a configuration change, the process may start staying at the top of Activity Monitor instead of visiting it briefly. This is where it crosses the line from benign helper to nuisance.
Is searchpartyd a virus?
Short answer: normally, no. When the searchpartyd process is located at the system path /usr/libexec/searchpartyd, it’s a native part of macOS. In that form, it’s not adware, a browser hijacker, or a Trojan – just another background service involved in device discovery.

However, there are two caveats worth keeping in mind.
- Misleading “virus” claims
Various low-quality security pages now brand SearchPartyd as a Mac hijacker allegedly injecting ads into web pages. In many cases they simply piggyback on user confusion around the legitimate process, using the name as a hook to promote questionable “cleaning” software. - Look-alike components
In theory, a potentially unwanted application (PUA) could register a LaunchAgent or app with a similar-looking name to blend in. In that scenario:- The path would be different (under
/Library/LaunchAgents,/Library/LaunchDaemons, or~/Library/Application Supportrather than/usr/libexec). - You’d likely see additional symptoms such as browser redirects, injected ads, or unknown extensions.
- The path would be different (under
If searchpartyd sits exactly where it should and your sole issue is CPU usage, you’re almost certainly dealing with a misbehaving Apple service, not a classic infection. If you also observe browser takeover, unwanted ads, or strange login items, it’s reasonable to suspect a PUA riding along under a similar label.
Why searchpartyd can hog CPU and battery
From a broader perspective, searchpartyd is a coordination point for several subsystems: Find My, Bluetooth scanning, location services, and iCloud. If anything in that chain misbehaves, CPU usage can spike and stay elevated. Common scenarios include:
- Heavy Find My / offline finding activity
- A large set of devices attached to your Apple ID.
- Frequent movement of your Mac (or other devices) triggering constant updates.
- The Mac being left awake for long periods, so searchpartyd never gets a true idle window.
- Bluetooth and proximity scanning loops
- Multiple nearby Bluetooth accessories and AirTags.
- Glitches where the service repeatedly tries to communicate with unreachable or misconfigured devices.
- iCloud / Find My sync issues
- Corrupted local cache or conflicting data for your Apple ID.
- Problems after signing in or out of iCloud, or toggling Find My options.
- Post-upgrade anomalies
- Resource spikes that begin after a major macOS update and persist across reboots until something is reset manually.
- Third-party interference
- Aggressive firewalls or “hardening” tools blocking Apple daemons.
- Overzealous security suites filtering network traffic for system processes.
- Adware or PUA overlap (less common)
- If you see “SearchPartyd” mentioned alongside browser redirects and invasive ads, there may be a separate hijacker leveraging that branding rather than the built-in daemon itself.
First steps to diagnose the issue
Before you start flipping switches and deleting files, it helps to confirm what exactly you’re dealing with.
1. Confirm the process and its path
- Open Applications → Utilities → Activity Monitor.
- Switch to the CPU tab and locate searchpartyd.
- Select it and use View → Sample Process or File → Open Files and Ports to inspect the executable path.
If you see /usr/libexec/searchpartyd, you’re looking at the built-in Apple daemon. Anything that lives outside standard system directories deserves extra scrutiny.

2. Reboot and observe behavior
A simple restart still fixes a surprising number of high-CPU anomalies:
- Restart your Mac normally.
- After logging in, open Activity Monitor again.
- Watch searchpartyd for several minutes.
Brief spikes are normal. Constant 70–150% CPU on a multi-core system is not. If the process calms down after a reboot and stays that way, you may not need more intrusive measures.
3. Use Safe Mode as a sanity check
If you’re comfortable with a bit of troubleshooting, boot into Safe Mode:
- On Apple silicon: hold the power button until startup options appear, then pick your disk while holding Shift.
- On Intel: restart and hold Shift immediately after the startup chime.
In Safe Mode, only essential system components and limited third-party items load. If searchpartyd behaves normally there but spikes in a standard boot, third-party software is likely involved.
How to fix searchpartyd high CPU on Mac
With basics out of the way, let’s move on to actual remediation. The steps below go from least intrusive to more advanced.
1. Force quit searchpartyd so that it restarts clean
This is the quickest, lowest-risk action and often enough on its own.
- Go to Activity Monitor → CPU tab.
- Select searchpartyd in the list.
- Click the “X” button in the toolbar and choose Force Quit.

The process will respawn automatically. If the problem was a transient glitch or stuck task, CPU use may drop back to negligible levels. If it immediately jumps back to 100% and stays there, continue with the next steps.
2. Temporarily disable Find My Mac and offline finding
Because searchpartyd is closely coupled with Find My and the offline finding network, turning these features off is a good diagnostic move.
On macOS Sonoma and newer:
- Open System Settings.
- Click your Apple ID at the top and go to iCloud.
- Locate Find My Mac and click Options (or a similar button).
- Turn off Find My Mac and, if available separately, the Find My network / offline finding toggle.
- Restart your Mac and monitor searchpartyd in Activity Monitor.

If CPU usage suddenly returns to normal, you’ve confirmed that the high load is directly tied to Find My. You can later try re-enabling it to see whether the issue comes back or whether it was just a one-off glitch.
3. Tidy up Bluetooth and nearby devices
Since offline finding piggybacks on Bluetooth, a noisy radio environment or problematic accessory can cause persistent scanning.
Try the following:
- Toggle Bluetooth off from the menu bar and keep it off for a few minutes while watching searchpartyd in Activity Monitor.
- If CPU usage drops sharply, turn Bluetooth back on and:
- Remove accessories you no longer use from the Bluetooth list.
- Re-pair devices that behave erratically or frequently disconnect.
- If possible, temporarily switch critical peripherals (keyboard, mouse) to wired mode and keep Bluetooth disabled for a longer test period.
This isn’t always convenient, but it’s a practical way to see whether nearby hardware is part of the problem.
4. Reset Location Services and related permissions
Glitched privacy settings can cause location-aware services to loop. To reset things in a controlled way:
- Open System Settings → Privacy & Security → Location Services.
- Make sure the Location Services option is enabled overall.
- Scroll down to System Services and expand it.
- Temporarily disable location access for Find My and any other closely related entries.
- Restart your Mac, then re-enable those items one by one while watching searchpartyd CPU usage.

If you prefer a more drastic test, you can disable Location Services entirely for a short time – just remember that this will affect Maps, Weather, and other apps that rely on your position.
5. Sign out of iCloud and sign back in
When CPU spikes clearly correlate with iCloud activity, a fresh sign-in can clear corrupted tokens or stuck sync operations.
- Go to System Settings → Apple ID.
- Click Sign Out, review the options to keep a copy of your data locally, and confirm.
- Restart your Mac.
- Sign back in with your Apple ID and let syncing complete.
Expect some temporary load while iCloud resyncs. If searchpartyd remains at extreme percentages long after everything else has settled, you may be dealing with a deeper configuration problem.
6. Check Login Items, LaunchAgents, and Profiles for impostors
If you see broader symptoms beyond searchpartyd, such as browser home page reset to an unfamiliar site, search results polluted with extra ads, or new toolbars or extensions you never installed, then it’s time to look for a PUA masquerading as a helper.
Work through these areas:
- Login Items
- Open System Settings → General → Login Items.
- Remove entries you don’t recognize or no longer need, especially anything with “search” or “helper” in the name that doesn’t clearly belong to trusted software.

- Configuration Profiles
- In System Settings, go to Privacy & Security and look for Profiles.
- Remove profiles you didn’t create or that appear to manage browser settings, proxies, or “security” features without a clear reason.

- LaunchAgents & LaunchDaemons
- In Finder, use Go → Go to Folder… and review:
/Library/LaunchAgents/Library/LaunchDaemons~/Library/LaunchAgents
- Look for suspicious
.plistfiles that reference unknown apps, random strings, or search-themed components that don’t obviously belong to Apple or reputable software.
- In Finder, use Go → Go to Folder… and review:

If you find anything questionable, move it to a quarantine folder such as a dedicated folder on your Desktop instead of deleting it outright, then restart your Mac and see whether symptoms improve.
How to prevent searchpartyd-related slowdowns going forward
Once your Mac is back to normal, a few adjustments will reduce the likelihood of searchpartyd becoming a recurring problem.
- Keep macOS up to date
Apple continuously refines background services like Find My and the Search Party framework. Installing system updates promptly means you benefit from bug fixes that specifically target stability and performance, even if they’re not called out in release notes. - Avoid shady “searchpartyd remover” tools
Alarmist pages claiming that searchpartyd is definitely a virus and pushing unverified cleaners are more dangerous than the process itself. Stick to known-good utilities and the Mac App Store where possible. - Manage Bluetooth and location sensibly
- Unpair accessories you don’t actually use.
- Avoid clustering dozens of AirTags and Bluetooth devices around a single Mac if you’re seeing recurring issues.
- Periodically review Location Services and disable access for apps that don’t legitimately need your location.
- Watch for broader adware symptoms
Treat sudden changes in browser defaults, new “search” pages, or intrusive pop-ups as signs that something beyond searchpartyd is going on. Promptly running a malware scan can prevent a minor annoyance from turning into a persistent hijack. - Be careful with aggressive security tweaks
Blocking Apple daemons in a firewall or tinkering with low-level privacy settings can have side effects that are hard to debug. Unless you’re comfortable reading logs and tracking down collateral damage, it’s safer to let core system services communicate with Apple infrastructure as designed.
Keep searchpartyd under control
From a security standpoint, searchpartyd is not the enemy. It’s a legitimate background component that occasionally ends up in the spotlight when something in the Find My or location ecosystem misfires. The symptoms, however, can be disruptive: loud fans, sluggish performance, and a Mac that runs hot for no obvious reason.
The practical way forward is straightforward:
- Confirm that you’re dealing with the genuine system daemon,
- Restart or force-quit it to clear transient glitches,
- Adjust Find My, Bluetooth, and Location Services when resource usage stays high,
- Resolve any underlying iCloud issues, and
- Sweep for impostors if you see classic adware behavior alongside the CPU spikes.
If you don’t want to spend time in system folders, a trusted security tool can shoulder most of the heavy lifting and highlight anything malicious hiding behind a familiar-sounding name. With those bases covered, searchpartyd should return to what it was meant to be: a quiet, unremarkable background helper you never have to think about.
FAQ
1. What is searchpartyd on my Mac and why is it running?
searchpartyd is an Apple system daemon associated with the Search Party framework and the Find My network. It helps your Mac participate in offline finding and device discovery by using Bluetooth, Wi-Fi, and location data in a privacy-preserving way. It runs in the background by design and normally consumes very little CPU.
#
2. Is searchpartyd a virus or malware?
No. When located at /usr/libexec/searchpartyd, it’s a legitimate part of macOS, not a virus. Confusion arises because some low-quality “virus removal” sites misuse the name, and because adware can in theory register look-alike components. If you also see browser redirects, injected ads, or strange login items, you may be dealing with a separate PUA that merely mimics system naming conventions.
#
3. Is it safe to force-quit searchpartyd from Activity Monitor?
Yes, force-quitting searchpartyd is generally safe. The system will automatically relaunch the process. This can clear a stuck task or temporary glitch that’s causing high CPU usage. If the process immediately jumps back to the top of the CPU list and stays there, use the other troubleshooting steps in this guide.
#
4. Can I disable searchpartyd permanently?
There is no supported, user-facing switch to disable searchpartyd permanently without also affecting Find My and related services. You can significantly reduce its activity by turning off Find My Mac, disabling Find My network / offline finding, and reducing Bluetooth and location use. Completely removing or blocking the daemon is not recommended and may break system functionality.
#
5. Why did searchpartyd start using so much CPU after a macOS update?
Major macOS updates can change how background services behave, trigger re-indexing, or reset parts of the Find My and iCloud stack. In some cases, this leads to short-term spikes as searchpartyd processes new data. If high CPU usage continues long after the update, it usually indicates a lingering sync glitch, a misbehaving device in your environment, or – less often – interference from third-party software. Following the manual fixes in this article typically resolves the issue.