This article explains the logic of ‘Your iPhone has been hacked’ scam campaign and provides steps to remove this pop-up ad from an affected Apple device.
What is ‘Your iPhone has been hacked’ scam?
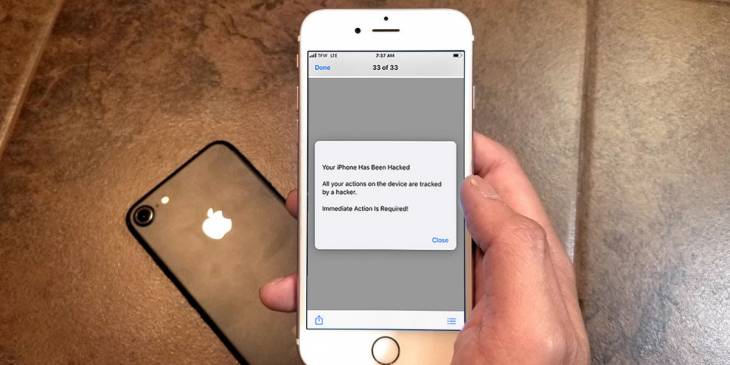
Although there are different shades of hacking that run the gamut from ethical and jailbreak-type to black hat and government-funded attacks, this term instills fear in most users regardless of the implications. With this in mind, some cybercriminal gangs boil their fraudulent activities down to a pseudo-hacking theme in an attempt to increase the success rate of getting people on the hook. This is the case with a social engineering wave that involves deceptive popup alerts to dupe Apple fans into making bad decisions. This message is generated by a dubious web page and says,
“Your iPhone has been hacked. All your actions on the device are tracked by a hacker. Immediate action is required!”
The source of this misleading notification can be twofold. It’s usually a series ofad scripts running on a malicious site created by malicious actors. However, in some scenarios the fraud is fueled by a takeover of a legitimate website through vulnerable plugins or weak, and hence easily crackable passwords used by webmasters. At the time of writing, there are a handful of dodgy and previously breached pages serving these popup ads to all visitors.

The purpose of “Your iPhone has been hacked” fake alerts
The operators of this scam seek to take advantage of the primary infection to deposit second-stage payloads onto unsuspecting people’s devices. Although the user interaction facet of different variants of this popup is isolated to the “Close” or “OK” button, tapping or clicking on it doesn’t do what is expected. Instead, it opens an additional tab in Safari, Google Chrome, or Mozilla Firefox, that displays a follow-up warning about dozens of viruses supposedly found in the system. If this phony page is closed, the relief won’t last: the browser hijacker that’s already inside the system will be circling back to its manipulative brainwashing method over and over. The potentially unwanted applications (PUAs) promoted this way include adware, Trojans, info-stealing threats, fake system maintenance tools, and screen lockers.
Who is at risk?
Although the wording of “Your iPhone has been hacked” popup suggests that the range of targeted devices is entirely in the iOS area, computers running macOS are potentially susceptible to the same exploitation, too. Therefore, in addition to the iPhone or iPad, the issue can make itself felt on MacBook Air and MacBook Pro laptops, as well as iMac and Mac Pro machines. Obviously, it doesn’t make a whole lot of sense, and yet the increased interoperability between different Apple products, plus a good deal of shared features across mobile and desktop ecosystems, makes this scam cross-platform. Another consideration is that the alert originates from a sketchy website that can just as well be visited from a computer. No matter what device is hit, the underlying principle of the attack is all about a piece of malware that sneaks in and modifies the settings of the victim’s default browser. This tampering entails incessant redirects that lead to a site hosting the spoofed warning.
Dealing with “Your iPhone has been hacked” pop-up ad virus: dos and don’ts
First things first, keep in mind that your device hasn’t been hacked for real. This is a stubborn fake popup triggered by a harmful site or a PUA that slithered its way into your system. Secondly, installing any apps pushed by this alert and the subsequent related web pages is not a good idea. This campaign is all about pressuring users into authorizing the infiltration of extra threats. So, ignoring the information on this ad is half the battle. It won’t stop deluging the device on its own, though, and therefore malware cleaning is on a victim’s to-do list. The following sections include point-by-point instructions to sort out the problem on an iOS and a macOS device.
“Your iPhone has been hacked” message manual removal for iOS (iPhone, iPad)
As per the anatomy of this hijack, settings of the web browser that may have gotten hit by the virus should be restored to their default values. The steps for performing this procedure are as follows:
- Safari troubleshooting on iPhone / iPad
- Go to Settings and select Safari on the menu.
- Tap the Clear History and Website Data option.

- Confirm by tapping Clear History and Data. Check if the problem with Safari has been fixed. In the event the iPhone / iPad virus popups are still there, proceed to the next step.
- When on the Safari Settings screen, tap Advanced. Find the JavaScript entry there and toggle it off. This should solve the problem.
- Reset Google Chrome on iOS device (iPhone / iPad)
- Open Chrome browser, go to Settings and select the Privacy entry. Then, tap Clear Browsing Data.
- As the menu expands, make sure the following options are checked: Browsing History; Cookies, Site Data; and Cached Images and Files. Now, tap Clear Browsing Data and confirm before exiting. The popup and redirect activity should now stop in Chrome.
- Open Chrome browser, go to Settings and select the Privacy entry. Then, tap Clear Browsing Data.


“Your iPhone has been hacked” pop-up ad manual removal for Mac
The steps listed below will walk you through the removal of this malicious application. Be sure to follow the instructions in the specified order.
- Expand the Go menu in your Mac’s Finder bar and select Utilities as shown below.
- Locate the Activity Monitor icon on the Utilities screen and double-click on it.
- In the Activity Monitor app, look for a process that appears suspicious. To narrow down your search, focus on unfamiliar resource-intensive entries on the list. Keep in mind that its name isn’t necessarily related to the way the threat is manifesting itself, so you’ll need to trust your own judgement. If you pinpoint the culprit, select it and click on the Stop icon in the upper left-hand corner of the screen.
- When a follow-up dialog pops up asking if you are sure you want to quit the troublemaking process, select the Force Quit option.
- Click on the Go menu icon in the Finder again and select Go to Folder. You can as well use the Command-Shift-G keyboard shortcut.
- Type /Library/LaunchAgents in the folder search dialog and click on the Go button.
- Examine the contents of the LaunchAgents folder for dubious-looking items. Be advised that the names of files spawned by malware may give no clear clues that they are malicious, so you should look for recently added entities that appear to deviate from the norm.
As an illustration, here are several examples of LaunchAgents related to mainstream Mac infections: com.pcv.hlpramc.plist, com.updater.mcy.plist, com.avickUpd.plist, and com.msp.agent.plist. If you spot files that don’t belong on the list, go ahead and drag them to the Trash.
- Use the Go to Folder lookup feature again to navigate to the folder named ~/Library/Application Support (note the tilde symbol prepended to the path).
- When the Application Support directory is opened, identify recently generated suspicious folders in it and send them to the Trash. A quick tip is to look for items whose names have nothing to do with Apple products or apps you knowingly installed. A few examples of known-malicious folder names are Quick Mac Booster, IdeaShared, and ProgressMatch.
- Enter ~/Library/LaunchAgents string (don’t forget to include the tilde character) in the Go to Folder search area.
- The system will display LaunchAgents residing in the current user’s Home directory. Look for dodgy items related to “Your iPhone has been hacked” virus (see logic highlighted in subsections above) and drag the suspects to the Trash.
- Type /Library/LaunchDaemons in the Go to Folder search field.
- In the LaunchDaemons path, try to pinpoint the files the malware is using for persistence. Several examples of such items cropped by Mac infections are com.pplauncher.plist, com.startup.plist, and com.ExpertModuleSearchDaemon.plist. Delete the sketchy files immediately.
- Click on the Go menu icon in your Mac’s Finder and select Applications on the list.
- Find the entry for an app that clearly doesn’t belong there and move it to the Trash. If this action requires your admin password for confirmation, go ahead and enter it.
- Expand the Apple menu and select System Preferences.
- Proceed to Users & Groups and click on the Login Items tab.
The system will display the list of items launched when the computer is starting up. Locate the potentially unwanted app there and click on the “-” (minus) button. - Now select Profiles under System Preferences. Look for a malicious item in the left-hand sidebar. Several examples of configuration profiles created by Mac adware include TechSignalSearch, MainSearchPlatform, AdminPrefs, and Chrome Settings. Select the offending entity and click on the minus sign at the bottom to eliminate it.
If your Mac has been infiltrated by adware, the infection will most likely continue to hold sway over your default web browser even after you remove the underlying application along with its components sprinkled around the system. Use the browser cleanup instructions below to address the remaining consequences of this attack.


Get rid of “Your iPhone has been hacked” virus in web browser on Mac
To begin with, the web browser settings taken over by the “Your iPhone has been hacked” virus should be restored to their default values. Although this will clear most of your customizations, web surfing history, and all temporary data stored by websites, the malicious interference should be terminated likewise. The overview of the steps for completing this procedure is as follows:
- Remove “Your iPhone has been hacked” virus from Safari
- Open the browser and go to Safari menu. Select Preferences in the drop-down list.
- Once the Preferences screen appears, click on the Advanced tab and enable the option saying “Show Develop menu in menu bar”.
- Now that the Develop entry has been added to the Safari menu, expand it and click on Empty Caches.
- Now select History in the Safari menu and click on Clear History in the drop-down list.
- Safari will display a dialog asking you to specify the period of time this action will apply to. Select all history to ensure a maximum effect. Click on the Clear History button to confirm and exit.
- Go back to the Safari Preferences and hit the Privacy tab at the top. Find the option that says Manage Website Data and click on it.
- The browser will display a follow-up screen listing the websites that have stored data about your Internet activities. This dialog additionally includes a brief description of what the removal does: you may be logged out of some services and encounter other changes of website behavior after the procedure. If you’re okay with that, go ahead and click on the Remove All button.
- Restart Safari
- Open the browser and go to Safari menu. Select Preferences in the drop-down list.
- Remove “Your iPhone has been hacked” in Google Chrome
- Open Chrome, click the Customize and control Google Chrome (⁝) icon in the top right-hand part of the window, and select Settings in the drop-down
- When on the Settings pane, select Advanced
- Scroll down to the Reset settings section.
- Confirm the Chrome reset on a dialog that will pop up. When the procedure is completed, relaunch the browser and check it for malware activity.
- Open Chrome, click the Customize and control Google Chrome (⁝) icon in the top right-hand part of the window, and select Settings in the drop-down
- Remove “Your iPhone has been hacked” from Mozilla Firefox
- Open Firefox and go to Help – Troubleshooting Information (or type about:support in the URL bar and press Enter).
- When on the Troubleshooting Information screen, click on the Refresh Firefox button.
- Confirm the intended changes and restart Firefox.
- Open Firefox and go to Help – Troubleshooting Information (or type about:support in the URL bar and press Enter).


Get rid of “Your iPhone has been hacked” virus using Combo Cleaner removal tool
The Mac maintenance and security app called Combo Cleaner is a one-stop tool to detect and remove “Your iPhone has been hacked” virus. This technique has substantial benefits over manual cleanup, because the utility gets hourly virus definition updates and can accurately spot even the newest Mac infections.
Furthermore, the automatic solution will find the core files of the malware deep down the system structure, which might otherwise be a challenge to locate. Here’s a walkthrough to sort out the “Your iPhone has been hacked” issue using Combo Cleaner:
- Download Combo Cleaner installer. When done, double-click the combocleaner.dmg file and follow the prompts to install the tool onto your Mac.
By downloading any applications recommended on this website you agree to our Terms and Conditions and Privacy Policy. The free scanner checks whether your Mac is infected. To get rid of malware, you need to purchase the Premium version of Combo Cleaner.
- Open the app from your Launchpad and let it run an update of the malware signature database to make sure it can identify the latest threats.
- Click the Start Combo Scan button to check your Mac for malicious activity as well as performance issues.
- Examine the scan results. If the report says “No Threats”, then you are on the right track with the manual cleaning and can safely proceed to tidy up the web browser that may continue to act up due to the after-effects of the malware attack (see instructions above).
- In case Combo Cleaner has detected malicious code, click the Remove Selected Items button and have the utility remove “Your iPhone has been hacked” threat along with any other viruses, PUPs (potentially unwanted programs), or junk files that don’t belong on your Mac.
- Once you have made doubly sure that the malicious app is uninstalled, the browser-level troubleshooting might still be on your to-do list. If your preferred browser is affected, resort to the previous section of this tutorial to revert to hassle-free web surfing.


