This is an all-in-one summary on virus infecting MacBook Pro laptops, with a special emphasis on methods to remove all types of harmful code from them.
Update: April 2024
MacBook Pro is a premium line of Apple’s laptops. Such an honorable status, though, doesn’t make them any better protected against malware than entry level Mac machines. Moreover, it also means “premium” focus of cybercriminals who are constantly scouring the Mac landscape for preys. Technically, these fancy devices are just as susceptible to infections as their less powerful counterparts, primarily because they run the same operating system. Some might argue that macOS virus is the exception rather than the rule, but we can prove this wrong. There have been numerous adware, scareware, and even some ransomware campaigns zeroing on this platform over the past years, and this trend continues to be the case.

Adware is the name of the game
As far as the quantity goes, adware is by far the dominating threat to MacBook Pro’s. This is a vast niche encompassing browser redirect viruses, also known as hijackers, and ad-injecting culprits. Let’s start with the former, that is, malicious apps taking over web browsers and rerouting traffic to what’s called landing pages – mostly pseudo search engines, junk ecommerce resources or sites hosting drive-by virus downloads. These pests are typically manifested as aggressive plugins or extensions that are furtively embedded in Apple’s native Safari and additionally installed third-party web browsers, such as Mac versions of Chrome or Firefox.
You might overlook the trespass, because these baddies mostly sneak in alongside other programs, all under the umbrella of the same installation clients. As a result, your default search engine, new tab and homepage will be replaced with some rogue URL that will be resolved whenever the above mutilated values are supposed to be triggered. The destination page will often include some type of a spoof warning that tries to manipulate you into downloading other nasty infections.
Riff-raff cashes in on viruses redirecting to Yahoo and Bing
In a campaign that broke out in early 2020 and has since reached unprecedented heights, numerous Mac users have found themselves trapped in a merry-go-round of redirects leading to Yahoo or Bing. Both are legitimate services, obviously, so what’s the catch? The fundamental element of this plot is all about websites resolved for very brief intervals before the victim hits the benign site. These interim addresses compose a complex traffic redistribution and monetization scheme with dubious advertising networks kicking in as well. A common example is an in-between page whose URL contains a.akamaihd.net string, which is often prepended with “lkysearchds” character sequence. Other spinoffs of the Yahoo redirect hoax include shifty services like Safe Finder, Chill Tab, SearchMine, Search Pulse, Any Search Manager, and SearchLee. Their role is to tweak the victim’s browser settings and reroute the traffic further.

A separate category of browser-focused malware raiding MacBook Pro laptops includes pests that forward Safari, Chrome, and Firefox to Bing. These ones pull off a complex traffic reorganization scheme that involves rogue services called Search Marquis, Search Baron, Searchsnow, and SearchItNow. This plot additionally relies on ad networks that help the malware operators transform the fraudulently accumulated traffic into profit. In most cases, the victim may also notice a new configuration profile crop up in System Preferences. This is a clever trick aimed at hampering easy removal of the infection.
Insanely annoying ads generated by Mac malware
Ad-injecting applications are even more irksome. They display tons of advertisements on pretty much every web page you visit from an infected MacBook Pro. Just like hijackers, these PUPs (potentially unwanted programs) make their way into computers by dint of software bundles. Therefore, when installing any freeware that appears too good to be true, consider selecting the custom setup mode that will unveil the actual package of apps configured to get on board in one hit. A few extra clicks on the install stage can save you the trouble of eliminating noxious Mac threats afterwards.

When inside a host, the average ad-injector establishes persistence by adding an aggressive browser extension that gets elevated privileges. In particular, it can insert arbitrary elements into the layout of visited sites. In the upshot of this tampering, you will be stumbling into popups, transitional ads, bizarrely hyperlinked text fragments (in-text links), and various other sponsored items, including banners, coupons, price comparisons, and freebies. What’s more, these entities are targeted most of the time, which designates another nontrivial adverse trait of adware – online user activity tracking. The infection keeps record of every keyword you type in a search engine, every website you visit, and quite possibly every password you enter. So the damage from this misdemeanor can, obviously, exceed irritation alone. Some adware samples aren’t as innocuous as they might appear – keep that in mind.

This caveat holds true particularly for the latest lineage spawning sketchy applications that are replicas of one another except the variable, slightly odd names. They all share the same icon design depicting a magnifying glass inside a green or blue circle, and they additionally install a Safari extension with version number 1.0 next to the name. A few recent examples are adware programs called SystemSpecial, ProgressSite, and MainReady. In addition to displaying unwanted ads, these nasties maintain control over the victim’s custom browsing settings to fuel the above-mentioned Yahoo and Bing redirect viruses plaguing Macs.
Rogue apps mimicking Mac optimization software
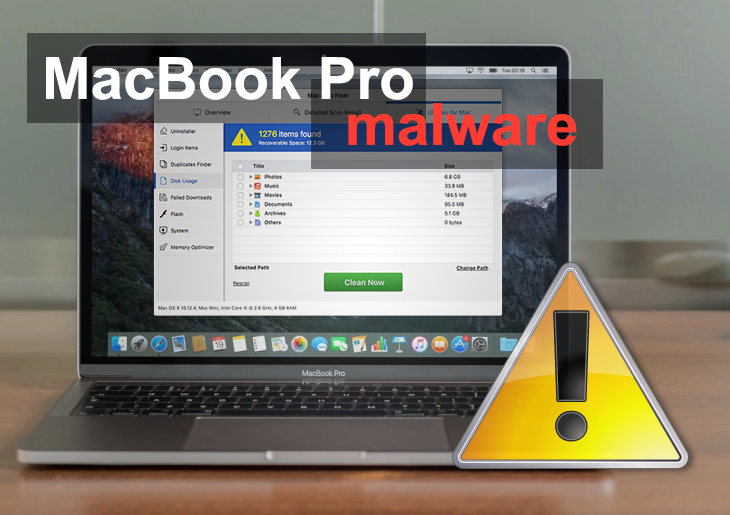
Scareware resides further down the MacBook Pro malware hierarchy. These impostor baddies are really straightforward in their tactics. They bombard victims’ conscience with a slew of fake alerts reporting viruses and system performance issues. Their goal is to frighten you into thinking your computer is about to run out of memory space or crash due to severe virus activity. For instance, the rogue utility called Mac Auto Fixer, which surfaced in early August 2018, will list critical disk usage problems as well as system and memory errors even if your MacBook Pro is brand-new and has been booted up for the very first time. The phony scan results will be accompanied by recurrent popup warnings that remind you of the purported tech quandary and insist that you hit the Clean Now button. Now, that’s where the trick is – the “fix” suggested by any scareware boils down to your paying for its license. The whole modus operandi is ridiculously simple: to forge a bad virus contamination scenario and then lend the victim a helping hand.

Ransomware is an escalating peril to MacBook Pro users
Yet another group of cyber predators haunting MacBook Pro laptops is the infamous blackmail virus. Better known as ransomware, these infections are targeting Macs increasingly but haven’t yet reached a massive propagation milestone, as opposed to the way things are on the Windows arena. The most common type is the police ransomware, which impersonates the FBI or other law enforcement agencies and locks down the Safari browser with a warning page. It attempts to brainwash victims into believing they are being accused of law violations, and if it works the gullible ones may submit the extorted fine. There’s a great deal of misconception about these infections, which are actually browser hijackers rather than conventional ransomware. Plus, they are relatively easy to contain. There have been more devastating outbreaks, though. The KeRanger ransomware from 2016, for example, had a fully functional crypto module that rendered victims’ valuable data inaccessible and held it for ransom. Thankfully, it didn’t get to worldwide propagation, otherwise it could have caused enormous damage to Mac users.
Zooming out, viruses targeting MacBook Pro are quite versatile, and they're here to stay. The tips below will help you remove common Mac infections described above and get your laptop running smooth and hassle-free.
Remove virus from MacBook Pro manually
The steps listed below will walk you through the removal of this malicious application. Be sure to follow the instructions in the specified order.
- Expand the Go menu in your Mac’s Finder bar and select Utilities as shown below.

- Locate the Activity Monitor icon on the Utilities screen and double-click on it.
- In the Activity Monitor app, look for a process that appears suspicious. To narrow down your search, focus on unfamiliar resource-intensive entries on the list. Keep in mind that its name isn’t necessarily related to the way the threat is manifesting itself, so you’ll need to trust your own judgement. If you pinpoint the culprit, select it and click on the Stop icon in the upper left-hand corner of the screen.
- When a follow-up dialog pops up asking if you are sure you want to quit the troublemaking process, select the Force Quit option.
- Click on the Go menu icon in the Finder again and select Go to Folder. You can as well use the Command-Shift-G keyboard shortcut.
- Type /Library/LaunchAgents in the folder search dialog and click on the Go button.
- Examine the contents of the LaunchAgents folder for dubious-looking items. Be advised that the names of files spawned by malware may give no clear clues that they are malicious, so you should look for recently added entities that appear to deviate from the norm.
As an illustration, here are several examples of LaunchAgents related to mainstream Mac infections: com.pcv.hlpramc.plist, com.updater.mcy.plist, com.avickUpd.plist, and com.msp.agent.plist. If you spot files that don’t belong on the list, go ahead and drag them to the Trash.
- Use the Go to Folder lookup feature again to navigate to the folder named ~/Library/Application Support (note the tilde symbol prepended to the path).
- When the Application Support directory is opened, identify recently generated suspicious folders in it and send them to the Trash. A quick tip is to look for items whose names have nothing to do with Apple products or apps you knowingly installed. A few examples of known-malicious folder names are SystemSpecial, ProgressSite, and IdeaShared.
- Enter ~/Library/LaunchAgents string (don’t forget to include the tilde character) in the Go to Folder search area.
- The system will display LaunchAgents residing in the current user’s Home directory. Look for dodgy items related to the virus (see logic highlighted in subsections above) and drag the suspects to the Trash.
- Type /Library/LaunchDaemons in the Go to Folder search field.
- In the LaunchDaemons path, try to pinpoint the files the malware is using for persistence. Several examples of such items cropped by Mac infections are com.pplauncher.plist, com.startup.plist, and com.ExpertModuleSearchDaemon.plist. Delete the sketchy files immediately.
- Click on the Go menu icon in your Mac’s Finder and select Applications on the list.
- Find the entry for an app that clearly doesn’t belong there and move it to the Trash. If this action requires your admin password for confirmation, go ahead and enter it.
- Expand the Apple menu and select System Preferences.
- Proceed to Users & Groups and click on the Login Items tab.
The system will display the list of items launched when the computer is starting up. Locate the potentially unwanted app there and click on the “-” (minus) button. - Now select Profiles under System Preferences. Look for a malicious item in the left-hand sidebar. Several examples of configuration profiles created by Mac adware include TechSignalSearch, MainSearchPlatform, AdminPrefs, and Chrome Settings. Select the offending entity and click on the minus sign at the bottom to eliminate it.
If your Mac has been infiltrated by adware, the infection will most likely continue to hold sway over your default web browser even after you remove the underlying application along with its components sprinkled around the system. Use the browser cleanup instructions below to address the remaining consequences of this attack.


Get rid of virus in web browser on MacBook Pro
To begin with, the web browser settings taken over by the virus should be restored to their default values. Although this will clear most of your customizations, web surfing history, and all temporary data stored by websites, the malicious interference should be terminated likewise. The overview of the steps for completing this procedure is as follows:
- Remove virus from Safari
- Open the browser and go to Safari menu. Select Preferences in the drop-down list.
- Once the Preferences screen appears, click on the Advanced tab and enable the option saying “Show Develop menu in menu bar”.
- Now that the Develop entry has been added to the Safari menu, expand it and click on Empty Caches.
- Now select History in the Safari menu and click on Clear History in the drop-down list.
- Safari will display a dialog asking you to specify the period of time this action will apply to. Select all history to ensure a maximum effect. Click on the Clear History button to confirm and exit.
- Go back to the Safari Preferences and hit the Privacy tab at the top. Find the option that says Manage Website Data and click on it.
- The browser will display a follow-up screen listing the websites that have stored data about your Internet activities. This dialog additionally includes a brief description of what the removal does: you may be logged out of some services and encounter other changes of website behavior after the procedure. If you’re okay with that, go ahead and click on the Remove All button.
- Restart Safari
- Open the browser and go to Safari menu. Select Preferences in the drop-down list.
- Remove virus in Google Chrome
- Open Chrome, click the Customize and control Google Chrome (⁝) icon in the top right-hand part of the window, and select Settings in the drop-down
- When on the Settings pane, select Advanced
- Scroll down to the Reset settings section.
- Confirm the Chrome reset on a dialog that will pop up. When the procedure is completed, relaunch the browser and check it for malware activity.
- Open Chrome, click the Customize and control Google Chrome (⁝) icon in the top right-hand part of the window, and select Settings in the drop-down
- Remove virus from Mozilla Firefox
- Open Firefox and go to Help – Troubleshooting Information (or type about:support in the URL bar and press Enter).
- When on the Troubleshooting Information screen, click on the Refresh Firefox button.
- Confirm the intended changes and restart Firefox.
- Open Firefox and go to Help – Troubleshooting Information (or type about:support in the URL bar and press Enter).


Automatic virus removal process for MacBook Pro
The Mac maintenance and security app called Combo Cleaner is a one-stop tool to detect and remove MacBook Pro virus virus. This technique has substantial benefits over manual cleanup, because the utility gets hourly virus definition updates and can accurately spot even the newest Mac infections.
Furthermore, the automatic solution will find the core files of the malware deep down the system structure, which might otherwise be a challenge to locate. Here’s a walkthrough to sort out the MacBook Pro virus issue using Combo Cleaner:
- Download Combo Cleaner installer. When done, double-click the combocleaner.dmg file and follow the prompts to install the tool onto your Mac.
By downloading any applications recommended on this website you agree to our Terms and Conditions and Privacy Policy. The free scanner checks whether your Mac is infected. To get rid of malware, you need to purchase the Premium version of Combo Cleaner.
- Open the app from your Launchpad and let it run an update of the malware signature database to make sure it can identify the latest threats.
- Click the Start Combo Scan button to check your Mac for malicious activity as well as performance issues.
- Examine the scan results. If the report says “No Threats”, then you are on the right track with the manual cleaning and can safely proceed to tidy up the web browser that may continue to act up due to the after-effects of the malware attack (see instructions above).
- In case Combo Cleaner has detected malicious code, click the Remove Selected Items button and have the utility remove MacBook Pro virus threat along with any other viruses, PUPs (potentially unwanted programs), or junk files that don’t belong on your Mac.
- Once you have made doubly sure that the malicious app is uninstalled, the browser-level troubleshooting might still be on your to-do list. If your preferred browser is affected, resort to the previous section of this tutorial to revert to hassle-free web surfing.


FAQ
If you have some basic computer troubleshooting skills, then you can try to get rid of viruses on your MacBook Pro manually. This will require spotting all the files, processes, device profiles, and browser extensions added by the infection. It could be a challenging task, though, because these components are random-looking most of the time, so you run the risk of skipping some of them or deleting critical system files.
The key to clearing your MacBook Pro of viruses is to identify the malicious application before you proceed. Pay attention to the symptoms, such as the software name mentioned on annoying popups and scans, or website URLs your browser is being redirected to. Look up these clues on a search engine to find out what Mac virus strain it is. This way, you’ll get a better idea of what files and other dubious elements to look for and delete from your laptop.
Most Mac viruses create new items in the following system locations: Applications, /Library/LaunchAgents, ~/Library/LaunchAgents, /Library/LaunchDaemons, and /Library/Application Support. Go ahead and check these folders for suspicious or known-malicious objects. If they cannot be deleted, consider spotting and force quitting the underlying executable in the Activity Monitor. If all goes well and the pest is eliminated, go ahead and fix the problem with the web browser if it’s acting up due to virus interference.
You can alternatively use an automatic cleaner that will find and erase every item associated with the virus in minutes. The summary of all these methods is provided in the article above. It includes illustrations and detailed steps that will walk you through the process.
There are overarching symptoms and ones that can be uniquely attributed to specific viruses. The former include sluggish MacBook Pro performance, slow Internet connection, and overheating issues. The red flags that allow you to narrow down the detection task depend on the type of a threat you’re confronted with. Browser hijackers forcibly forward your traffic to fake search engines and junk websites you never intended to visit. Adware displays superfluous sponsored materials all over web pages.
Phony system utilities, or scareware, run noxious scans and flood your MacBook Pro with scary-looking popup alerts. Ransomware locks your default browser with a law violation warning or, if it’s a file-encrypting malicious program, makes data inaccessible and displays a ransom note. If any of the above symptoms is the case, take immediate action to sort out the predicament.
Strictly speaking, a Trojan is a harmful application that infiltrates a system under the guise of something harmless. This kind of a tactic fits the mold of malicious bundling, a distribution method used by nearly all mainstream Mac adware, scareware, and so-called potentially unwanted apps (PUAs). The sketchy entity sneaks into a machine while being in the same installation package as an arbitrary piece of benign software. Technically, it means all these culprits assume the characteristics of a Trojan when it comes to the propagation.
There is a nuance to keep in mind, though. Several clusters of these infections known as banking Trojans and info-stealing Trojans are much sneakier by design than most other Mac threats. Their operators try to keep the attack secret from the victim so that a maximum of sensitive data can be amassed furtively and sent to the attackers’ Command and Control server.
No matter what type of a Trojan may be running on your Mac, the removal is pretty much the same as in the average virus scenario. You’ll need to check the common system paths for traces of the unwanted program and delete them once found. Given that some of these files can be obfuscated and stubborn in terms of removal, an effective anti-malware tool can yield better results than manual cleaning. One way or another, read the guide above to explore all the options that apply to a Trojan contamination quandary.
Yes, wiping a Mac removes viruses as long as the infection resides on the disk being erased, which is close to a 100% probability. As a general rule, viruses targeting Macs are a software rather than a hardware problem. Therefore, if you take the “scorched earth” route and wipe your Mac, the unwanted code will vanish along with the rest of your data and operating system components.
Before going through this process, it’s of paramount importance to make sure you have an up-to-date backup of your Mac and all your data. Check the Time Machine feature to see if you’re in the clear. After wiping your Mac, go ahead and reinstall macOS from the recovery disk built into your computer. Then, restore everything previously backed up with Time Machine.
On a side note, viruses lurking in the firmware of motherboard chips are theoretically possible, but they are mostly fiction as far as Macs go, unless you are a high-level government official or a CEO of a major corporation targeted by some advanced persistent threat (APT) group. Obviously, this isn’t the average user’s concern.