Those struggling to stop excessive CPU and memory usage by the sysmond process on a Mac can get some actionable details in this write-up.
What is sysmond Mac process?
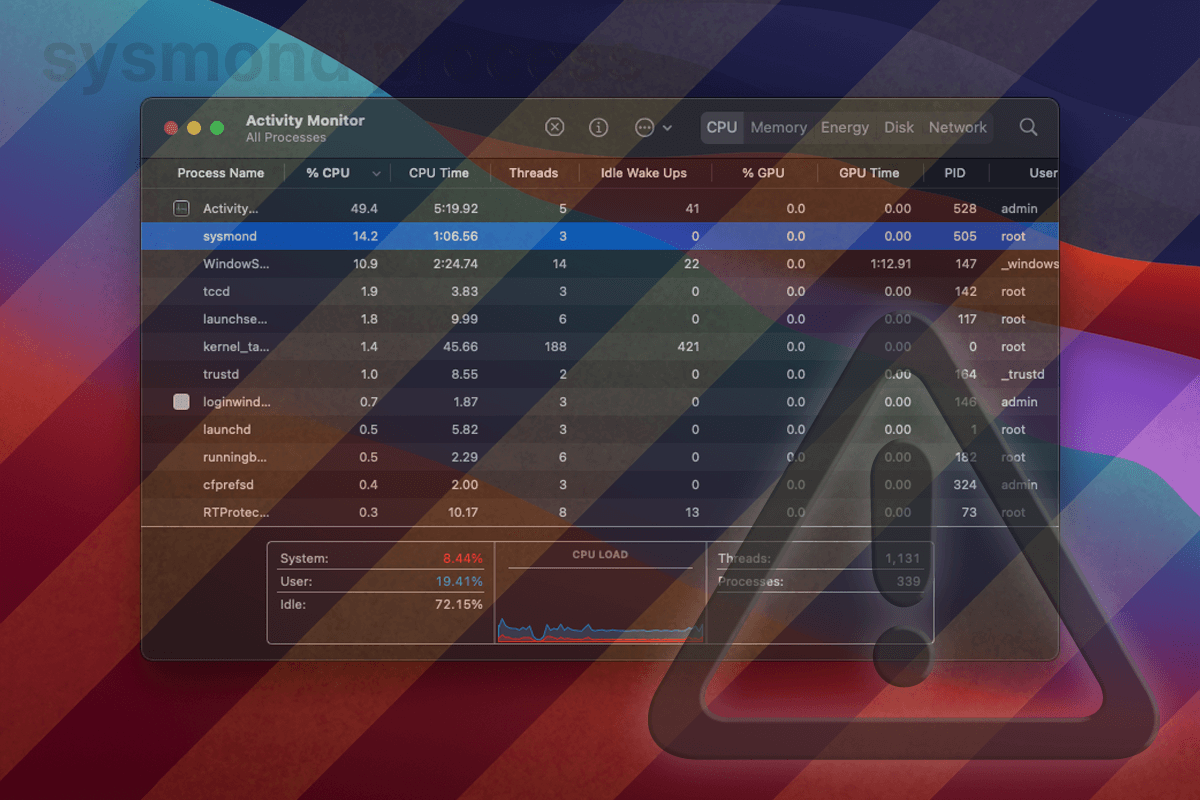
Regular macOS processes can jump from being idle to resource-intensive in the blink of an eye, leaving users stumped over the reasons and the ways to sort out the unexpected spike. Over the past two years or so, several system executables have exhibited such anomalies. This is especially true of WindowServer, kernel_task, accountsd, and nsurlsessiond. This time around, one more entity has extended the list. Apple desktop machines and laptops running different macOS versions, from Mojave to Monterey, may suddenly slow down to a crawl, and a quick look at the Activity Monitor stats reveals that the culprit is a process named sysmond. In some cases, it uses up to 100% CPU and a good deal of memory, which deteriorates system performance, keeps the fans running fast non-stop, and may even trigger a kernel panic condition.

Let’s figure out what sysmond is supposed to do and why it may get out of hand. The name stands for System Monitor Daemon, and that’s undoubtedly a benign object. It is geared toward collecting a bevy of system functioning metrics so that the Activity Monitor can reflect these details in its user-friendly interface. In plain words, this is a useful auxiliary process that shouldn’t precipitate any issues in an ideal world. However, something in this complex data tracking mechanism can go wrong, causing sysmond to consume more processor resources than usual. Some users report this item gobbling up about 15% CPU, others notice it reaching 70%, and some see the usage maxing out permanently. Even if the number isn’t too high, this oddity can put a spanner in the works when the person is using graphics editing apps or playing video games that need processing power to run smoothly. It’s definitely a good idea to stop this waste of the CPU vigor in its tracks.
AIt turns out that addressing the abnormal operation of sysmond on Mac isn’t necessarily rocket science. One of the most common reasons for its misbehavior lurks in the Activity Monitor’s update frequency, a configurable value which – as its name would suggest – specifies at what intervals the utility should refresh its data. The causality is simple there: the lower this parameter, the more resources sysmond needs to do its thing. To check whether this setting is to blame, open the Activity Monitor, expand the View menu, go on to Update Frequency, and make sure the item called “Normally (5 sec)” is selected (see screenshot below). Enabling the “Very often (1 sec)” option is nearly a sure-shot way to drive.

According to some users’ observations, the range of the displayed columns affects sysmond CPU usage. Control-clicking anywhere in the blank area of the Activity Monitor toolbar opens all types of system-related data that should be displayed. If, for instance, Real Private Memory or Real Shared Memory is picked in that listing, the processor load from sysmond will likely skyrocket. Anyway, this is one more thing to examine during the troubleshooting process. Deselecting redundant stuff usually helps.
Whereas this predicament is mostly within the realm of legitimacy, it might have a flavor of abuse. It’s common knowledge that cybercriminals are adept at creating malware that injects sketchy code into benign processes or camouflages itself as one of such binaries to slip below the radar of XProtect, Gatekeeper, and other native macOS protection mechanisms. Should either scenario occur, a booby-trapped variant of the sysmond daemon may run in the background and hoover up the CPU power. The good news is that this situation is unlikely, and yet it’s a good idea to ascertain that it’s not the case. The following information will help dot the i’s and cross the t’s in that regard.
Sysmond high CPU virus manual removal for Mac
The steps listed below will walk you through the removal of this malicious application. Be sure to follow the instructions in the specified order.
- Expand the Go menu in your Mac’s Finder bar and select Utilities as shown below.

- Locate the Activity Monitor icon on the Utilities screen and double-click on it.
- In the Activity Monitor app, look for sysmond or another process that appears suspicious. To narrow down your search, focus on unfamiliar resource-intensive entries on the list. Keep in mind that its name isn’t necessarily related to the way the threat is manifesting itself, so you’ll need to trust your own judgement. If you pinpoint the culprit, select it and click on the Stop icon in the upper left-hand corner of the screen.
- When a follow-up dialog pops up asking if you are sure you want to quit the troublemaking process, select the Force Quit option.
- Click on the Go menu icon in the Finder again and select Go to Folder. You can as well use the Command-Shift-G keyboard shortcut.
- Type /Library/LaunchAgents in the folder search dialog and click on the Go button.
- Examine the contents of the LaunchAgents folder for dubious-looking items. Be advised that the names of files spawned by malware may give no clear clues that they are malicious, so you should look for recently added entities that appear to deviate from the norm.
As an illustration, here are several examples of LaunchAgents related to mainstream Mac infections: com.updater.mcy.plist, com.avickUpd.plist, and com.msp.agent.plist. If you spot files that don’t belong on the list, go ahead and drag them to the Trash.
- Use the Go to Folder lookup feature again to navigate to the folder named ~/Library/Application Support (note the tilde symbol prepended to the path).
- When the Application Support directory is opened, identify recently generated suspicious folders in it and send them to the Trash. A quick tip is to look for items whose names have nothing to do with Apple products or apps you knowingly installed. A few examples of known-malicious folder names are ProgressSite and IdeaShared.
- Enter ~/Library/LaunchAgents string (don’t forget to include the tilde character) in the Go to Folder search area.
- The system will display LaunchAgents residing in the current user’s Home directory. Look for dodgy items related to rogue sysmond process (see logic highlighted in subsections above) and drag the suspects to the Trash.
- Type /Library/LaunchDaemons in the Go to Folder search field.
- In the LaunchDaemons path, try to pinpoint the files the malware is using for persistence. Several examples of such items cropped by Mac infections are com.apple.sysmond.plist, com.startup.plist, and com.ExpertModuleSearchDaemon.plist. Delete the sketchy files immediately.
- Click on the Go menu icon in your Mac’s Finder and select Applications on the list.
- Find the entry for an app that clearly doesn’t belong there and move it to the Trash. If this action requires your admin password for confirmation, go ahead and enter it.
- Expand the Apple menu and select System Preferences.
- Proceed to Users & Groups and click on the Login Items tab.
The system will display the list of items launched when the computer is starting up. Locate the potentially unwanted app there and click on the “-” (minus) button. - Now select Profiles under System Preferences. Look for a malicious item in the left-hand sidebar. Several examples of configuration profiles created by Mac adware include TechSignalSearch, MainSearchPlatform, AdminPrefs, and Safari Settings. Select the offending entity and click on the minus sign at the bottom to eliminate it.
If your Mac has been infiltrated by adware, the infection will most likely continue to hold sway over your default web browser even after you remove the underlying application along with its components sprinkled around the system. Use the browser cleanup instructions below to address the remaining consequences of this attack.


Get rid of sysmond related malware in web browser on Mac
To begin with, the web browser settings taken over by the sysmond malware should be restored to their default values. Although this will clear most of your customizations, web surfing history, and all temporary data stored by websites, the malicious interference should be terminated likewise. The overview of the steps for completing this procedure is as follows:
- Remove sysmond virus from Safari
- Open the browser and go to Safari menu. Select Preferences in the drop-down list.
- Once the Preferences screen appears, click on the Advanced tab and enable the option saying “Show Develop menu in menu bar”.
- Now that the Develop entry has been added to the Safari menu, expand it and click on Empty Caches.
- Now select History in the Safari menu and click on Clear History in the drop-down list.
- Safari will display a dialog asking you to specify the period of time this action will apply to. Select all history to ensure a maximum effect. Click on the Clear History button to confirm and exit.
- Go back to the Safari Preferences and hit the Privacy tab at the top. Find the option that says Manage Website Data and click on it.
- The browser will display a follow-up screen listing the websites that have stored data about your Internet activities. This dialog additionally includes a brief description of what the removal does: you may be logged out of some services and encounter other changes of website behavior after the procedure. If you’re okay with that, go ahead and click on the Remove All button.
- Restart Safari
- Open the browser and go to Safari menu. Select Preferences in the drop-down list.
- Remove sysmond virus in Google Chrome
- Open Chrome, click the Customize and control Google Chrome (⁝) icon in the top right-hand part of the window, and select Settings in the drop-down
- When on the Settings pane, select Advanced
- Scroll down to the Reset settings section.
- Confirm the Chrome reset on a dialog that will pop up. When the procedure is completed, relaunch the browser and check it for malware activity.
- Open Chrome, click the Customize and control Google Chrome (⁝) icon in the top right-hand part of the window, and select Settings in the drop-down
- Fix sysmond problem in Mozilla Firefox
- Open Firefox and go to Help – Troubleshooting Information (or type about:support in the URL bar and press Enter).
- When on the Troubleshooting Information screen, click on the Refresh Firefox button.
- Confirm the intended changes and restart Firefox.
- Open Firefox and go to Help – Troubleshooting Information (or type about:support in the URL bar and press Enter).


Fix sysmond Mac process issues using Combo Cleaner removal tool
The Mac maintenance and security app called Combo Cleaner is a one-stop tool to detect and remove sysmond high CPU virus. This technique has substantial benefits over manual cleanup, because the utility gets hourly virus definition updates and can accurately spot even the newest Mac infections.
Furthermore, the automatic solution will find the core files of the malware deep down the system structure, which might otherwise be a challenge to locate. Here’s a walkthrough to sort out the sysmond high CPU issue using Combo Cleaner:
- Download Combo Cleaner installer. When done, double-click the combocleaner.dmg file and follow the prompts to install the tool onto your Mac.
By downloading any applications recommended on this website you agree to our Terms and Conditions and Privacy Policy. The free scanner checks whether your Mac is infected. To get rid of malware, you need to purchase the Premium version of Combo Cleaner.
- Open the app from your Launchpad and let it run an update of the malware signature database to make sure it can identify the latest threats.
- Click the Start Combo Scan button to check your Mac for malicious activity as well as performance issues.
- Examine the scan results. If the report says “No Threats”, then you are on the right track with the manual cleaning and can safely proceed to tidy up the web browser that may continue to act up due to the after-effects of the malware attack (see instructions above).
- In case Combo Cleaner has detected malicious code, click the Remove Selected Items button and have the utility remove sysmond high CPU threat along with any other viruses, PUPs (potentially unwanted programs), or junk files that don’t belong on your Mac.
- Once you have made doubly sure that the malicious app is uninstalled, the browser-level troubleshooting might still be on your to-do list. If your preferred browser is affected, resort to the previous section of this tutorial to revert to hassle-free web surfing.


