This guide explains how to address high CPU usage by WindowServer, nsurlsessiond, mdnsresponder, mds_stores, hidd, trustd, and syslogd processes on Mac.
Update: April 2024
| Threat Profile | |
|---|---|
| Name | WindowServer high CPU malware |
| Category | Mac adware, potentially unwanted application (PUA) |
| Related Processes | nsurlsessiond, mdnsresponder, mds_stores, hidd, trustd, syslogd, kernel_task, gamecontrollerd, photoanalysisd, coreaudiod, virtual machine service, searchpartyd, vshieldscanner, securityagent, xprotectservice, ApplicationsStorageExtension |
| Symptoms | Uses a lot of CPU and RAM, causes Mac slowdown, Activity Monitor alerts |
| Distribution Techniques | Fake Adobe Flash Player update popups, malware-riddled bundles, drive-by downloads |
| Severity Level | Medium |
| Damage | Serious Mac performance hit, kernel panics, random reboots |
| Removal | Scan your Mac with Combo Cleaner to detect all files related to the malware. Use the tool to remove the infection if found. |
Slowdown issues are a natural upshot of a Mac starting to age and lacking the resources to support increasingly resource-intensive applications. If the machine’s hardware is upgradeable, one decent workaround is to install more RAM and replace the standard “spinning” storage media with a faster SSD drive. But what if the performance of a brand-new or recently released MacBook, iMac, Mac Pro is running slower than usual? This condition requires some insight into the whys. Many users who run into such a situation and open the Activity Monitor to do some reconnaissance discover that a process named WindowServer is constantly using up most of the CPU resources. In many cases, this drag co-occurs with abnormally high memory consumption. This bug doesn’t appear to survive Mac reboots, but this measure has a short-time effect and the issue eventually re-emerges. It’s worth mentioning that the WindowServer related bug is often observed alongside unproportioned CPU consumption by the following processes: nsurlsessiond, mdnsresponder, mds_stores, hidd, trustd, photoanalysisd, gamecontrollerd, syslogd, and ApplicationsStorageExtension.

So, what is WindowServer on a Mac? And why does its CPU usage occasionally skyrocket? Let’s try to figure out. First things first, here is some wiki stuff on this matter: WindowServer is a collection of services tasked with window management. It is also defined as a compositing engine responsible for reflecting application behavior on the Mac’s screen. The core macOS process sits in between the programs you run and their graphical manifestation you see on the display. It is executed once you log in and stops running as soon as you log out. Whenever you’re using an app, surfing the web via your browser, seeing an ad online, or playing a game, WindowServer is the entity that enables you to view it all dynamically. Therefore, it is a hugely important and harmless system element. This doesn’t mean that it operates flawlessly at all times, though.
One of the widely reported scenarios where WindowServer consumes too much CPU and RAM is related to connecting an external monitor to a Mac machine. The adverse occurrence is more likely if it’s a 4K monitor. Also, a lot of users notice the bug after enabling a scaled resolution on a Retina display. Improper implementation of transparency effects can be another reason for the unwanted activity. A Mac’s home screen clogged up with files and folders may contribute to the adverse situation, too. Furthermore, unused desktops accessible through Mission Control are known to put an extra strain on the system’s windows management service and should be closed. The automatic rearrangement of elements in the Spaces virtual desktop ecosystem based on recent use is yet another potential trigger for this resource hogging situation. This overlapping of factors suggests that the problem may kick in when the normal graphics rendering process becomes more complex due to a specific set-up and resolution tweaks.
Some users bumped into the quandary right after updating to macOS Catalina 10.15, one of the previous versions of Apple’s operating system. An upgrade to macOS 11 Big Sur, macOS 12 Monterey, macOS 13 Ventura, and macOS 14 Sonoma isn’t always smooth in this regard either. Ideally, a glitch like that shouldn’t be observed in either case, but it’s often there and it needs immediate fixing. The affected machine runs hot for a long time and works slower than it should. Sometimes the buggy activity leads to kernel panics, a condition where the Mac crashes and the user cannot get it back on track easily.
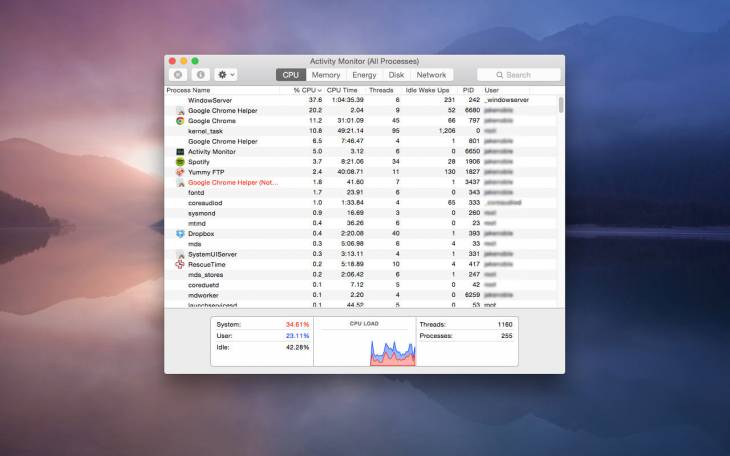
As mentioned above, the WindowServer high CPU usage predicament is often encountered as part of a more unnerving whole. If you head to the Utilities and launch the Activity Monitor, you may notice several more processes collectively consuming the greater part of the central processing unit’s resources. Here’s a brief description of these entities that may turn into CPU hogs out of the blue:
- Nsurlsessiond. This is a process involved in syncing a Mac user’s images, contacts, and other data with the iCloud server.
- Mdnsresponder. This one is a zero-configuration networking service that allows Apple devices to spot each other on the same network and share content such as iTunes libraries. Mdnsresponder a constituent of the so-called Bonjour protocol.
- Mds_stores. It’s a component of the Spotlight search feature. One of its functions is to index files stored on the Mac.
- Hidd. The acronym stands for “human interface device daemon”. Its role is to interpret all the events associated with your mouse and keyboard usage.
- Trustd. This is a daemon that manages and verifies digital certificates to make sure the running processes are code-signed and can be trusted. It also checks if websites encrypt the connection and are safe to visit.
- Syslogd. Maintenance of system logs is what the syslogd process does. It performs, among other things, the compression of these logs to optimize their size and make sure they don’t take too much space on disk.
- Photoanalysisd. This daemon traverses the Photos library to identify faces and objects. Such analysis may take a long time and consume a good deal of CPU resources if the Mac stores a lot of images and new ones are frequently added.
- Gamecontrollerd. The gist of this background service boils down to ensuring seamless interoperability between macOS and external devices connected to the computer for better gaming experience.
- ApplicationsStorageExtension. This one runs high when the user heads to the storage statistics through the “About This Mac” screen. Even after the calculations have been completed, the process may continue to drain resources until the storage analysis window is closed.
- Kernel_task
A whole separate facet of abnormal Mac CPU usage by WindowServer and the processes listed above is in the security area. These bugs may be the way some malware strains signal their presence on a Mac computer. Cybercriminals aren’t likely to engage in extensive testing of their harmful code, which could lead to malfunctions when a system is infiltrated behind the scenes. Adware apps that target web browsers are also known to waste a ton of CPU resources by overburdening legitimate macOS services. Therefore, if your computer’s processing power is being permanently exhausted by the processes described in this tutorial, checking it for malicious activity is just as important as finding and tackling regular system malfunctions.
Manual removal of viruses causing WindowServer high CPU usage problem
The steps listed below will walk you through the removal of this malicious application. Be sure to follow the instructions in the specified order.
- Expand the Go menu in your Mac’s Finder bar and select Utilities as shown below.

- Locate the Activity Monitor icon on the Utilities screen and double-click on it.
- In the Activity Monitor app, look for a process that appears suspicious. To narrow down your search, focus on unfamiliar resource-intensive entries on the list. Keep in mind that its name isn’t necessarily related to the way the threat is manifesting itself, so you’ll need to trust your own judgement. If you pinpoint the culprit, select it and click on the Stop icon in the upper left-hand corner of the screen.
- When a follow-up dialog pops up asking if you are sure you want to quit the troublemaking process, select the Force Quit option.
- Click on the Go menu icon in the Finder again and select Go to Folder. You can as well use the Command-Shift-G keyboard shortcut.
- Type /Library/LaunchAgents in the folder search dialog and click on the Go button.
- Examine the contents of the LaunchAgents folder for dubious-looking items. Be advised that the names of files spawned by malware may give no clear clues that they are malicious, so you should look for recently added entities that appear to deviate from the norm.
As an illustration, here are several examples of LaunchAgents related to mainstream Mac infections: com.pcv.hlpramc.plist, com.updater.mcy.plist, com.avickUpd.plist, and com.msp.agent.plist. If you spot files that don’t belong on the list, go ahead and drag them to the Trash.
- Use the Go to Folder lookup feature again to navigate to the folder named ~/Library/Application Support (note the tilde symbol prepended to the path).
- When the Application Support directory is opened, identify recently generated suspicious folders in it and send them to the Trash. A quick tip is to look for items whose names have nothing to do with Apple products or apps you knowingly installed. A few examples of known-malicious folder names are UtilityParze, LinkBranch, SystemSpecial, and IdeaShared.
- Enter ~/Library/LaunchAgents string (don’t forget to include the tilde character) in the Go to Folder search area.
- The system will display LaunchAgents residing in the current user’s Home directory. Look for dodgy items related to the virus (see logic highlighted in subsections above) and drag the suspects to the Trash.
- Type /Library/LaunchDaemons in the Go to Folder search field.
- In the LaunchDaemons path, try to pinpoint the files the malware is using for persistence. Several examples of such items cropped by Mac infections are com.pplauncher.plist, com.startup.plist, and com.ExpertModuleSearchDaemon.plist. Delete the sketchy files immediately.
- Click on the Go menu icon in your Mac’s Finder and select Applications on the list.
- Find the entry for an app that clearly doesn’t belong there and move it to the Trash. If this action requires your admin password for confirmation, go ahead and enter it.
- Expand the Apple menu and select System Preferences.
- Proceed to Users & Groups and click on the Login Items tab.
The system will display the list of items launched when the computer is starting up. Locate the potentially unwanted app there and click on the “-” (minus) button. - Now select Profiles under System Preferences. Look for a malicious item in the left-hand sidebar. Several examples of configuration profiles created by Mac adware include TechSignalSearch, MainSearchPlatform, AdminPrefs, and Chrome Settings. Select the offending entity and click on the minus sign at the bottom to eliminate it.
If your Mac has been infiltrated by adware, the infection will most likely continue to hold sway over your default web browser even after you remove the underlying application along with its components sprinkled around the system. Use the browser cleanup instructions below to address the remaining consequences of this attack.


Get rid of resource-intensive malware in web browser on Mac
To begin with, the web browser settings taken over by the virus exploiting WindowServer process should be restored to their default values. Although this will clear most of your customizations, web surfing history, and all temporary data stored by websites, the malicious interference should be terminated likewise. The overview of the steps for completing this procedure is as follows:
- Remove malware in Safari
- Open the browser and go to Safari menu. Select Preferences in the drop-down list
- Once the Preferences screen appears, click on the Advanced tab and enable the option saying “Show Develop menu in menu bar”.
- Now that the Develop entry has been added to the Safari menu, expand it and click on Empty Caches.
- Now select History in the Safari menu and click on Clear History in the drop-down list.
- Safari will display a dialog asking you to specify the period of time this action will apply to. Select all history to ensure a maximum effect. Click on the Clear History button to confirm and exit.
- Go back to the Safari Preferences and hit the Privacy tab at the top. Find the option that says Manage Website Data and click on it.
- The browser will display a follow-up screen listing the websites that have stored data about your Internet activities. This dialog additionally includes a brief description of what the removal does: you may be logged out of some services and encounter other changes of website behavior after the procedure. If you’re okay with that, go ahead and click on the Remove All button.
- Restart Safari
- Open the browser and go to Safari menu. Select Preferences in the drop-down list
- Get rid of viruses in Google Chrome
- Open Chrome, click the Customize and control Google Chrome (⁝) icon in the top right-hand part of the window, and select Settings in the drop-down
- When on the Settings pane, select Advanced
- Scroll down to the Reset settings section.
- Confirm the Chrome reset on a dialog that will pop up. When the procedure is completed, relaunch the browser and check it for malware activity.
- Open Chrome, click the Customize and control Google Chrome (⁝) icon in the top right-hand part of the window, and select Settings in the drop-down
- Stop malicious activity in Mozilla Firefox
- Open Firefox and go to Help – Troubleshooting Information (or type about:support in the URL bar and press Enter).
- When on the Troubleshooting Information screen, click on the Refresh Firefox button.
- Confirm the intended changes and restart Firefox.
- Open Firefox and go to Help – Troubleshooting Information (or type about:support in the URL bar and press Enter).


Use automatic tool to fix the WindowServer Mac issue
The Mac maintenance and security app called Combo Cleaner is a one-stop tool to detect and remove WindowServer virus. This technique has substantial benefits over manual cleanup, because the utility gets hourly virus definition updates and can accurately spot even the newest Mac infections.
Furthermore, the automatic solution will find the core files of the malware deep down the system structure, which might otherwise be a challenge to locate. Here’s a walkthrough to sort out the WindowServer issue using Combo Cleaner:
- Download Combo Cleaner installer. When done, double-click the combocleaner.dmg file and follow the prompts to install the tool onto your Mac.
By downloading any applications recommended on this website you agree to our Terms and Conditions and Privacy Policy. The free scanner checks whether your Mac is infected. To get rid of malware, you need to purchase the Premium version of Combo Cleaner.
- Open the app from your Launchpad and let it run an update of the malware signature database to make sure it can identify the latest threats.
- Click the Start Combo Scan button to check your Mac for malicious activity as well as performance issues.
- Examine the scan results. If the report says “No Threats”, then you are on the right track with the manual cleaning and can safely proceed to tidy up the web browser that may continue to act up due to the after-effects of the malware attack (see instructions above).
- In case Combo Cleaner has detected malicious code, click the Remove Selected Items button and have the utility remove WindowServer threat along with any other viruses, PUPs (potentially unwanted programs), or junk files that don’t belong on your Mac.
- Once you have made doubly sure that the malicious app is uninstalled, the browser-level troubleshooting might still be on your to-do list. If your preferred browser is affected, resort to the previous section of this tutorial to revert to hassle-free web surfing.


FAQ
Despite a good deal of negative feedback from users, WindowServer is a legitimate macOS process that plays an important role in enabling proper manifestation of graphical elements on the display. It is geared toward dynamic reflection of app windows and the embedded visual objects so that the user experience is seamless. Ideally, when you notice it running on your Mac, that’s perfectly normal.
In some situations, though, WindowServer may get out of hand by gobbling up most of the processor and memory resources. This likelihood of this drag increases when a user connects an external display to their Mac, especially one that supports 4K resolution. The problem may also be security-flavored: crudely made malware, crypto miners, and adware often impersonate benign system services and are to blame for slowing down a system to a crawl.
It depends on the root cause of the problem. If it occurs when you connect an external monitor to your Mac, change the screen resolution, or play around with transparency effects, the good news is that you aren’t dealing with a virus. In this scenario, try restarting your computer and see how it goes. Be sure to apply the latest macOS update, too. If none of this helps, go to System Preferences, select “Accessibility”, click “Display” in the sidebar, and enable the “Reduce transparency” option.
If the CPU and RAM overconsumption is happening without any graphics-related catalysts (that is to say, you haven’t changed any visual settings or plugged in an extra monitor), then you’ll need to check your Mac for malware. The guide above will point you in the right direction.
Kernel_task is an important service that prevents a Mac’s CPU from overheating. It kicks in when the operating system identifies an abnormally high resource usage that causes a considerable increase of the central processing unit’s temperature. Under adverse circumstances like that, this maintenance instrument automatically takes on an active role in curbing CPU-intensive processes to reduce the heat. When viewed in the Activity Monitor app, this routine sometimes appears bizarre because the amount of CPU power used by Kernel_task may exceed 100%, which doesn’t make much sense.
If the performance of your Mac has taken a nosedive, there’s a handful of techniques to speed it up. Identifying the main reason for a slowdown will provide actionable insights into what area of the system needs fine-tuning in the first place. For instance, if too many apps are launched at startup, you should audit the list and eliminate redundant items. If you are low on disk space, it’s time to clean some junk. Scenarios vary, but the following tips help address most system productivity issues:
- Go to System Preferences > Users & Groups and remove unnecessary Login Items.
- Pinpoint and terminate resource-heavy processes.
- Release disk space by deleting clutter such as application caches and logs.
- Uninstall apps you don’t use.
- Install the latest macOS update.
- Check your Mac for viruses and remove everything dodgy you detect.
- If you are using an HDD, replace it with a Solid State Drive (SSD).
- Install more RAM if your Mac supports hardware upgrades.
First things first, don’t confuse memory (RAM) with disk space. The former stores short-term data your apps require to run seamlessly, and the latter is the total storage capacity of your hard disk (HDD or SSD). When memory usage reaches a critical threshold, your Mac will become sluggish or even completely unresponsive. When faced with this kind of a nuisance, try a few best-practice methods to reduce RAM consumption and give the system a productivity boost.
- Restart your Mac.
- Explore the Memory tab in the Activity Monitor and quit RAM-intensive processes.
- Eliminate Login Items that don’t have to be executed at startup.
- Close unused browser tabs.
- Make sure you’re running the latest version of macOS.
That’s a strange question, isn’t it? You can’t delete Activity Monitor on Mac. It’s hard-coded into the system and does a bunch of incredibly useful things. Believe it or not, though, some users put it that way while implying something like this: “How do you stop a process using Activity Monitor on Mac?” Let’s set the formulation quirk aside and move on to the answer.
To quit a process that’s causing issues, expand the “Go” menu in the Finder toolbar, select “Utilities”, and double-click the Activity Monitor icon. The app provides a breakdown of active processes by the following categories: CPU, Memory, Energy, Disk, and Network. Just click the appropriate tab in the upper part to enable the required view. Then, select the executable you want to terminate, click the button with the X symbol in it, and use the “Quit” or “Force Quit” option on the popup dialog to stop it from running.