Learn how to remove all the components of Citrix Receiver software from Mac in case you don’t plan on using it further and it’s taking up too much disk space.
Update: April 2024
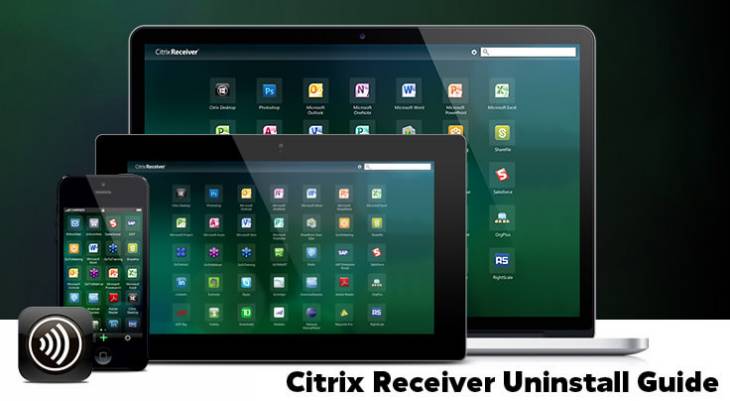
Virtualization is a game-changing thing for businesses and it also has a sizeable audience among end-users. An organization can benefit from leveraging such a framework in that it can cut the server acquisition and maintenance costs while providing the staff with a plethora of tools that technically don’t run on local hosts. Citrix Receiver is a cross-platform solution that brings these perks to specific computers on a network, simulating a fully-fledged computing and multitasking experience powered by a server rather than the processing capacity of a specific node. It is a basis for setting up workspace virtualization where the employees can use various applications without actually installing them onto their machines that have limited disk space and insufficient memory to support so many apps.

When executed on a Mac, this utility allows for outsourcing the whole computing job to enterprise on-premises servers or classic cloud services. Citrix Receiver can also play into a home user’s hands by providing virtual desktops with applications that the laptop or desktop device might otherwise not cope with. Furthermore, it’s easy to customize the virtualized environment extensively so that the apps match one’s preferences even when accessed from another machine. The data is also saved and preserved across different sessions regardless of the device and operating system.
By the way, Citrix Receiver for Mac was superseded by Citrix Workspace application starting from August 2018. Whereas the legacy program can still be downloaded if a user so desires, it doesn’t get new features anymore. Irrespective of the version, enterprise networks form the bulk of the tool’s user base. Some organizations enforce a software policy stating that employees must use this solution to connect to the corporate servers in a secure fashion. Furthermore, if the company has some spare server resources it can assign a part of them to handle virtual desktops used by the personnel.

All in all, there are numerous pros of this software, but imagine the following situation: it was installed quite a while ago and, for whatever reason, hasn’t been in use for ages. Another likely scenario is that you may have decided to switch to the newer Citrix Workspace app mentioned above, which – unlike the old one – is regularly getting enhancements and new feature roll-outs. Also, it’s within the realms of possibility that the version you have on your computer was downloaded off of an uncertified third-party app store and doesn’t work as intended. It means glitches or potentially even malicious functionality will be wreaking havoc with your Mac experience.
Pair all of these possible circumstances with the fact that Citrix Receiver is taking up a good deal of disk space, and you will eventually realize that it should be uninstalled if you no longer need it. Unfortunately, removing this tool from a Mac can sometimes be easier said than done. By using the appropriate DMG file (CitrixReceiver.dmg) provided by the publisher, you can get most components of the suite automatically deleted from your system. However, in some cases this process leaves a ton of leftover objects that have to be eradicated manually. This holds true especially for older editions of the automatic uninstaller (for example, v11.x).
One of the residual items that often persists after Citrix Receiver uninstall attempts is a file named AuthManager_Mac. Its full location path is as follows: Library/LaunchAgents/com.citrix.AuthManager_Mac.plist. Moreover, this component doesn’t just continue to reside inside the computer silently – it causes a great deal of frustration because it is automatically launched at startup along with other LaunchAgents that are required, among other things, for system stability. Since the rest of the virtualization suite could already be missing, the users are faced with after-effects of incomplete removal leading to errors and other malfunctions. One of the symptoms is the influx of system alerts saying that AuthManager_Mac may harm the Mac.
It’s worth mentioning that this predicament sometimes co-occurs with the emergence of popup warnings saying, “ServiceRecords will damage your computer” or “ReceiverHelp will damage your computer”. In this case, macOS gives users a heads-up about additional suspicious or buggy processes, which can either be remnants of the legacy software under scrutiny or malicious files deposited by Mac adware. With that said, be sure to follow the steps below to remove Citrix Receiver app from your Mac for good.
Citrix Receiver removal from Mac
As previously mentioned, the procedure of thoroughly uninstalling all the elements of Citrix Receiver application on Mac can be a combo of using the vendor’s official automatic uninstaller and additionally applying manual cleaning techniques. Here is a step-by-step guide that will help you remove the virtualization software in question.
- Open your Downloads folder and find the original installer of the suite. It’s called CitrixReceiver.dmg or CitrixReceiverWeb.dmg. If it’s not there anymore (which is quite likely), go to Citrix website and download the installation client for Mac from there.

- Double-click the CitrixReceiver.dmg (CitrixReceiverWeb.dmg) file. Once the disk image is mounted and opened, select the option that says Uninstall Citrix Receiver.
- Follow the instructions on subsequent dialogs to complete the uninstall procedure. Be advised that you will need to enter your admin name and password to make sure the changes take effect.
- Restart your Mac.


As an extra layer of the removal process, you need to look for a number of associated files and manually delete them if found. Here’s a quick tip before you proceed: since you will need to examine the contents of several different folders, consider using Go to Folder feature (available from the Go menu in Apple Finder). This way, you can type or paste the directory names listed below to quickly open them one by one.
- Go to the /Applications folder and look for Citrix Receiver.app entry. If it’s on the list, go ahead and send it to the Trash.
- Navigate to the /Library folder. If the following files are found in it, drag them to the Trash:
- /Internet plug-ins/CitrixICAClientPlugIn.plugin
- /LaunchAgents/com.citrix.AuthManager_Mac.plist
- /LaunchAgents/com.citrix.ServiceRecords.plist
- Go to /Users/Shared directory. Find and remove the folder named /Citrix/Receiver Integration.
- Type ~/Library in the folder search box and click Go to open this path. Notice the tilde (~) sign prepending the directory name – it denotes a location within the user profile rather than the system root folder version. Look for the following entries and send them to the Trash if found:
- /Internet plug-ins/CitrixICAClientPlugIn.plugin
- /Application Support/Citrix Receiver
- CitrixID
- Config
- Module - /Preferences/com.citrix.receiver.nomas.plist
- /Preferences/com.citrix.receiver.nomas.plist.lockfile
- /Preferences/com.citrix.ReceiverFTU.AccountRecords.plist
- /Preferences/com.citrix.ReceiverFTU.AccountRecords.plist.lockfile
- Navigate to ~/Applications. Spot and remove all apps you added to your virtualized workspace by means of the Citrix Receiver user interface.
- Go to /private/var/db/receipts folder. Find the following files in it and drag them to the Trash:
- com.citrix.ICAClient.bom
- com.citrix.ICAClient.plist
- Empty the Trash
Remove records generated by Follow Me Data feature
Follow Me Data is a service built into Citrix Receiver that ensures a seamless experience as you sign in to your workspace from different devices. It preserves your apps, data, and all customizations. If you have decided to uninstall Citrix Receiver, then removing Follow Me Data and the related information is on your to-do list as well.
- Browse to the following folders and clear their contents:
- ~/Applications/Citrix/FollowMeData
- ~/Library/Application Support/ShareFile
- /Library/PreferencePanes/FMDSysPrefPane.prefPane
- Spot and delete the following files that contain installation details and user data:
- /private/var/db/receipts/com.citrix.ShareFile.installer.plist
- /private/var/db/receipts/com.citrix.ShareFile.installer.bom
- ~/ShareFile
- /private/var/db/receipts
- com.citrix.ShareFile.installer.plist
- com.citrix.ShareFile.installer.bom
Now that you have run the DMG uninstaller and deleted all the above entries, there should be no file traces of Citrix Receiver and Follow Me Data feature left on your Mac. That’s quite a bit of tedious work, isn’t it? On a side note, you can take a shortcut and use Combo Cleaner (Mac maintenance and security application) to automate this process and save yourself the trouble of looking for every fragment of the program you don’t need anymore. If you’d like to give this method a shot, here is what you need to do:
- Download and install Combo Cleaner (read review).
- Open the app and click Uninstaller in its left-hand pane.
- Select Citrix Receiver in the list of your applications.
- Click Remove Selected Items button.

Once you follow these four simple steps, Citrix Receiver will be completely uninstalled along with all the data it has stored on your Mac. Whether you choose to go the manual removal route or outsource this cumbersome job to the automatic cleaning app, the files spawned by this suite won’t be cluttering your Mac’s disk space any longer. If you are still interested in using virtualization software, consider switching to the newer Citrix Workspace app to increase your personal productivity or – if you are a business owner – to make the most of your team’s potential.
How to uninstall an app on Mac – best practices
In an ideal world, software removal from Mac is a streamlined experience, with several equally effective methods being available right through the operating system’s controls or the application’s built-in features. However, it can be daunting in scenarios entangled by malware interference, crude DevOps on the software publisher’s end, or high complexity of the program’s structure.
Whether you are faced with a garden-variety software removal task or a more intricate one, a few battle-tested options are absolutely worth a shot. The following paragraphs provide a summary of how to uninstall apps on Mac using these easy techniques.
Launchpad
Not only is Launchpad a one-stop tool to run programs on your Mac, but it also presents a fairly handy way to get rid of an unneeded application. Here is the walkthrough to perform the latter:
- Click the Launchpad icon in the Dock.
- Find the app you’d like to uninstall. Click its icon and hold it until all programs start jiggling.
- You will see an X button in the top left corner of the app. Click that button to uninstall the app from your Mac.
Be advised that this method won’t work with software installed from outside of the official App Store (the X symbol won’t appear for those). If that’s the case, proceed to the next method.
Finder
This way of removing apps from your Mac has a broader functional coverage than the one using Launchpad, as its practicability doesn’t depend on whether or not the program hails from the App Store. Here is your course of action:
- Open the Finder interface and select Applications in the sidebar.
- Spot the app you no longer need, right-click it, and select Move to Trash in the drop-down menu.
- At this point, you may be prompted to enter your admin password. If so, go ahead and type it in the dialog.
- Now that the program is gone from the Applications screen, right-click the Trash icon in the Dock area and select Empty Trash.


The caveat with this mode of software removal is that it might keep leftover files behind. To get around this potential roadblock, consider opting for one of the following techniques.
Built-in uninstaller
The good part about using a built-in app uninstaller is that the cleaning process is typically thorough enough to save you the hassle of tidying up software breadcrumbs afterwards. The adverse side of it, though, is that many applications lack this feature.
To check if this uninstall mechanism is applicable in a specific case, open Finder, proceed to Applications, and look for a folder that says “[App Name] Uninstaller”. If it’s there, open it, find the native installation utility, run it, and follow the onscreen prompts to get rid of the program.
Some applications contain an uninstall button right in their GUIs, although this is a rare encounter, to be honest. With an app like this, all it takes to remove it is click that button and stick to the intuitive instructions on the interface to complete the procedure.
Terminal
This method stands out from the crowd due to the most thoroughgoing removal across the spectrum, plus it usually works wonders when an app won’t delete through the other approaches. Here’s how you do it:
- Click on Go in the Apple menu bar and select Utilities in the drop-down list. Alternatively, you can go to Finder > Applications > Utilities.
- Select Terminal in the Utilities window.
- Type cd /Applications/ in Terminal, as illustrated in the screenshot below, and hit Return.
- Type the following command: sudo rm -rf (see screenshot below). Then, drag the application you’d like to uninstall to the Terminal window.
- If the system asks for your admin password at this point, enter it and press Return.


That’s it, the application should now be completely removed from your Mac. As stated previously, this method ensures that all the associated files, including Launch Agents, Launch Daemons, and Application Support data, disappear from your system for good. Keep in mind, though, that the improper use of Terminal without due skills can cause irreversible changes to macOS, so be sure to follow the above steps exactly as they are provided.
Final thoughts
Once you follow these four simple steps, Citrix Receiver will be completely uninstalled along with all data it has stored on your Mac. Whether you choose to go the manual removal route or outsource this cumbersome job to the automatic cleaning app, the files spawned by this suite won’t be cluttering your Mac’s disk space any longer. If you are still interested in using virtualization software, consider switching to the newer Citrix Workspace app to increase your personal productivity or – if you are a business owner – to make the most of your team’s potential.